
Winter sowing is fun and easy! In this quick-start guide, I cover everything from the benefits and when to begin, all the way through to maintenance and transplanting. Plus I’ll give you detailed step-by-step instructions to show you exactly how to winter sow your seeds.


If you enjoy growing seeds, then you definitely need to give winter sowing a try. It’s a really fun method to use, and has even been a game-changer for some gardeners.
With the winter sowing method, you put your seeds outside so they don’t take up any space in the house.
Plus, you don’t have to buy any expensive equipment, or fuss over tender seedlings for months on end.
There are lots of other benefits too, which I will list out below (I’m getting a bit ahead of myself here).
In this quick-start guide, I will tell you all the details you need to know about winter sowing seeds, and give you step-by-step instructions too.
What Is Winter Sowing?
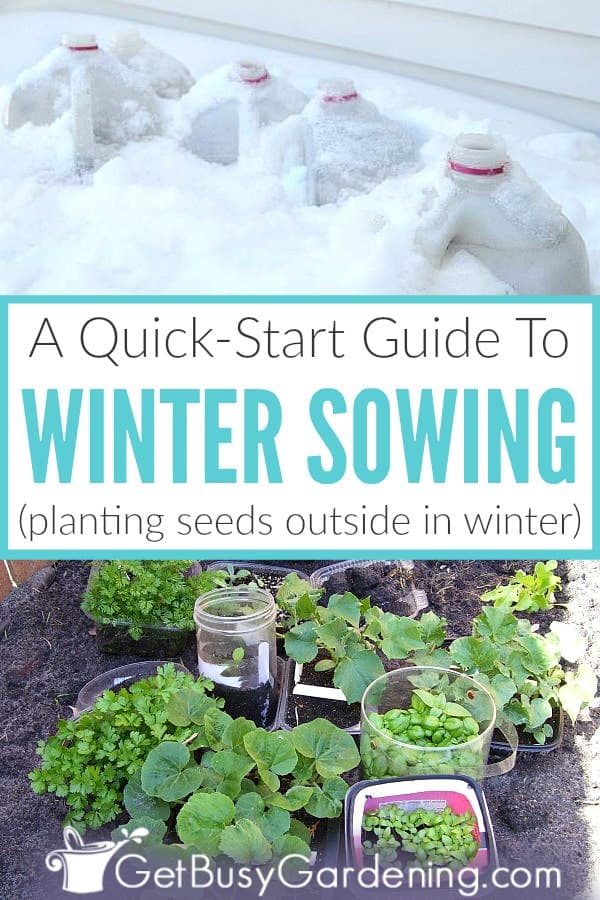
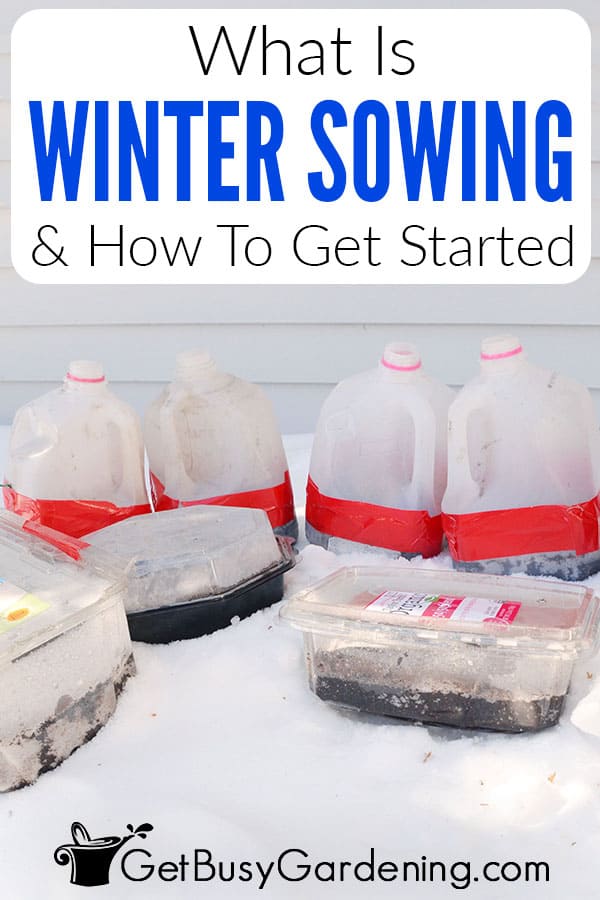
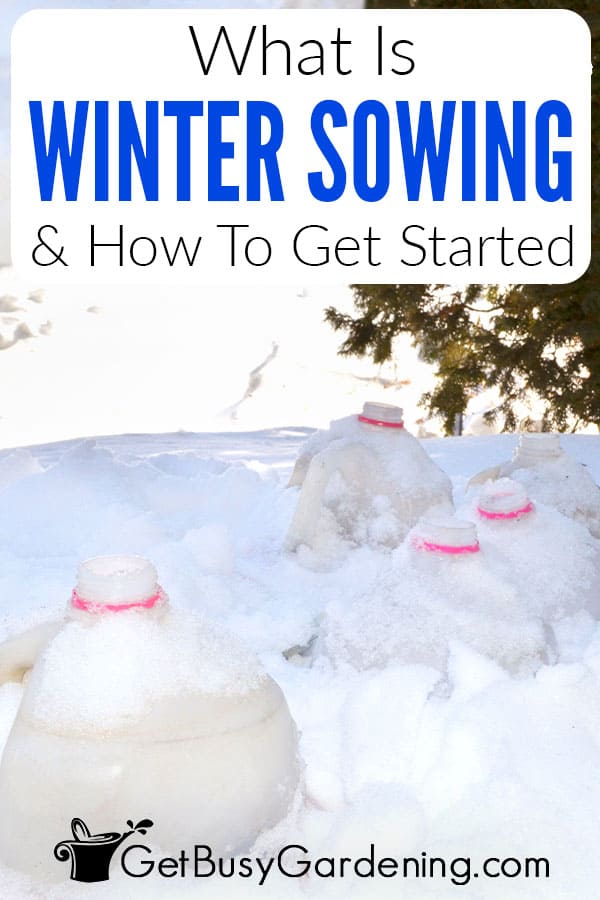
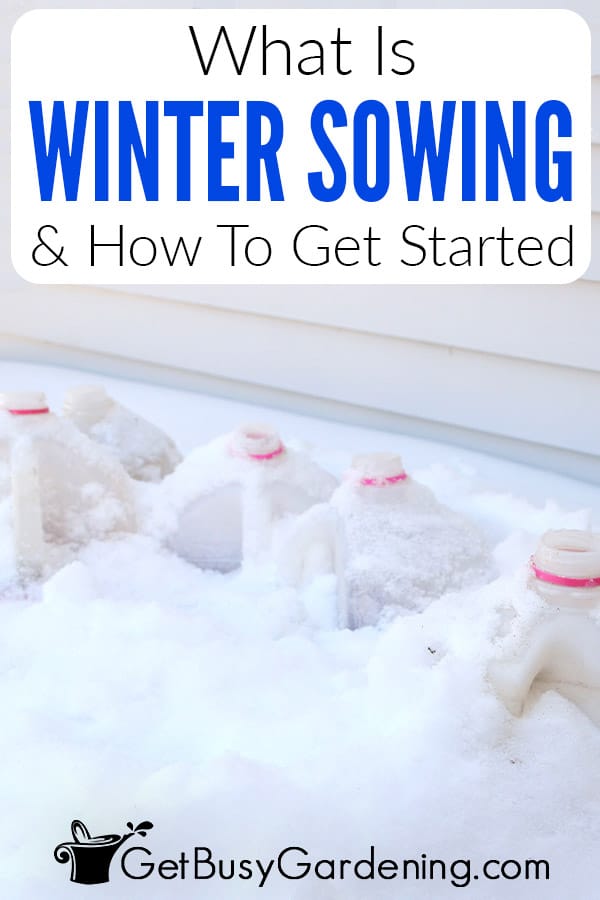
Winter sowing is a fun and easy way to start seeds outside during the winter. You plant your seeds in miniature greenhouses made from recycled plastic containers, and then put them outside in the snow and freezing cold.
Once the weather starts to warm up in the spring, the seeds will germinate at their own pace, just as in nature. Sounds cool, right? It gets better…
Related Post: Seed Starting Methods That Every Gardener Should Try
Benefits Of Winter Seed Sowing
For me, the biggest benefit of winter sowing is space. Since they go outside, they don’t take up any space in the house. That is HUGE!
But there are lots of other BIG benefits of winter sowing too…
- You don’t need to buy any special equipment or grow lights
- There’s no need to sterilize seedling trays
- There’s no risk of the seedlings damping off
- Winter sown seedlings don’t need to be hardened off, they are already growing outside
- The seedlings are hardier, and more robust, which means they have a much higher survival rate
- You can start planting your seeds much earlier
When Can You Start?
One of the things I love the best about winter sowing is that there is no set schedule you need to worry about. You don’t have to think about your last frost dates, or time your plantings to avoid leggy seedlings.
You can winter sow seeds outdoors at your own convenience, and whenever you have time. The only rule you need to follow is to wait until freezing temperatures are here to stay. Learn exactly when to begin here.
How To Winter Sow Seeds
Winter sowing is easy. There’s no fancy technique, or any complicated equipment setup required. You only need a few supplies to get started.
But, there are are couple of things you need to understand before you begin. So, first let’s talk about the three main things you’ll need… soil, containers, and seeds.
The Best Soil To Use
The best type of soil to use is an all-purpose potting soil. I’ve also used a seed starting potting mix, which works just fine. But those can be a little bit more expensive.
Just make sure you buy a quality potting mix. Cheap dirt is too heavy, and could be full of weed seeds.
Also, always use fresh, sterile potting soil, and never, use garden soil in any of your containers. Read about the best soil to use (and which ones to avoid) here.
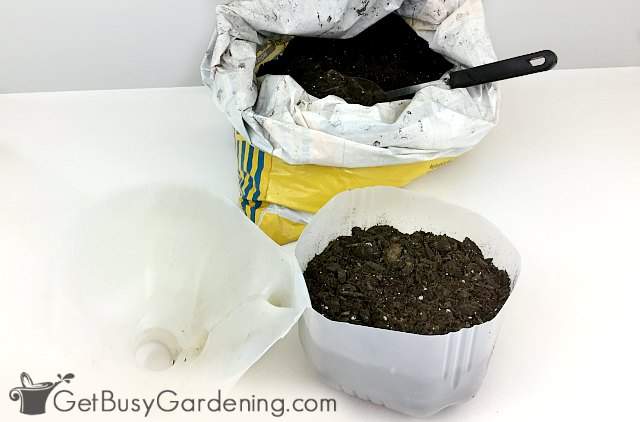
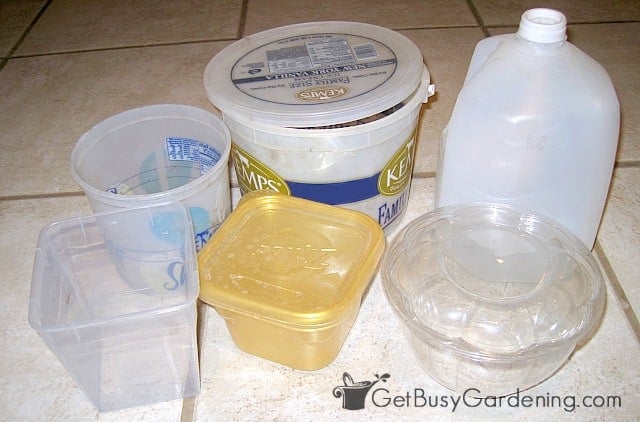
Choosing Containers
There are tons of different types of containers you can use to make your mini greenhouses for winter sowing. They can be made out of items you throw out every day.
Things like milk jugs, 2 liter bottles, restaurant/deli/bakery food storage, ice cream buckets…etc. The shape and size doesn’t matter, but it must be made of transparent plastic.
It should also be deep enough to hold 3-4 inches of soil in the bottom, and tall enough to allow a few inches of headspace for the seedlings to grow. Read all about how to choose the best containers here.
Types Of Seeds To Plant
It’s important to use the correct types of seeds, because you can’t just use anything. The best ones to use for winter sowing are cold hardy annuals, herbs and cold crop vegetables, or plants that are perennial in your zone.
If you’re unsure, check the seed packets. Look for terms like “self-sowing”, “direct sow outside in the fall”, “direct sow outside in early spring” or “cold stratification”.
Keywords like these are good indicators of seeds that will work well for winter sowing. Learn all about how to choose the best seeds to use here.
Step-By-Step Instructions
Before getting started, be sure to clean your containers. You can simply rinse them out if there’s no residue in them.
Otherwise, if they’re dirty, then be sure to wash them first. Here’s how to clean your containers.
Supplies Needed:
- Containers
- Scissors
- Drill or old metal knife
- Potting soil
- Seeds
- Heavy duty tape or duct tape
- Plant tags (optional)
- Pencil, permanent marker or paint pen
Step 1: Choose your containers – Raid your recycling bin to find the perfect mini greenhouses, or ask your family and friends to save them for you.
It may take some time to build up a good selection, so be sure to start hunting for them a few weeks before you plan to begin winter sowing.
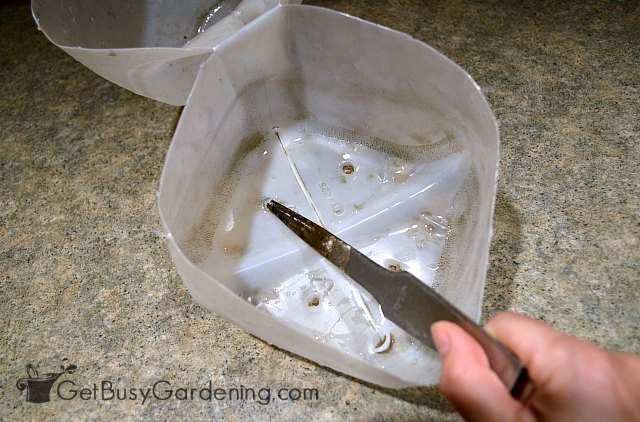
Step 2: Prepare the mini greenhouses – If you’re using a tall, narrow container, like a 2 liter bottle or milk jug, first cut it in half using a pair of scissors.
Then poke holes in the bottom for drainage, and also in the top for ventilation. Use a drill to make the holes, or a hot knife to melt them into the plastic. Learn exactly how to prepare winter sowing containers here.
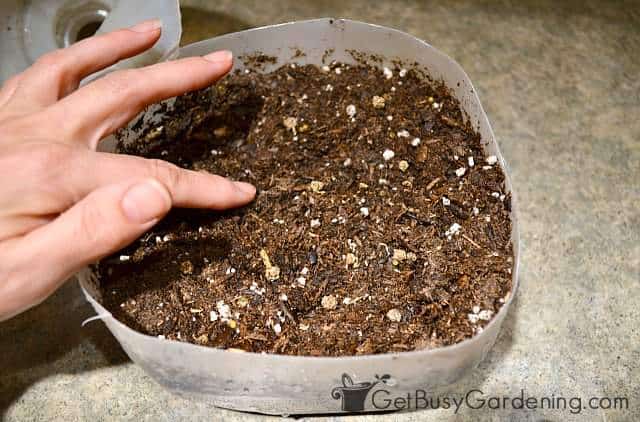
Step 3: Add the soil – Fill the bottom of your mini greenhouse with 3-4 inches of potting soil or a seedling mix. If the soil is really dry, you may want to wet it down a bit before planting the seeds.
Step 4: Plant the seeds – The number of seeds you add to each container is up to you.
But I prefer to space them out a bit to make it easier to transplant the seedlings later on. If they’re sown too thick, it will be difficult to separate the seedlings.
Step 5: Label your winter sowing – When you plant seeds in the dead of winter, you will forget what’s in the containers by spring – trust me on this one! So you’ll definitely want to label them.
There are a few ways you could do that. Some people write on masking or duct tape, and others write directly on the top of the container.
However, if you use a permanent marker on top, the writing will fade in the sun, and could be unreadable by spring.
I recommend using a paint pen to write on the top. If you use tape, put it on the bottom of the container so the writing won’t fade.
My preferred method for labeling my winter sown seed containers is to use plastic plant markers, and writing on them with a pencil. Then I push the marker into the soil, and I have never had one of them fade.
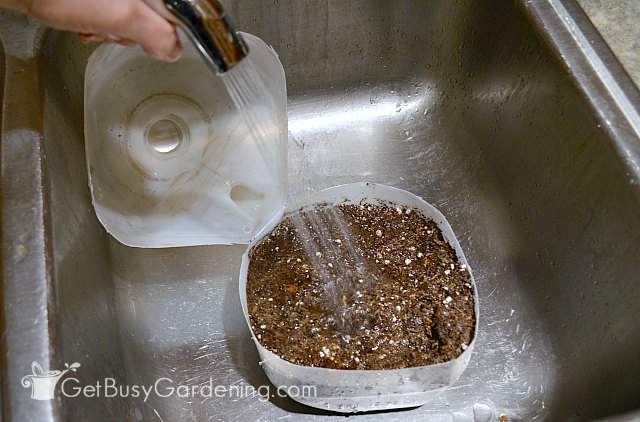
Step 6: Water the soil – After you’re done planting the seeds, water the soil thoroughly, and allow it to drain before moving them outside.
I give mine a light shower with the sprayer in my kitchen sink because it won’t disrupt the soil or displace the seeds. If the soil is really dry, then water it a few times to make sure it’s evenly moist.
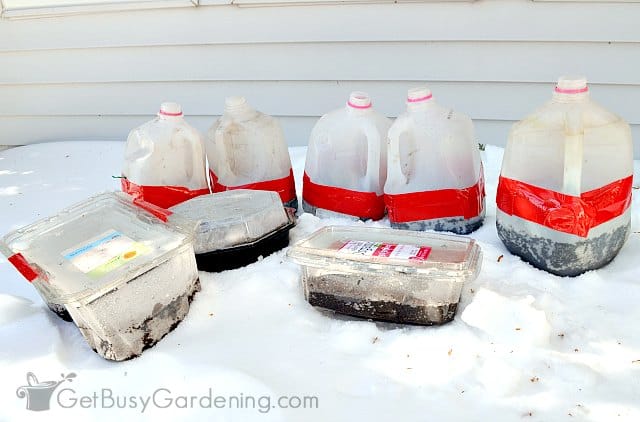
Step 7: Put the lids on – The details for this step depend on what type of container you used. If the lid snaps on and fits tight, then you’re done.
If you used something tall that you had to cut in half (i.e.: milk jug, 2 liter bottle… etc), then you can use duct tape (or other heavy duty tape) to attach the lid back on (but leave the caps off).
You can tape any of the lids on if they don’t fit tightly. Just make sure you don’t completely cover the transparent parts of the container, or the holes you made back in step 2.
Step 8: Move them outside – Move your winter sown containers outside to a spot where they are protected from heavy wind, but will get moisture and full sun.
If you have pets or children, put your containers on a table, or other spot where they will be out of reach.
Step 9: Forget about them until spring – Once they’re moved outside, you can pretty much forget about them until spring. Don’t worry, it’s OK if they’re completely covered by snow for a few months. Just leave them be.
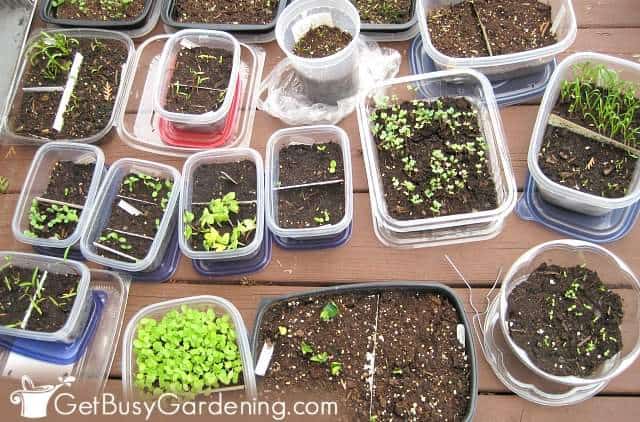
How Long Do Winter Sown Seeds Take To Grow?
The seeds will start growing at their own pace, and the timing can be different for each one.
Some may start germinating before the snow even melts off the containers. While others won’t start growing until the weather gets warmer in the spring.
On average, my winter sown seeds start germinating in early March… but I’m in Minneapolis zone 4b.
Warmer zones will start to see sprouts much earlier. Oh, and it can also vary year to year, depending on the weather.
The best thing to do is to make sure you check regularly for any signs of sprouts. Start checking them as the weather begins to warm up in the late winter/early spring. The hardiest seeds will germinate first.
Monitoring & Maintaining Your Containers
The only maintenance you have to do in the spring is to make sure your seedlings don’t overheat, and that the soil doesn’t dry out.
Those mini greenhouses can get pretty hot inside in the sun, so you may need to vent them more. You can vent them by cracking the lids open, or making the holes in the top larger.
Once the seedlings get tall enough that they are touching the top of the inside of the container, it’s time to remove the lids.
The soil can dry out pretty quickly once you take the lids off, so check them at least once a day, and water if necessary.
Once the lids are off, keep an eye on the weather report. If there is a chance for freezing temperatures, cover your seedlings with a sheet or blanket overnight.
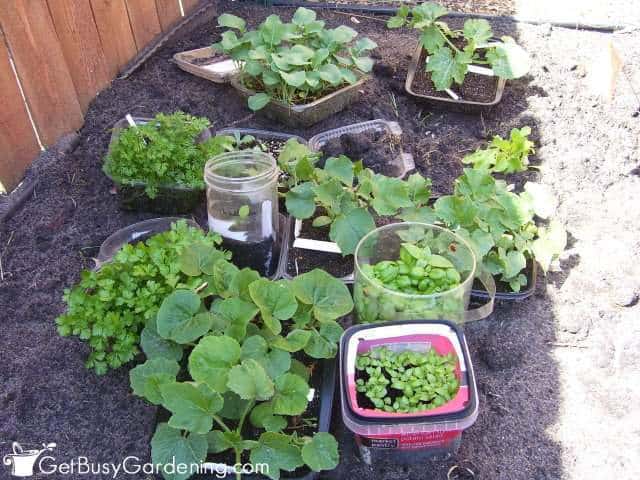
Planting The Seedlings Into The Garden
Once the seedlings are tall enough, and have grown their first few sets of true leaves, it’s time to plant them into the garden.
Hardy winter sown seedlings can be transplanted as soon as the soil is workable in early spring.
There’s no need to harden them off either, since they’re already growing outside! You can simply plant them directly into the garden.
Related Post: How To Harvest & Collect Seeds From Your Garden
Winter sowing is a great way to grow the seeds for your garden every year. You can do it at your own pace, and there’s minimal care involved. And, since you don’t have to harden winter sown seedlings, it makes transplanting them a breeze too!

Next Steps: If you want more help learning how to winter sow, pick up a copy of my Winter Sowing eBook. It’ll be your essential guide that will walk you through every step of the process in detail.
If you want learn how to easily grow all of your plants from seeds, then the Online Seed Starting Course would be perfect for you! It is an in-depth online training that will walk you through everything you need to know about growing all types of seeds, step-by-step.
More Posts About Winter Sowing
Have you tried winter sowing yet? Share your tips or experiences in the comments section below.
")

Terri Jo says
Do I need to check the soil so it doesn’t get too dry over the next couple months?
Amy Andrychowicz says
As long as your containers are frozen and/or covered by snow you don’t have to worry about them. That’s one of the beauties of winter sowing!
La says
How do you keep them from blowing arond the yard when the snow melts or during windy snow storm? I am in Colorado. We have bipolar weather.
Amy Andrychowicz says
In all the years I’ve been winter sowing, I’ve never had this issue before. 🙂 The wet soil should be heavy enough to keep them from blowing around. But if that’s not enough, then you could move them to a more protected area, or maybe try putting a rock or something on top to weigh them down more.
Carol says
Hi. I noticed that you’re watering with the sprayer from your kitchen sink, meaning you’re using tap water. Do you have any problems using tab water?. I’ve been using Brita water which is a royal pain and would love to use tap water. Are you using cold or a mix of hot and cold.
Thanks for your help
Carol
Amy Andrychowicz says
Yes, wetting down the soil with tap water before putting them outside for winter sowing won’t harm the seeds. I use lukewarm water or cold, don’t use hot.