Growing castor beans from seed can be a bit challenging at first. But once you get the hang of it, you’ll be able to easily grow them every year.
In this post, I am going to give you all the details you need, and show you exactly how to grow castor seeds step-by-step.
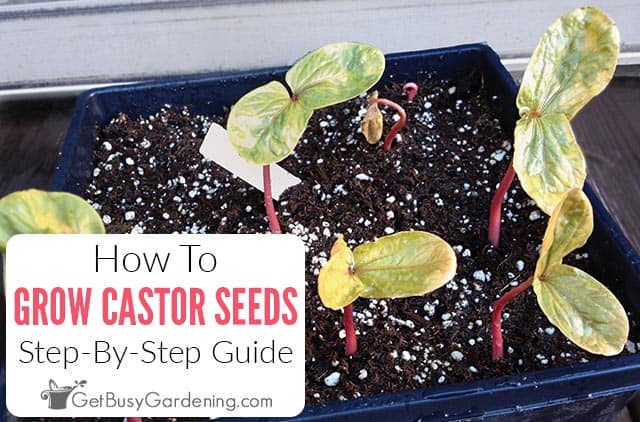
Castor bean (Ricinus communis, aka: mole plant) is a fast growing tropical plant, and it’s one of my favorite annuals. I love the red ones especially, they add a wonderful contrast of color and texture to my garden.
I get tons of compliments on them, and everyone asks what they are. I start them from seeds every year, and they grow to be monsters by the end of summer.
Below I am going to show you exactly how to grow castor beans from seed so you can enjoy them in your garden too. I’ll cover everything from start to finish.
This includes which method to use, when to start, step-by-step planting instructions, germination time, and seedling identification.
I’ll also give you tons of seedling care and transplanting tips, show you how to fix common problems, answer your faqs about germinating castor bean seeds, and more!
Toxicity Of Castor Plant Seeds
It’s true that castor plants are beautiful additions to the garden… but be careful with this one. All parts of the plant and the seeds are poisonous if ingested.
You might not want to grow it in your garden if you have pets or kiddos running around. At minimum, you should keep the seeds out of reach of children and pets at all times.
Growing Castor Bean From Seed
Below I am going to give you everything you need to know to successfully grow castor beans from seed. It doesn’t matter which type you have, the steps for planting and germination are the same for all.
Types Of Castor Seeds To Grow
There are several varieties of castor plants, and all of them are easy to grow from seed. The most common ones have green leaves, but I love the red leaf ones the best.
There are also giant varieties that can grow to be upwards of 20′ tall, with huge leaves. And others that have curled leaves that also look amazing in the garden.
What Do The Seeds Look Like?
Castor bean seeds are sometimes referred to as “dog tick seeds”. That’s because they look very similar to wood ticks when they are engorged with blood.
Gross, I know, but it’s the best way to describe them! Haha! Let me see if I can give you a less disgusting description…
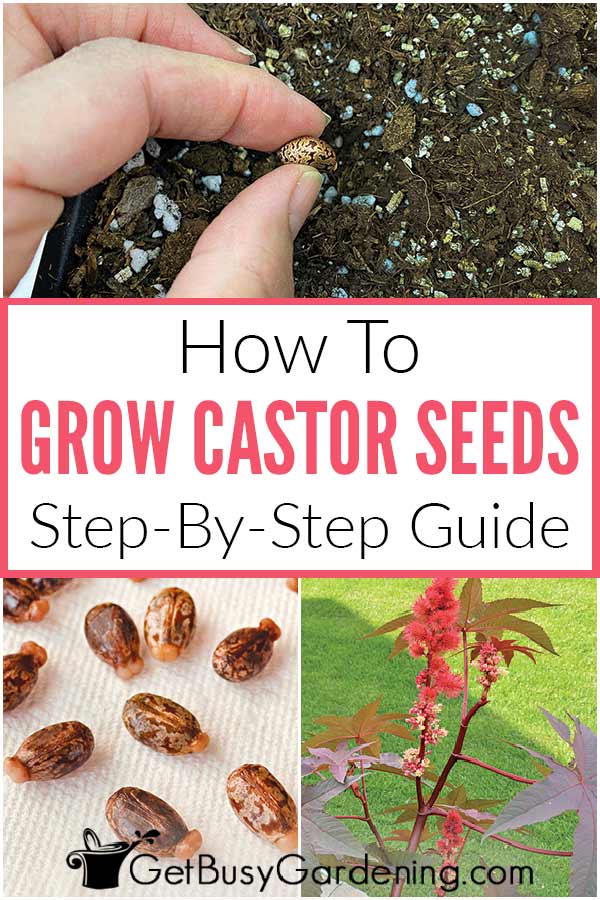
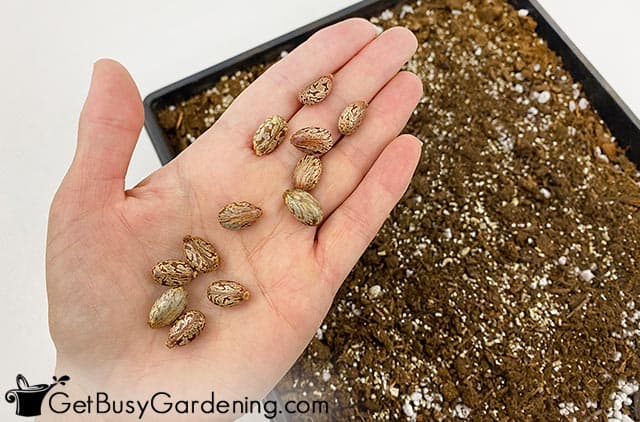
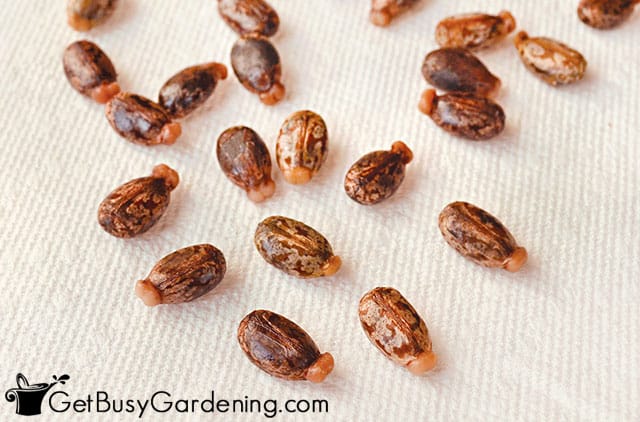
Castor seeds are large, oval shaped, and have a pretty spotted pattern on them. One end of the oval has a small nub that sticks out slightly. They are usually brown or reddish in color, but sometimes can look more gray.
Recommended Ricinus Seed Starting Methods
If you live in a warm enough climate, you can sow castor plant seeds directly into the garden. But for most of us, they need to be started indoors.
That’s because they require quite a long growing season to mature to full size. Plus, it can take a long time for the seeds to germinate.
Related Post: 3 Seed Starting Methods That Every Gardener Should Try
When To Plant Castor Bean Seeds
To give them the biggest head start, it’s best to plant them indoors 6-8 weeks before your average last frost date.
That exact date varies depending on where you live. So if you don’t know it, then be sure to look it up. In zone 4b, ours is around May 15th, so I start mine sometime in early April.
Tips For Growing Castor Bean From Seed
Since growing castor bean seeds is different than it is for other plants, there are a few things to consider before sowing them.
Soaking them first will give them a much better chance of germinating. And it’s also important to be sure you use the proper container to make things easier on yourself and the seedlings.
Soaking Castor Bean Seeds
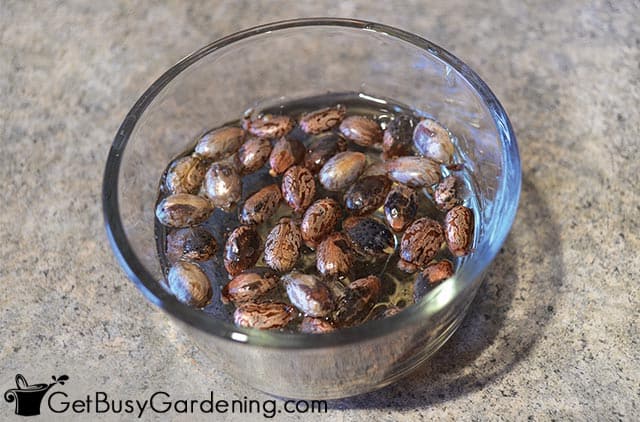
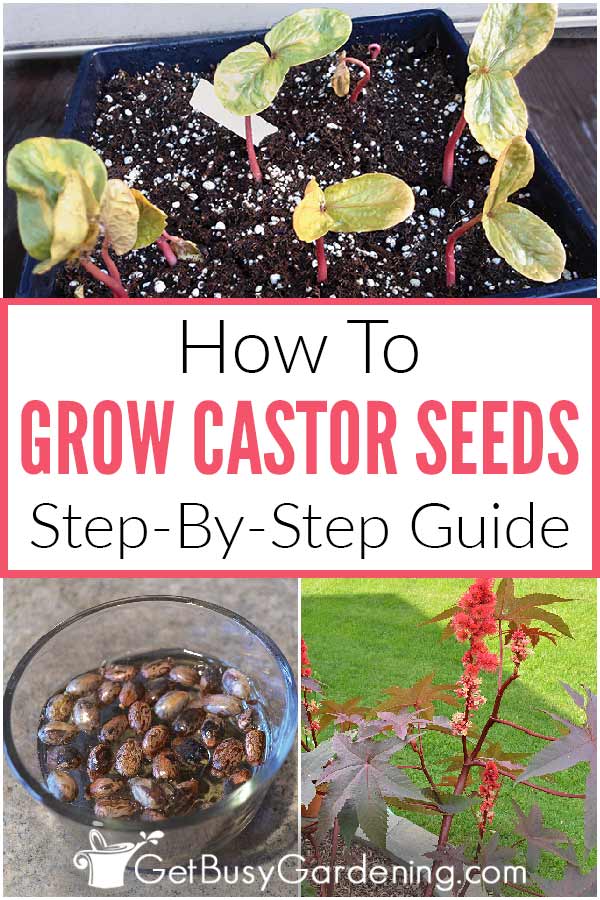
The first step for successfully germinating castor seeds is to soak them in warm water for 24 hours before sowing.
To give them even more of a boost, try soaking them in diluted organic fish emulsion, liquid kelp or compost tea. After soaking the seeds, it will look like one end has popped out – this is normal.
Choosing The Best Containers
It’s a good idea to plant castor oil plant seeds in a deep container, unless you plan to transplant them shortly after they start to grow.
Once they have germinated, the seedlings will grow very quickly. So it only takes a few days for them to outgrow seed starting trays.
You could start them directly in plantable peat pots to make transplanting them to the garden a snap.
If you prefer to use something more sustainable than peat, try coco coir or cow pots instead. Otherwise, plastic seedling pots are perfect (and reusable).
How To Plant Castor Bean Seeds Step-By-Step
You don’t need any special equipment to grow castor bean seeds, but you’ll definitely need a few things. If you do a lot of seed starting, then you’ll already have this stuff on hand…
Supplies Needed
- Plantable pots, reusable plastic pots, or a seeding tray
- Seed starting soil or large peat pellets
- Plastic wrap or a clear bin (if your container doesn’t have a lid)
- Seeds
- Water
- Heat mat (optional, but highly recommended)
Step By Step Instructions
Step 1: Add soil to the seed trays – Fill your container will a high quality seed starting medium. Or you could use pre-moistened large peat pellets instead, and place them into the tray.
Step 2: Drain the water (optional) – You can either drain the water from the seeds, or just pull each one out of the water as you work to plant them. Either way is fine, just make sure they don’t dry out. Also, take care not to damage the little nub that’s sticking out as you work.
Step 3: Plant the seeds – Make a hole in the dirt to the proper depth (they should be planted 1 – 1 1/2″ deep), and drop a seed into the hole. It doesn’t matter which side is up, the seedlings will find their way to the top.
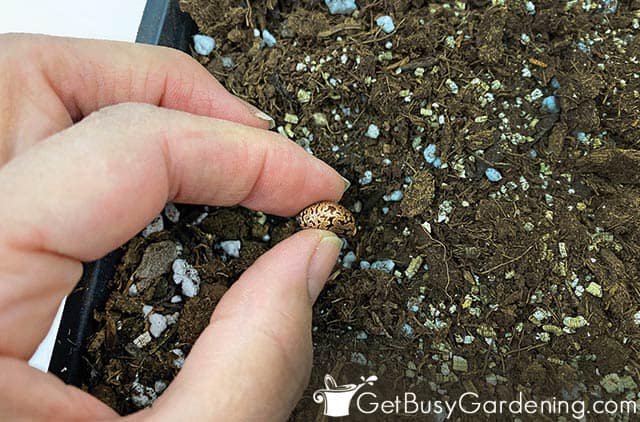
Step 4: Cover the seeds with soil – Bury each one with soil, and then gently press it down. You want to make sure the soil comes in contact with the seeds, but don’t pack it down too tightly over them.
Step 5: Cover the containers – If your container doesn’t have a clear plastic lid, then cover it with plastic wrap. Or you could put them into a large plastic bin with the lid closed to keep the soil moist during germination.
Step 6: Place them in a warm spot – Ideally, you should place them on top of a heat mat, which will speed up germination. Otherwise, put them in the warmest spot you can because they need warm soil to grow.
Step 7: Keep the soil evenly moist – As you wait for the seeds to germinate, be sure to keep an eye on the soil so it doesn’t dry out. It should stay evenly moist, but never allow it to get soggy. Soggy soil can cause the seeds to rot.
Castor Bean Germination Time
It can take a long time to germinate castor seeds, so be patient. The typical germination time is 10-21 days. I’ve had some take as long as a month before finally sprouting, so don’t panic if it takes longer.
The good news is that you can help to speed up germination! The key is keeping the soil nice and warm by adding bottom heat.
So be sure to use a seedling heat mat to help castor bean plant seeds germinate much faster, and lower the risk of rot.
What Do Castor Bean Seedlings Look Like?
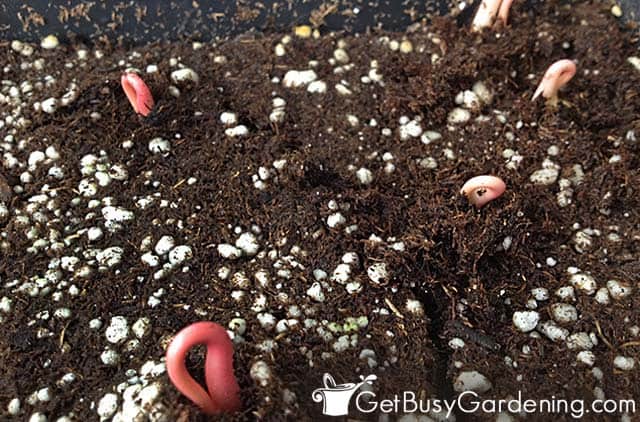
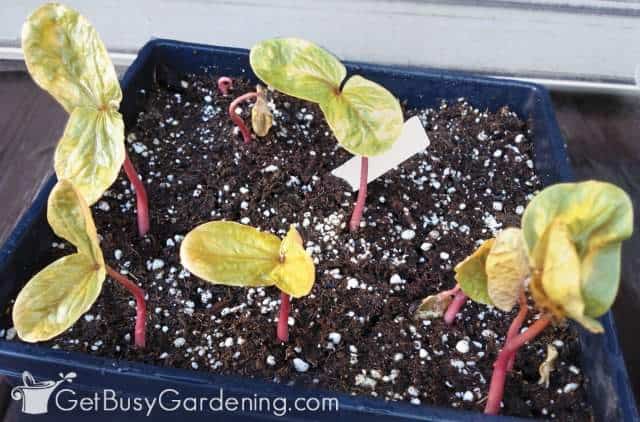
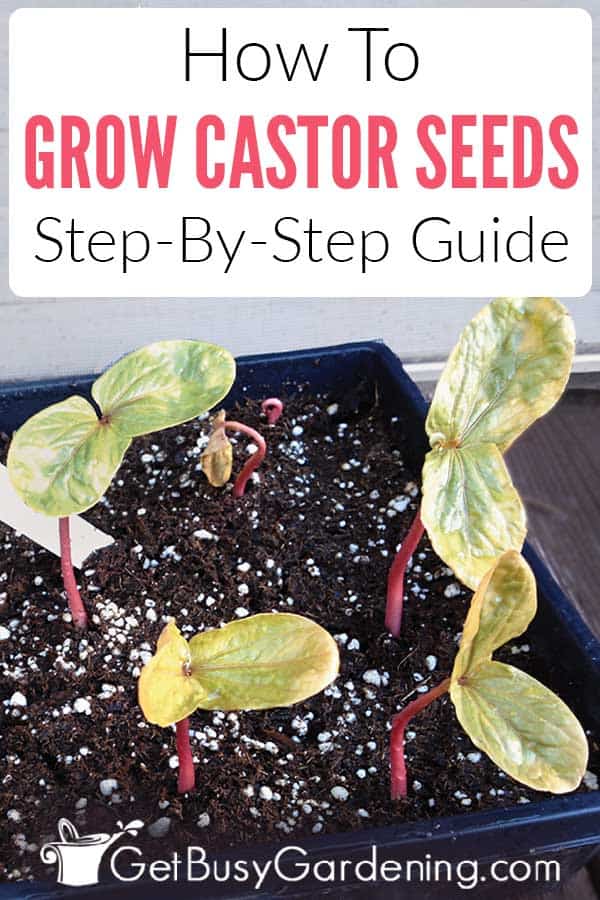
As the seedlings emerge from the soil, they look very similar to bean seedlings. The color will vary, depending on the variety you’re growing.
The photo below is red castor bean seedlings emerging from the soil, that’s why they’re pink. Once they start to emerge, they will pop up very quickly.
The first two leaves that grow, called the “seedling leaves”, will be oval shaped. The next leaves to grow after that are called the “true leaves”, and those look like tiny baby castor plant leaves.
Castor Seedling Care Tips
The seedlings can be a bit difficult to care for indoors. So, for the best success, be sure you read through the following care tips before your seeds start germinating. You can also learn more about general seedling care here.
Light
After the seeds finally germinate, the seedlings will grow very fast. So, as soon as you see them popping out of the dirt, add a grow light right away.
Since they grow so fast, a grow light is a must to prevent castor bean seedlings from getting too tall, weak and leggy.
I made my own seed starting grow lights using an inexpensive florescent light fixture and plant grow bulbs, which works great.
Make sure the light hangs an inch or two above the seedlings at all times, and keep it on for 14-16 hours per day. Use an outlet timer to make it easy to control the lights. Check a few times per day, and adjust the height of the light as the seedlings grow taller.
Related Post: A Beginner’s Guide To Grow Lights For Seedlings
Water
Consistent watering is also very important to the health of your castor seedlings. Keep the soil evenly moist, but never wet or soggy. And never allow it to dry out completely.
Give your seedlings a good drink until water starts coming out of the drainage holes, then dump the excess out of the trays. Never leave them sitting in water.
Fertilizer
Once your castor bean plant seedlings grow their first set of true leaves, it’s time to begin fertilizing them.
I prefer (and highly recommend) using an organic fertilizer like fish emulsion or a compost tea solution. (The fish emulsion can get a little stinky indoors, so you may want to use that outside only.)
You could also buy compost tea bags, and brew your own. Whatever kind you decide to use, start with a weak, half dose of liquid fertilizer, and gradually increase it to full strength over time.
Air Circulation
After your castor seedlings have popped up out of the soil, it’s a good idea to add some airflow. Remove the lids to prevent mildew growth, and run an oscillating fan over them on low to strengthen them up.
You can run the fan for a few hours a day at first, to get them used to it. Then, if you want, you could plug it into the same outlet timer as your lights to make it easy.
Thinning
If you planted more than one seed per hole, then you’ll definitely want to thin out the weakest one. Wait until the seedlings have grown to be a few inches tall, and then remove the smallest/weakest one.
Don’t pull them out though, or it could damage the tender roots of the healthy seedling. Instead, cut it off at the base using a pair of micro-tip snips or bonsai shears.
Repotting
If you planted your castor seeds in small containers or cells, then you’ll need to pot them up once they’re 3-4″ tall to give them plenty of room to grow larger.
Using plantable pots will help ease the transition into the garden, and lower the risk of transplant shock. My favorite types to use are peat pots, ones made out of coco coir, or cow pots.
Otherwise, 4″ plastic nursery pots are the perfect size, and you can reuse them year after year. For soil, either use the same seedling mix you planted the seeds in, or you can use regular potting soil.
Transplanting Castor Bean Seedlings Into Your Garden
After all the hard work and patience it takes to grow castor beans from seed, you don’t want to lose them by planting them outside too early.
So follow the tips below to give them a healthy transition, and learn exactly when to transplant castor seedlings into your garden.
When To Transplant
Castor bean plants hate the cold, so it’s best to wait to plant them, rather than risk doing it too early. If the soil or weather is too cold, the seedlings could die, or their growth could be stunted.
So wait to transplant them into the garden until after all chance of frost is gone, and the soil has warmed up in the spring.
Hardening Off
Before you can plant your castor bean seedlings in your garden, they must to be hardened off to get them ready for life outdoors. Do not skip this step!
Start this delicate transition a few weeks before you plan to transplant them into your garden. Place the seedlings outside in a shady, protected spot for a few hours a day, then bring them back indoors.
Each day, give them a little more time outside, and gradually move them into the sun. After a few weeks, they’ll be toughened up and ready to move to the garden.
Where To Plant Castor Seedlings
Castor bean plants need a full sun location, and lots of heat to grow their best. They will tolerate shade, but the plants will stay small.
Choose a location in your garden where they will be protected from high winds. It’s best to grow them in fertile soil that drains quickly. They like a lot of water, but they don’t like soggy soil.
You certainly could plant them in a large pot, but their growth will be stunted. So a nice, sunny garden location is best.
Related Post: How To Care For Castor Bean Plant (Ricinus communis)
Spacing
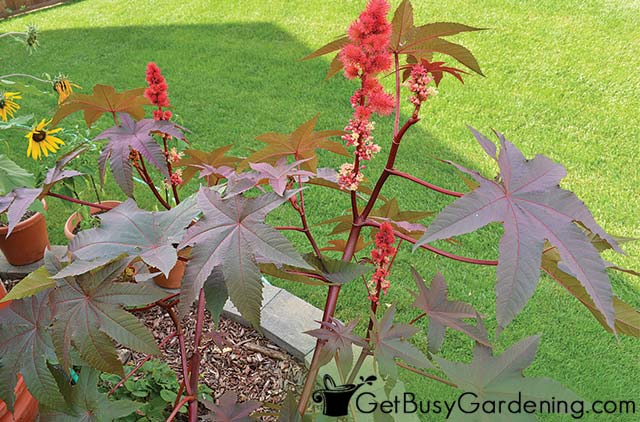
Since castor plants grow very large, they need quite a bit of space. Plant the seedlings 36-48″ apart for best results. If they are overcrowded, the plants may not grow very large.
Some varieties grow much bigger than others, so it’s best to research the type you have to give them adequate space.
Seedling Planting Depth
For the best success, plant castor seedlings into your garden at the same depth that they were growing in the container.
Planting them too shallow could expose their delicate roots. While planting too deep could cause them to rot at the base.
Troubleshooting Common Problems
There’s nothing worse than putting all the time and effort into growing castor beans from seed, only to have nothing but problems with them. Especially if you don’t know what’s wrong, or how to fix it!
So here I will list a few of the most common things that may go wrong. You can read more about fixing common seedling problems here.
Castor Seeds Not Germinating
Lack of germination can be caused by a few things: the seeds are old or immature, and therefore not viable, or they could have rotted if the soil was kept too wet. Or maybe they are just really slow, and you need to give them more time.
Leggy Seedlings
This is definitely one of the most common problems for castor seedlings! Since the seedlings grow so fast, they need lots of light, and they need it from the moment they pop out of the dirt. Otherwise, they will quickly grow tall and leggy.
Seedlings Growing Crooked
Lack of light can also cause the seedlings to grow crooked, and reach for the nearest window. So be sure to add a grow light asap (a sunny window is usually not enough).
Seedlings Not Growing
If the seeds germinated, but the seedlings aren’t growing any larger, they may have outgrown their container. If that’s the case, pot them up into a larger one. Otherwise, stunted growth may be caused by either overwatering, or it’s too cold for them (they need to be in a warm location).
FAQs About Growing Castor Seeds
Below I will answer some of the most frequently asked questions about growing castor beans from seed. If you have any questions you can’t find the answer to here, ask them in the comments below.
How many castor seeds per hole?
Since they are so large, it’s best to plant only one castor bean seed per hole. If you’re using old seeds with low viability, I would recommend sowing additional containers, rather than planting more than one per hole.
How deep do you plant castor bean seeds?
Castor seeds should be planted 1″ to 1-1/2″ inches deep.
How long does it take for castor beans to germinate?
Normally it takes 10-21 days for castor seeds to germinate. But it can take up to a month if the conditions aren’t right.
How do you speed up castor bean germination?
The fastest way to speed up germination is to add bottom heat. A heat mat will give you the best results. But at minimum, you should place them in a warm location.
Are castor bean seeds poisonous?
Yes, the are highly toxic. So be sure to keep them away from pets and children.
Growing castor bean seeds isn’t difficult once you learn how. Following the steps in this detailed guide will give you the best success! Just remember, they can be slow, so be sure to have lots of patience.
Up Next: Learn how to collect castor bean seeds from your garden so you can grow them year after year.
If you’re tired of struggling, and want to learn how to grow any plant you want from seed, then enroll in my online Seed Starting Course. It’s a wonderful, fun, self-paced course that will teach you everything you need to know to easily grow your own seedlings. Enroll and get started today!
Or, if you just need a refresher, then my Starting Seeds Indoors eBook is for you! It’s a quick-start guide that will get you planting seeds in no time.
More Info About Growing Seeds
- How To Grow Seeds: The Ultimate Seed Starting Guide
- How To Make Your Own DIY Seed Starting Mix (With Recipe!)
- Tips For Growing Seeds Indoors For Beginners
- How To Test The Viability Of Seeds With An Easy Seed Germination Test
Share your tips for how to grow castor bean plant from seed in the comments section below.



Janine ruggiero says
Thank you for the info. I have been growing these for 7 years now with great success. This year I forgot about my seeds soaking for 6 days. After planting them they started sprouting in 4 days. I am blown away.Can’t wit to put them in the ground. Your article has surely cleared up a few issues for me thank you.
Question: can I plant these in the sandy soil in florida? And will they continue to grow all year round or die off?
Amy Andrychowicz says
You’re welcome! I’m so glad that you found my article helpful. Yes, they should grow well in Florida. The foliage may die back if you get a hard frost, but the plant should come back once it warms up again. Here’s more info about where and how to grow castor bean plants.
DarkWolf T Nova says
Does soaking the seeds soften the shell? I’m wanting to try to grow these to attempt getting my own castor oil someday but I noticed how hard the seed shell is. Will that make extraction harder when I get that far? Or will soaking the beans/seeds make the shell softer therefore easier to extract the oil? Also after the grow season is over how do you dispose of the dead plants if they are toxic?
Amy Andrychowicz says
I have never tried extracting the oil, so I can’t speak to that. But yes, soaking castor bean seeds softens the outer shell, which helps them germinate faster. I toss the plants into my compost bin, as the toxins break down pretty quickly in there. But if you’re concerned, then you can put them into your yard waste bin or toss them into the trash.
alistair young says
I have just germinated 5 out of 6 seeds by soaking for 24hrs within a week and the plants already got it’s 2nd set of leaves the first true leaves
Pat. says
Hello Amy I have soaked the green seed pods from last year and planted them but they have not popped up It’s done over a month.
I’ve never had a problem with the red ones. Do you have any suggestions?
Amy Andrychowicz says
You should remove the castor bean seeds from the pods before planting them. If the pods are green, then it means the seeds aren’t mature enough to grow on their own (here’s how to properly collect the seeds). If you meant to say you soaked and planted the “seeds” rather than the “seed pods”, then try adding bottom heat as I describe in the article. The seeds will grow much faster when the soil is warm.
Gary Friedel says
I came across your website and read it out of curiosity. I have been growing castor beans from my own seed for almost 20 years with great success. Your step by step process is almost identical to what I do… with one exception. I use the edge of a small steel file to score a small groove along the two side edges of the seeds, before I soak them overnight. It is a bit tricky because the seeds are hard to hold between your fingers while you score them, but I believe that is the key to having the seed hydrate and quickly break through the hard shell. After soaking, I plant the seeds in moist potting medium in small containers (due to space restriction), cover them with a plastic sheet, and put them in my boiler room close to the heat plenum. The temperature there is about 27 degrees C (80 degrees F), and I “always” get germination in 3 to 4 days. A good heat mat should be able to produce the same conditions. As soon as the seedling stem has emerged, I transplant it into a regular 6″ greenhouse pot and move it to the grow-light area in my workshop. A delicate job but easy enough. Like you, I get a lot of surprised comments about a plant you can grow from seed to 10′ high in one Edmonton Alberta growing season. Great Job on your website.
Amy Andrychowicz says
Awesome, thanks so much for sharing your method for starting castor bean seeds. It truly is amazing how quickly they grow into huge, beautiful plants!
Alistair Young says
I just two left over seed pods from last year containing 6 seeds it’s now end of June is it worth a try to grow them now our autumn in u.k. comes in October so maybe it’s too late what do you think?
Amy Andrychowicz says
You certainly could try planting a few of your castor bean seeds to see how well they do. They’ll have time to grow into decent sized plants if it’s hot and sunny enough, but they probably won’t produce any new seeds. So you may want to save a few for next spring.
Alistair young says
Thank you I will give it a go.
Anton Fieder says
I live near Toronto, Ontario. Where can I buy some castor beans to plant?
Amy Andrychowicz says
Castor bean seeds are pretty easy to find online, or you can check your local garden centers (not a big box store).
Deb says
Hi Amy.
Thank you so very much for creating this easy-to-follow guide for germinating Castor Bean seeds. It’s VERY helpful! One question — once the seeds have sprouted and are placed under lights, is the heat mat still required? Since you did say that they appreciate warmth, I’m thinking that perhaps I should leave them on heat right up until transplanting time but, on the other hand, I don’t want to encourage the growth of bacteria/fungi with unnecessary heat.
Thank you again!
Amy Andrychowicz says
You’re welcome, so glad you found this guide helpful! 🙂 The only reason I would recommend keeping your castor bean seedlings on the heat mat is if they are in a cold location – like an unheated porch or basement. But if the room is warm, or even average temperature, then you no longer need the heat mat.
Marialana Lenhart says
This is the BEST comprehensive guide to growing Castor Bean plants I’ve seen. I’ve been collecting my seeds and restarting for several years now and have gathered a lot of info on the subject. This year, I couldn’t remember if they required bottom heat when starting and found your guide. I just wanted to let you know I wish I would have found your guide years ago!
Amy Andrychowicz says
Awesome, so glad you found my guide for germinating castor bean seeds so helpful! 🙂
David Graeme says
Can you help me please.
As there are several different types of Castor species, does this mean the beans are of different sizes.
Amy Andrychowicz says
Yes, castor bean seeds can be different sizes, depending on the species.
SARAH SMITH says
My castor bean plant was 3 inches high and my neighbor cut the new leaves off will it continue to grow?
Amy Andrychowicz says
Oh bummer, why on earth would your neighbor do that? If there are still small leaves on the very top of your castor bean seedling, then it might survive and continue to grow. However, if they cut off the whole top of the seedling, then it probably won’t survive. I would leave it be and give it time to see if to grows back (and keep your neighbor away from it, LOL!). Good luck!
Evie Klein Whittingham says
Great explanations and instructions. I’ve grown Ricinus/Castor Bean in Barrie, Ontario zone 4B. I’ve moved to a corner lot in zone 5b/6a with lots of grass and one badly chopped Norway Maple.
I find Castor Bean plants are especially wonderful when you are starting a garden bed and don’t have any established shrubs or large perennials as they grow quickly and bring presence to the garden.
I agree they should be removed after frost hits them due to their toxicity.
Thanks for the refresher. –Evie in Ingersoll
Amy Andrychowicz says
You’re welcome!
Sandra Carter says
Hi my name is Sandra I live in Hurghada Egypt, after germination can I plant them
straight away in the ground as we do not get a frost and I plan to start germination
and the ground ,
is now getting warm about 25-28,
so will this be OK?
look forward to hearing from you
Sandra Carter
Amy Andrychowicz says
Yes, since it’s so warm where you live, you can either direct sow castor bean seeds right into your garden, or transplant them outside right after they germinate indoors.