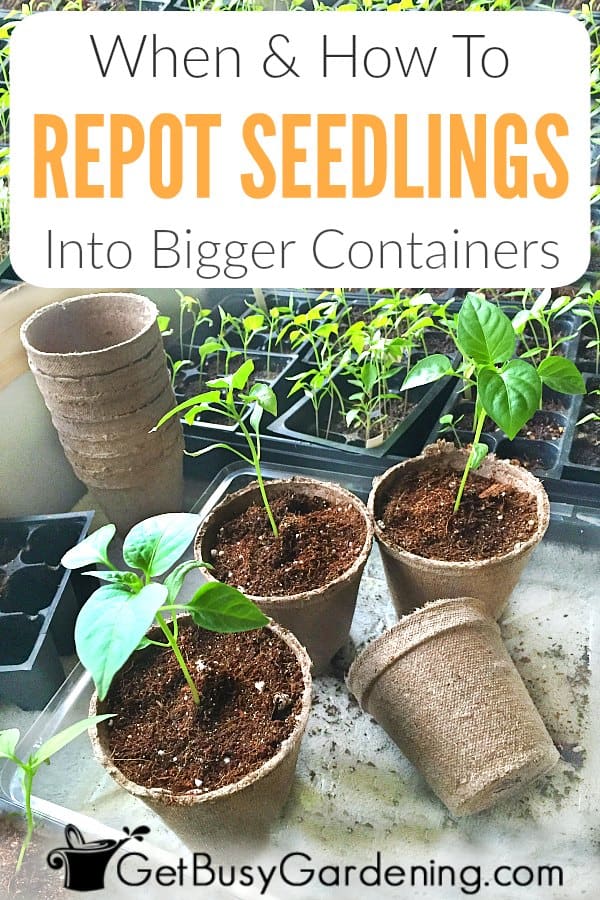

Repotting seedlings is important to grow strong plants for your garden. In this post I will talk about the benefits and tell you exactly when to move them to a bigger pot.
I’ll also show you the best types of containers and soil to use, and give you step-by-step instructions for how to pot up your seedlings quickly and easily.


Do Seedlings Really Need To Be Repotted?
The short answer is no, you don’t always need to repot them. This isn’t a required step for successful seedling care.
Some will be just fine staying in the trays all the way up until you move them outside. But others will suffer if they’re pot-bound for too long.
When To Repot Seedlings
Wait until your seedlings are a few inches tall and have their first sets of true leaves before you attempt to pot them up. Do not try to repot tiny, immature ones. Here’s how to know when it’s time:
- The seedlings are tall as or taller than the height of the tray
- There are lots of roots coming out of the drainage holes
- They’ve stopped getting larger, or their growth has slowed
- They dry out so quickly that you have to water more than once a day

The Best Soil & Containers To Use
If you’re wondering what type of soil and pot to transfer your seedlings into, then this section is for you. Below I’ll give you some pointers, and share my favorites.
What Soil To Use
It’s best to repot your seedlings using a lightweight soilless potting mix so their delicate roots can easily spread out. Here are my top choices:
- Leftover seed starting soil works great
- You can mix up a batch of your own seed starting soil using my recipe
- Or use a high quality general purpose one
Avoid cheap, heavy top or garden soil, or mixes that contain fertilizer, because they can stunt the growth of your seedlings, and harm or even kill them.
Different Types Of Pots
Choose a container that’s about twice the size of the seed cells, a 3-4″ pot is usually perfect. Just make sure it has drainage holes in the bottom.
There are basically two types of containers you could use to pot up your seedlings: non-plantable or plantable:
1. Non-plantable pots – The standard nursery pots are great because you can reuse them year after year. But you could make your own out of items like plastic cups, yogurt containers, the bottom half of water bottles, or any other small plastic containers you have in your recycling bin.
2. Plantable pots – These are made out of biodegradable materials, like coco coir, peat moss, cow manure, or recycled paper – like my DIY newspaper seedling pots. You can plant them directly into the garden, which is great for seedlings that don’t like their roots disturbed.

How To Repot Seedlings Step-By-Step
To make the transition easier on them (and on you), water your seedlings several hours or the night before you plan to pot them up.
A moist rootball will hold together better than a dry one, and ensuring they are well-hydrated will minimize the risk of transplant shock.
Supplies Needed
Below is a list of what you’ll need. Gather everything together before you get started.
- Seedlings
- Pots
- Potting soil
- Trowel or large spoon
- Permanent marker or paint pen
- Plant tags or painters tape (optional)
- Potting tray (optional)

Steps By Step Instructions
I definitely recommend using a potting tray, especially if you’re doing this indoors. You also might want to lay down a towel or a large bed sheet to catch any mess you make while repotting your seedlings, and make cleanup easy.
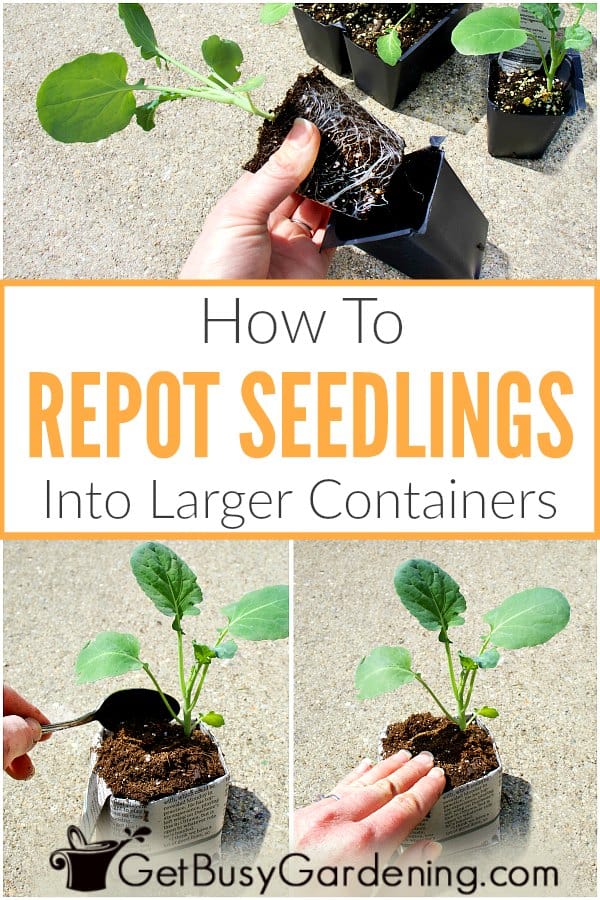
Step 1: Prepare the pots – Lay out your containers, add about 1″ of potting soil into each one, and pack it down tightly. You can do the rest of the steps one at a time, or use my assembly line method.
First I get all of my pots ready so I can quickly pop the seedlings into them as I go. Then I’ll come back afterward and finish filling each of them with soil.
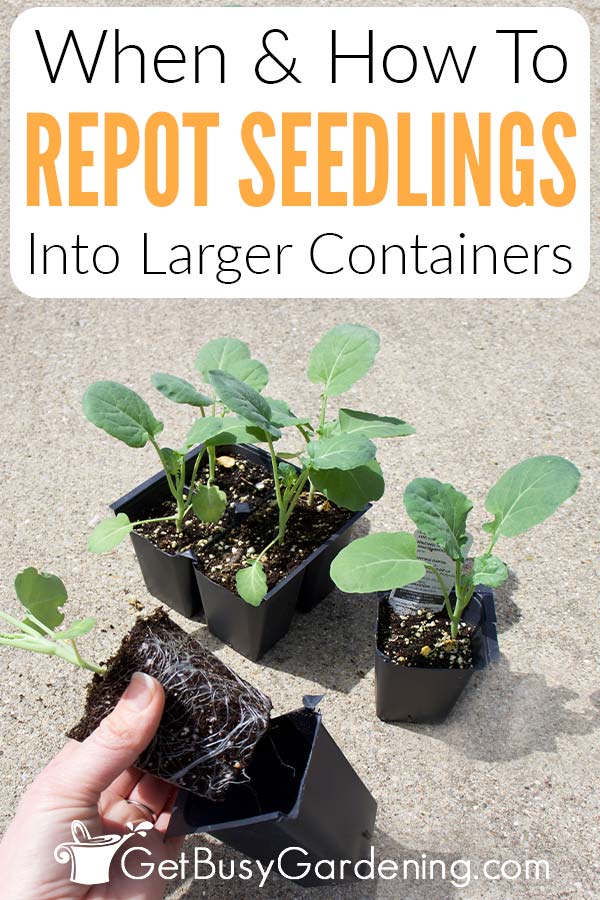
Step 2: Remove the seedlings from the cell – The key to this step is to be gentle and take it slow. Start by placing your fingers over the top of the soil on either side of the stem, and flip the whole container over so you’re holding it in your hand.
Then you can squeeze the bottom of the cell until the rootball comes loose. Make sure you don’t pull or grab the seedling by the stem to remove it. If you’re having trouble, you can use a spoon, butter knife, or skinny trowel to loosen them.

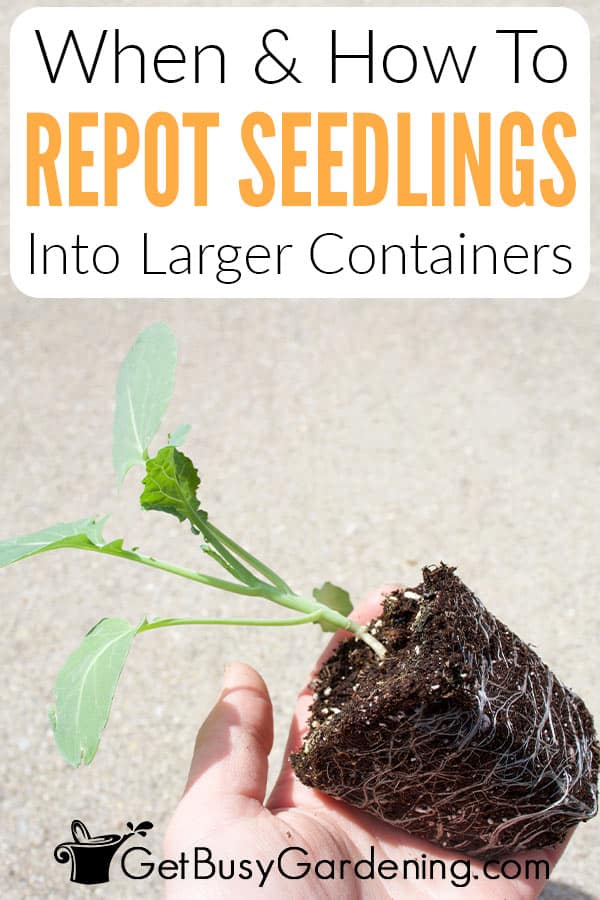
Step 3: Straighten the seedling roots – If the roots are growing in a circular pattern, or they are tightly bound, then gently tease them apart to straighten them before you repot them. Take care not to break any off in the process.
If there’s more than one seedling in a cell, then gently tease the roots apart to separate them. It’s important to plant each one into its own pot, or they will be too crowded.

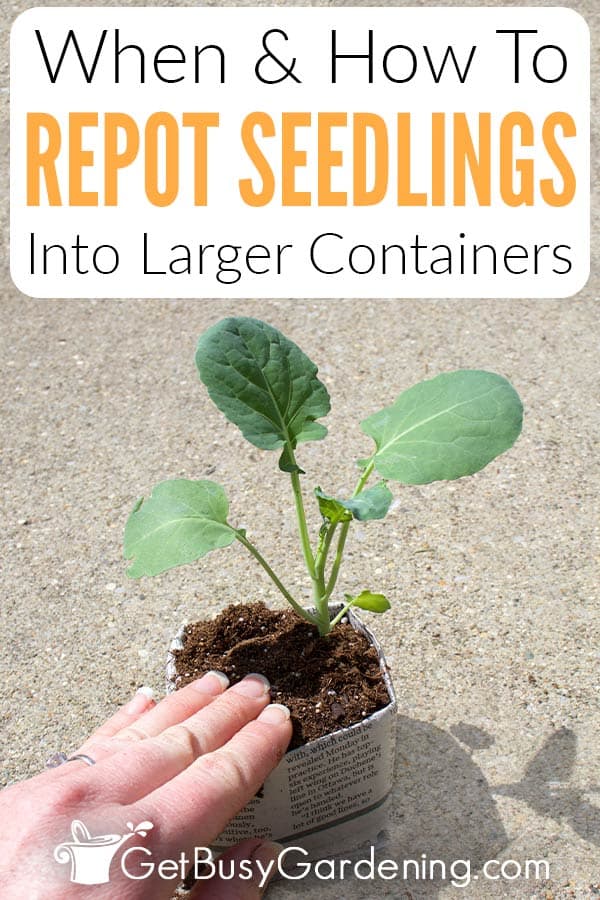
Step 4: Pot it up – Place the seedling into the pot at the same depth as it was in the tray (i.e.: don’t bury the stem) and fill in around the roots with soil.
As you work to fill the pot, lightly pack the soil around the rootball with your fingers. Once it’s full, give it a little water so everything can settle, then fill in any holes that appear, if necessary.

Step 5: Add a plant tag – Adding a plant tag to each pot will help you identify your seedlings later. If you don’t have any, you can write on the side of plantable pots with a permanent marker or paint pen.
Or put a piece of tape on your plastic containers, and write on that (I like to use painters tape because it’s easy to remove and doesn’t leave any residue).

Caring For Your Newly Repotted Seedlings
Once you have your seedlings potted up, there is a chance they will go into shock. That means they may droop for a few days afterward. Don’t panic if this happens, it’s common and fixable.
Just put them under the lights, keep the soil consistently moist, and hold off on fertilizing until they recover. They should pop back up and look healthy again in a few days.
Related Post: When & How To Transplant Seedlings Into Your Garden
Repotting seedlings is a wonderful way to ensure that you grow strong, healthy seedlings for your garden. Once you learn the signs to watch for, you’ll know which ones need to be potted on, and exactly when to do it.
If you’re tired of struggling to learn how to grow seeds by trial and error, then you should take my online Seed Starting Course. It’s a fun, self-paced online course that will teach you everything you need to know. Enroll and start today!
Or, if you just need a refresher or a quick-start guide, then my Starting Seeds Indoors eBook is what you need.
More Posts About Seedlings
- When & How To Harden Off Seedlings
- How To Fix Common Seedling Problems
- How To Get Rid Of Mold On Seedlings
Share your tips for repotting seedlings in the comments section below.


sherry bailey says
I have planted alot of different vegetable and herb seeds in peat pellets under grow lights. Have a few questions:
1. They have sprouted, do I need to repot them in seed starting mix or garden soil until ready for ground?
2. Is it okay to leave the dome over the seedlings until they have true sets of leaves?
I have read conflicting answers as to what type of soil to keep the seedlings in until planting in my raised bed.
Amy Andrychowicz says
You should repot your seedlings using either a seed starting mix or a general purpose potting soil, and never use garden soil in pots. Yes, you can leave the dome on your trays until the seedlings have their first sets of true leaves. But don’t wait too long to start giving them some air, or it could cause mold or rotting. Here’s my detailed post about how to care for seedlings that will help.
Richard Sawatsky says
I planted tomatoes in a starter pot that has 40 cells and lighting. I’m in my first week and they are touching the top of the starter pot. I have raised the top with styrofoam. What should I do know. I am a total ametuor and should I pull the seedlings when there are more than one in the pot and what should I do to provide light and keep them growing.
Amy Andrychowicz says
If you have more than one seedling in a pot, then it’s best to thin them out to keep only the healthiest one. Some people have success separating tomato seedlings and potting each one up individually, but doing so may cause fatal damage to the delicate roots or stems. Here’s more information that will help you out…
How To Grow Tomatoes From Seed
How To Take Care Of Seedlings & What To Do After They Sprout
Sarah says
I’m about to repot into larger containers and have a question about the soil medium. I bought some organic Promix, worm castings, and perlite. Figuring I can incorporate the seedling mix I used for the seeds into this, would this be a sufficient amount of nutrients for the plants?
Amy Andrychowicz says
I’m not familiar with that specific brand of soil, so I can’t speak from experience. But if it’s peat-based, then you should use a pH probe to test the acidity. It totally depends on the type of seedlings you’re potting up, but many types of veggies and other plants like alkaline soil, so you may need to add a bit of garden lime to neutralize the acidity. Otherwise, your mix sounds like it will work great. Check out my seedling care guide for details on how to care for them, including tips for fertilizing them for added nutrients.
Andrew Millier says
Thankyou for a great item about seedlings, Im feeling nervous about when to pot mine as they seem so small and frail, they are now about an inch tall, but are really tiny. But I dont want to lose them , Just have to be brave I guess.
ps. they are carnation seeds.
Bye for now,
Andy
Amy Andrychowicz says
You don’t need to pot up all of your seedlings. The small ones can just stay in the starter trays until they’re large enough to transplant into the garden.
Linda Zarate says
Linda says
The stem of my seedlings are so thin and the leaves so small after 10 weeks from the starting point. It seems that they are not strong enough to be re-potted. I am sure that the roots have not gotten strong either. What have I done wrong?
Amy Andrychowicz says
When the stems of seedlings are thin, then it usually means they aren’t getting enough light. If they aren’t growing any bigger, it usually means they need more heat and/or fertilizer. Here’s a detailed post that will help you out… How To Take Care Of Seedlings & What To Do After They Sprout.
Parrish Nored says
Why not just start your larger growing seedlings in larger seeding pots to eliminate the need for repotting? I am about to do seedlings for my Fall garden. WDYT?
Amy Andrychowicz says
You could certainly start your seeds in larger pots rather than repotting them later, if that works for you. But it is easier to germinate seeds in seedling trays. Repotting isn’t always necessary either. You could transplant the seedlings directly from the seed trays into the garden once they grow big enough. Repotting them just gives them more time to grow larger before transplanting into the garden.
Kristen says
I have a question, you say if you have more than one seed in a cell, to separate them. Each plant gets its own pot. What if you used the peat pellets. How do you go about this? And another question regarding the pellets. How do you keep the seed’s roots from going into another pellet? I tend to mix trays with different things.
Amy Andrychowicz says
I recommend thinning the weakest seedling because trying to break apart the peat pellet may be too hard on the seedlings, and end up damaging them beyond repair. If the seedling roots are growing so long that they’re growing into neighboring pellets, then you should definitely pot them up. In fact, they should be potted up before it even gets to that point. Otherwise, you could try spacing the pellets a bit further apart in the trays to keep the roots separated.