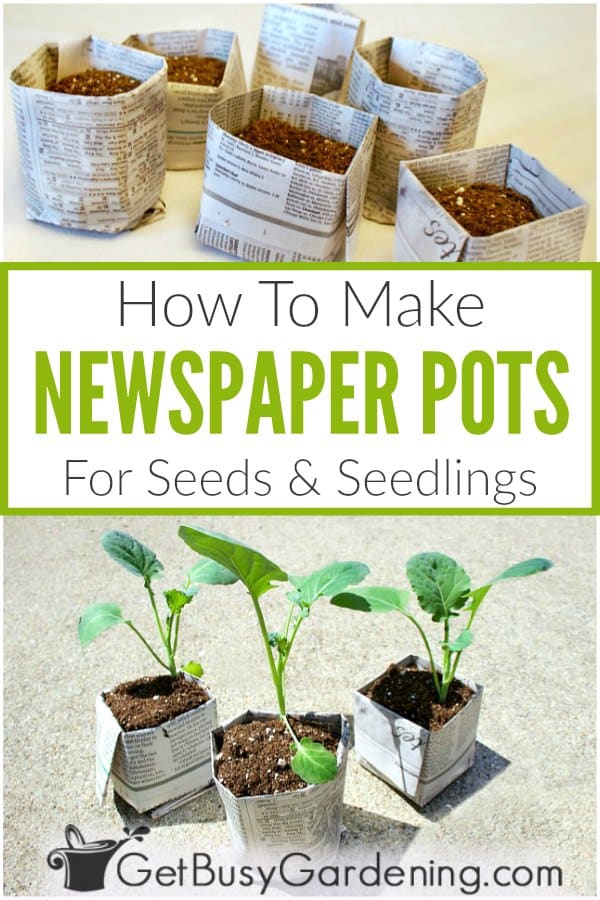
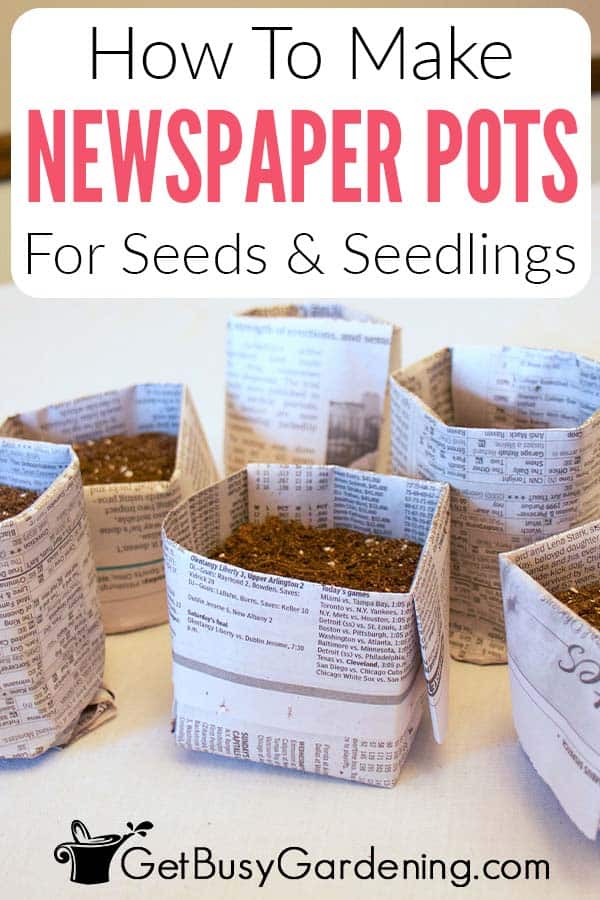
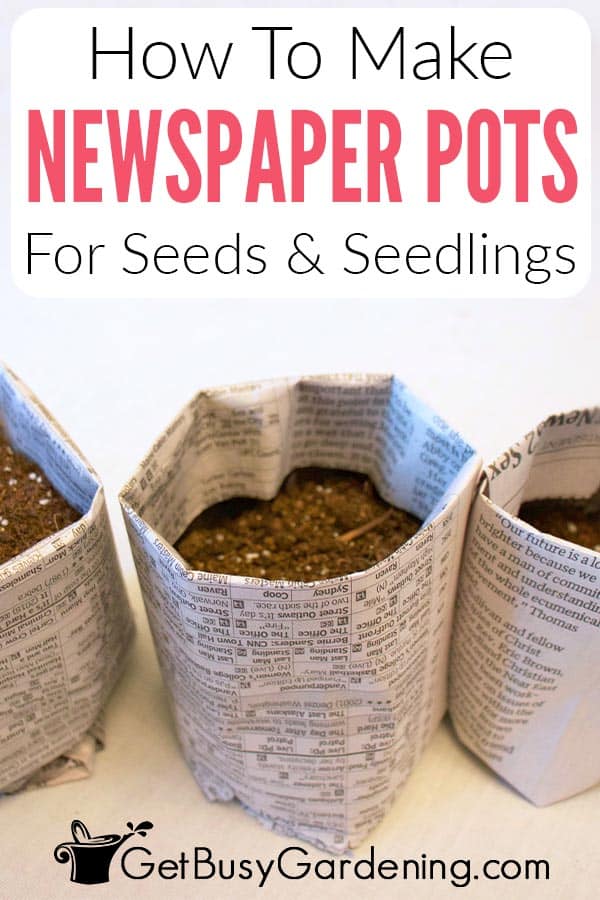
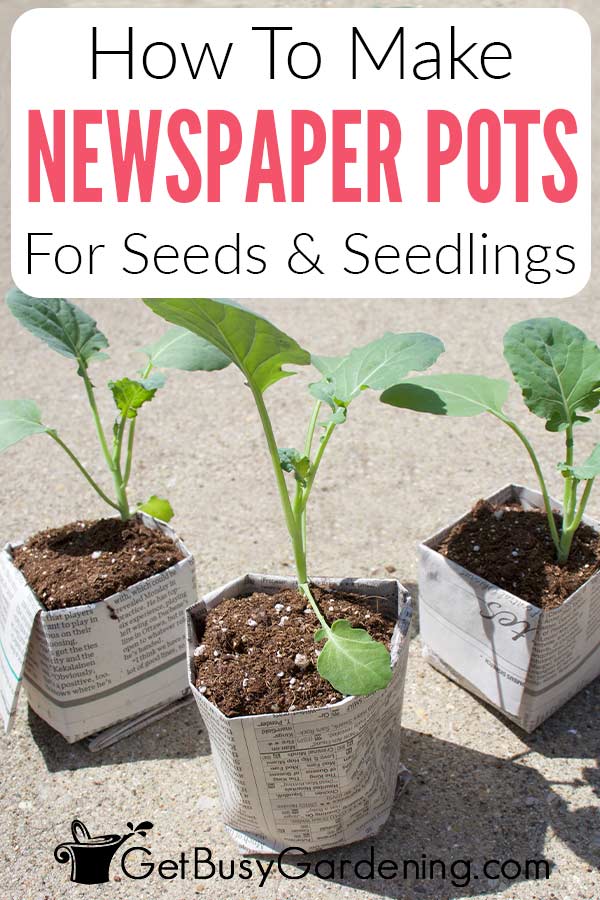
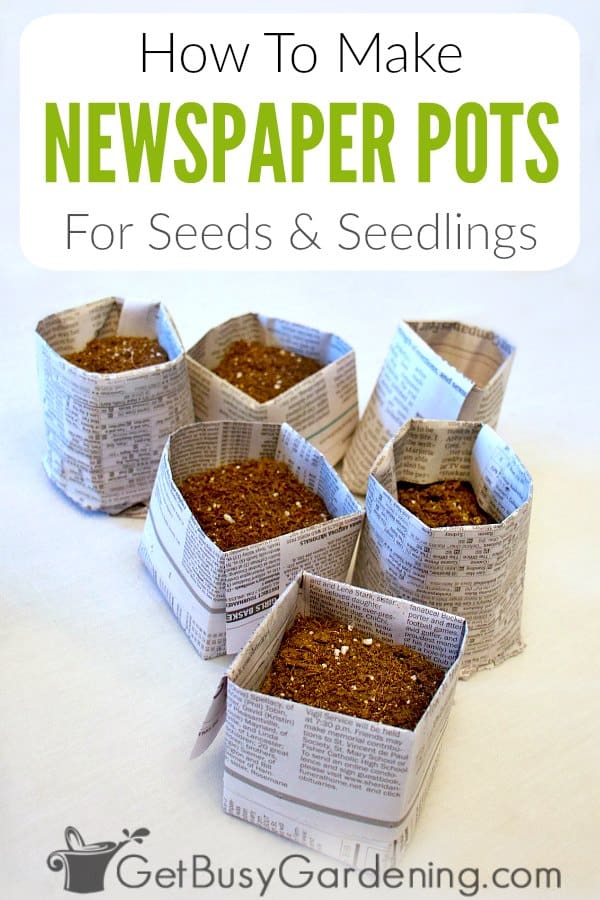
Newspaper seed starting pots are easy to make, and great for seedlings too. They are fun and quick to make, and you don’t have to be crafty for this DIY project. In this tutorial, I’ll show you step-by-step how to make both round and square newspaper pots for seedlings.
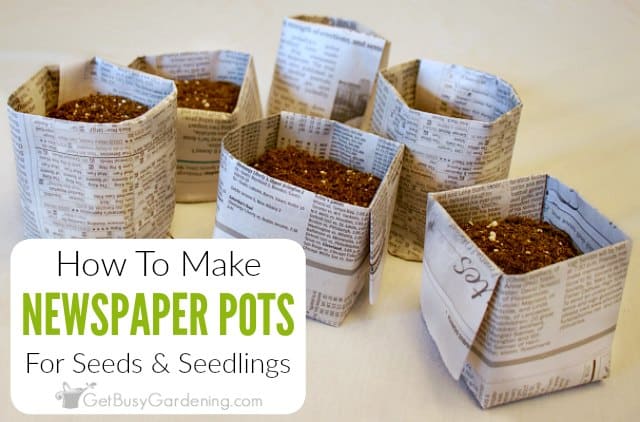
Making DIY newspaper pots for growing seeds is a really easy project, and doesn’t require a lot of time or materials.
It also economical and environmentally friendly. Plus it’s better for the seedlings, since the pots can be planted directly into the ground.
Your plantable pots don’t need to be incredibly strong either. The whole point is that they will break down quickly so you can plant the entire pot directly into the soil without worry.
Here’s what you’ll find in this tutorial for making newspaper seedling pots. Click the links to skip to the section you’re most interested in, or keep reading to learn everything…
Is Starting Seeds In Newspaper Safe?
I get this question a lot… “is using newspaper pots for seedlings safe?“. All that ink and processed paper makes you wonder, doesn’t it? But the answer is, YES!
Modern newspapers are printed using soy-based ink, which is biodegradable and non-toxic. So you can make all of the newspaper seed starting pots you need without worrying about harming your seedlings or the environment.
Benefits Of Using Newspaper Seed Starting Pots
If you’re considering using newspaper pots for starting seeds – you have a lot to gain and not much to lose. Here are the benefits of using them…
- Budget-friendly – You can buy newspaper for a fraction of the cost of buying pots from the store. And if you already get the paper delivered to your home or office, making your own pots is free! It doesn’t get much better than that.
- Environmentally friendly – Using newspaper pots for seedlings is a great way to reduce, reuse, and recycle!
- Better for your seedlings – Moving your seedlings out of their pot and into the ground (or another pot) can send them into transplant shock. When you use plantable pots like these, the seedling roots don’t get disturbed, which greatly reduces the risk of transplant shock.
- Plantable – Since these pots are plantable, you can transplant them directly into the garden or a larger pot. No need to remove the paper, it will naturally decompose. Easier for you, easier for the seedling!
- Fun to make – These newspaper seedling pots are quick and easy to make. So even if you don’t have a crafty gene, it’s fun to create them! You can even get the whole family to help – it’s a really great project for kids.
How Long Do Newspaper Pots Last?
Newspaper seed starting pots are not meant to last more than a few weeks before transplanting. After all, they’re made of paper. And once you start watering your seeds, the pots will weaken.
But remember, they are meant to break down quickly. So that when you plant them, the seedling roots can easily break through the paper and grow undisturbed.
If you need your seedling pots to last longer, try making the newspaper thicker by doubling it up. Or use a thicker type of paper to make them instead.
You could experiment with paper grocery bags or a similar type of paper, and see how well that works for you.
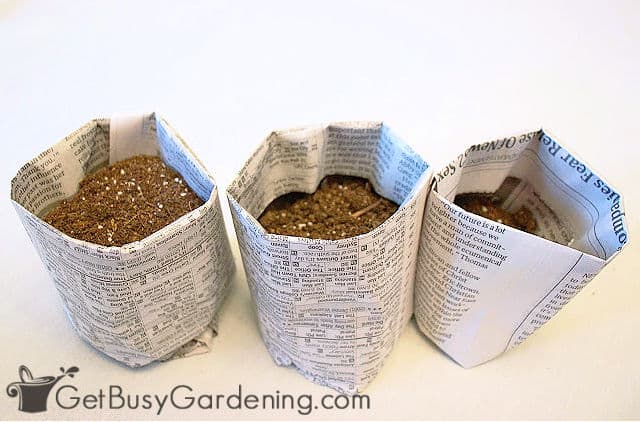
How To Make Newspaper Pots For Seedlings
Below I am going to show you the steps for how to make both round and square pots. The round newspaper pots are perfect for starting most types of seeds.
The square pots are a great size for growing larger seeds or potting up seedlings.
Once you get the hang of making these, you can modify the steps below to create different sized pots to fit your needs.
To make these pots, you only need a few supplies (which you probably already have on hand). Never use tape or glue to hold the folds in place though.
Tape and glue usually aren’t biodegradable, and you don’t need them for making these DIY plantable pots.
Are you ready to try your hand at making newspaper seed starting pots? Let’s get started!
How To Make Round Paper Seed Pots
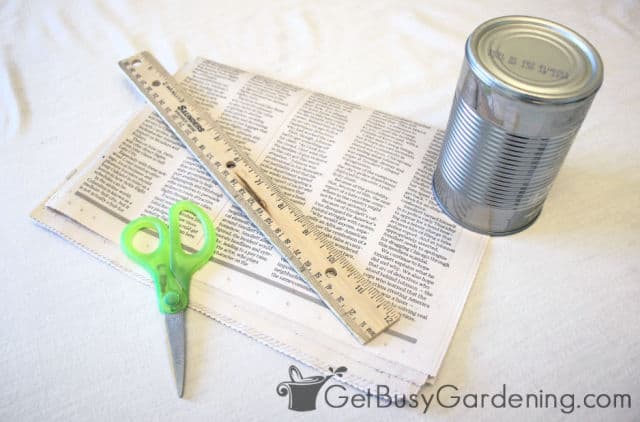
These round pots are the easiest and quickest to make. You only need a few basic household items to make your very own round newspaper seedling pots…
Supplies Needed For Round Seed Starting Pots
- Newspaper (don’t use the glossy pages or inserts, they don’t break down as fast as newsprint)
- A small round jar, aluminum can, or a newspaper pot maker
- Scissors
- Ruler
- Potting soil for starting seeds
- Seeds
Steps For Making Round Pots
To make round newspaper seed starting pots, you’ll only need about 2 minutes per pot.
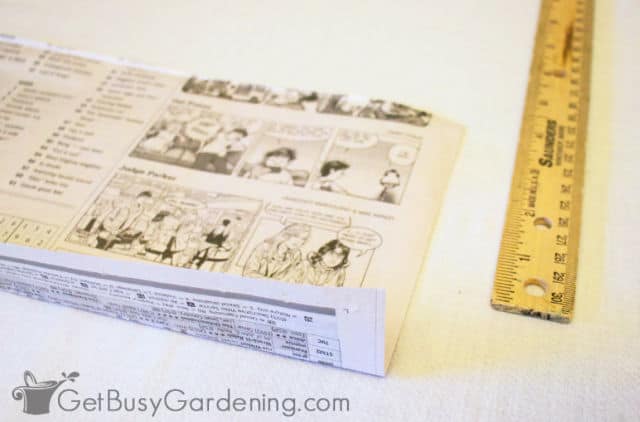
Step 1 – Cut the paper: Using your ruler as a guide, cut your newspaper into 5-7 inch wide strips. Use the width of the open sheet as your length.
Depending on the size of your newspaper, you can cut it in half (like I did) or try to get three strips out of one paper if it’s long enough. You only need one strip per pot.
Step 2 – Make a crease in the paper: Lay out one strip of newspaper. With the strip laying lengthwise, fold down one inch of the paper just to make a crease.
Promptly unfold it. Making this crease will help to fold over the top of the pot in the final step to give the sides strength.
Step 3 – Line up the can on the newspaper: Line up the top of your jar, can or newspaper seedling pot maker with one edge of the paper.
There should be a couple of inches of paper sticking out along the bottom end of the can (i.e.: the newspaper should be longer than the height of the can).
Step 4 – Roll the newspaper around the can: With your hand, hold one side of the newspaper and guide it around the can as you roll it along the table until all of the paper is rolled up around the can.
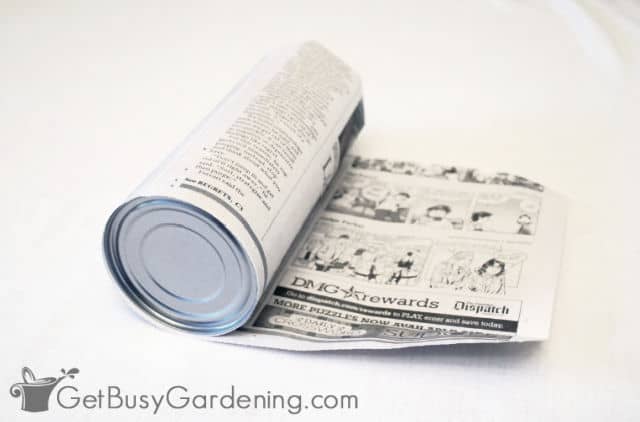
Step 5 – Wrap the paper around the bottom of the can: Once the newspaper is rolled up around the can, fold the excess paper to cover the bottom of the can. Just like wrapping the end of a present!
Step 6 – Slide the can out of the paper: Once you’ve got your fold, it’s time to remove the can. The newspaper should be snug around the can, so be patient and let it slide out slowly with the help of gravity.
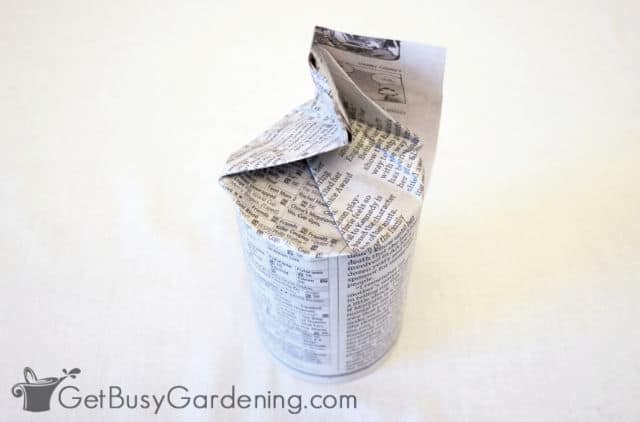
Step 7 – Fold in the bottom of the pot: To help hold the bottom folds in place, push the fold towards the inside of the pot. You can even use your fingers to enforce a crease along the edges.
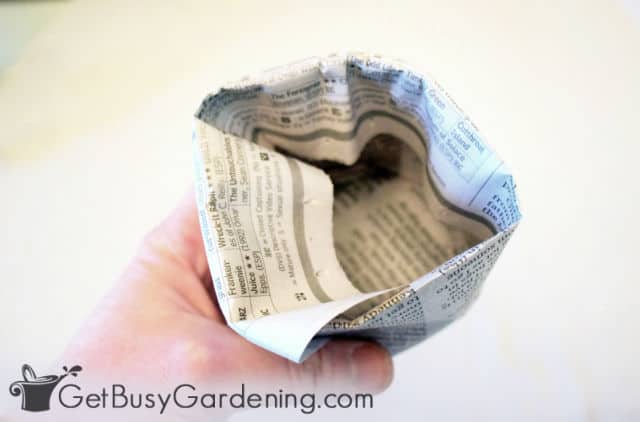
Step 8 – Fold over the top of the pot: Fold the top one inch of the top of the pot into the middle of the pot, using the crease you made in Step 1 to make it easier.
How To Make Square Origami Newspaper Pots
These square origami newspaper pots are slightly more complicated to make than the round ones above, but it’s easy once you get the hang of it.
There’s not really any huge benefits of making the pots square -vs- round. But some people find that the square pots line up in the seed trays better than the round ones.
Here are the steps for making DIY square pots…
Supplies Needed For Square Seedling Pots
- Newspaper (again, stick to using the newsprint pages only, and don’t use the glossy pages or inserts)
- Scissors
- Seed starting soil mix
- Seeds or seedlings
Square Newspaper Seedling Pot Steps
To make square origami newspaper pots, you’ll only need about 4 minutes per pot (maybe even less if you become an origami folding pro!).
Step 1 – Cut the newspaper: Cut a full sheet (meaning it contains two pages on one piece) of newspaper right down the middle (the fold).
Step 2 – Fold the paper in half: Fold the sheet in half from top to bottom.
Step 3 – Crease it to create a line: Fold it in half from side to side, make a crease, and then unfold. You only do this to get the crease.
Step 4 – Fold in the bottom corners: Position the newspaper so the open side is facing away from you, and the folded edge is facing toward you.
Next, fold the bottom left corner up towards the middle crease. You’re making a triangle with this fold, and one edge will completely touch the middle crease. Repeat this fold on the other side.
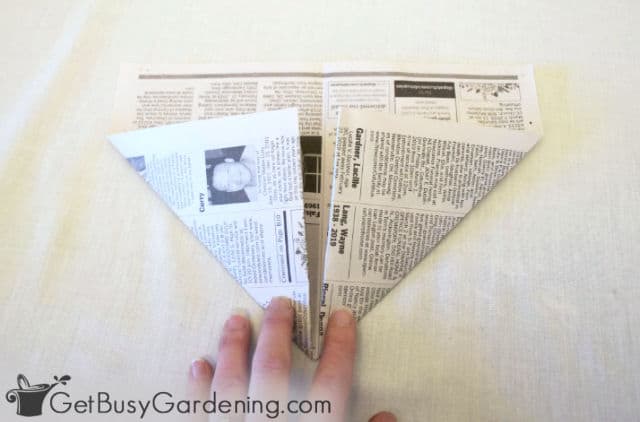
Step 5: Take the top open edge of the newspaper (leave the bottom one where it is) and fold it over straight edge of the triangles you created in Step 4. You’ll see a rectangle on top of two triangles.
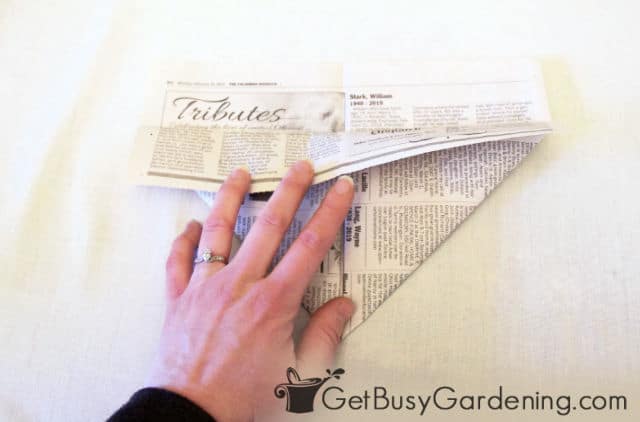
Step 6 – Flip it over: Flip the entire newspaper over.
Step 7 – Fold in the two sides: Using the center crease as your guide, fold the side of the newspaper towards that middle crease. Repeat on the other side.
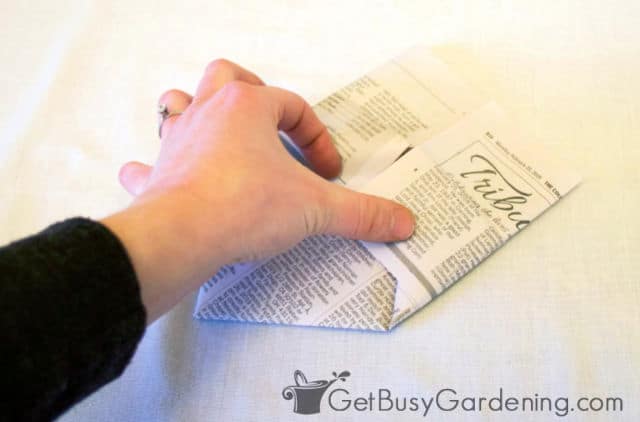
Step 8: Fold the remaining unfolded edge of the newspaper in towards the middle. If you have a longer newspaper, fold this piece in on itself twice.
This will create a flap that you can tuck inside the lip or pocket that has formed from the side folds you did in Step 7. Shorter papers do not require this step.
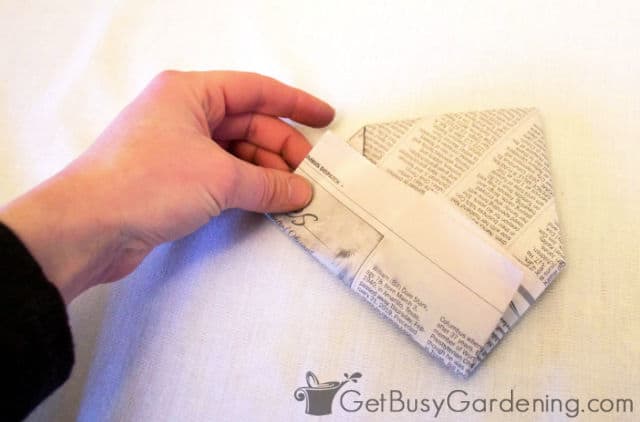
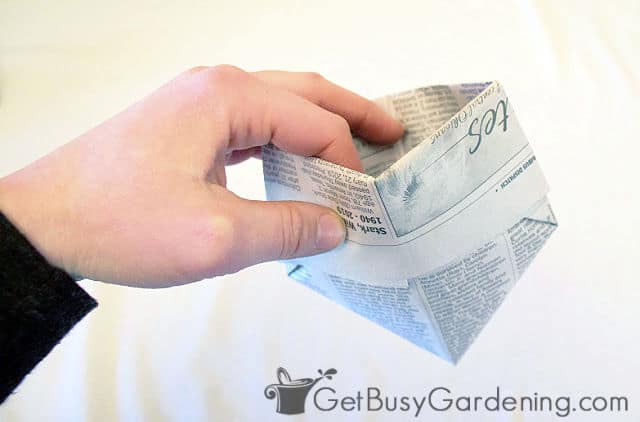
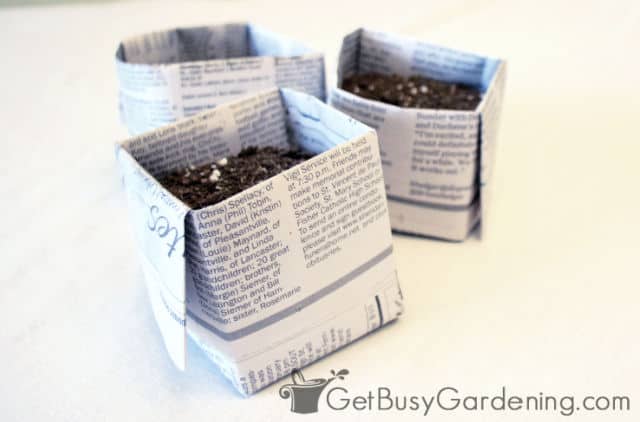
Step 9 – Open and shape your square pot: It’s time to reveal your square newspaper pot! Find the inside of your shape and gently push the sides out.
The bottom will have a small triangle shape that you will need to fold so that it will sit flat. As you push the sides out, you’ll notice this small triangle piece doesn’t have a natural place to go.
Simply use your fingers to fold it, making a small triangle on the bottom of your pot. Work with the folds and continue to press and mold the pot until it forms a square.
Tips for Using DIY Paper Seedling Pots
When you’re done making all of your pots, it’s time to start using them! Here are some quick tips for how to use them properly for planting seeds or seedlings…
- Fill pot with moist soil – It’s best to water the soil BEFORE putting it into the newspaper pots. This will make it much easier to water them after planting, and prevent the soil from drying out so fast.
- Plant your seeds – There’s nothing special here, you can simply plant your seeds just like you would in any other type of pot. Then place the pots into the seed tray, or other shallow container.
- OR pot up your seedlings – When potting up seedlings, plant each one at the same depth as it was in the original seed tray/pot. If you used paper pots for growing your seeds, you can simply plant the whole paper pot into the new seedling pot. Learn more about repotting seedlings here.
How To Water Newspaper Seedling Pots
Properly watering newspaper seed starting pots will help to make them last longer, and prevent problems with mold growth and overwatering. Watering from the top can cause damage to the seedling, and also to your paper pot.
The best way to water your seedlings is from the bottom. You can do this by simply filling the seed trays with an inch or so of water, and allowing the soil to soak it up.
Don’t let them sit in water too long though, be sure to dump out any water that hasn’t been absorbed after 30 minutes.
This helps to prevent mold growth, and to keep the integrity of your newspaper seedling pots strong for a longer period of time.
Preventing Mold Growth On Newspaper Pots
These newspaper pots for seedlings are great for so many reasons, but you do have to watch out for mold growth. It’s a common issue for all types of plantable pots since they’re made of organic materials and break down easily.
If you notice mold growth on your newspaper pots, they may be too warm or too wet, or they aren’t getting enough air circulation. Here are a few tips for preventing mold growth on biodegradable pots…
- Too much heat – Remove any bottom heat that you may be using, or lower the room temperature where you are growing your seedlings.
- Too much moisture – Allow the pots to dry out before watering again. When it comes time to water, do it from the bottom instead of the top. And don’t mist seedlings that are growing in plantable pots.
- No enough airflow – Give them more air circulation. Remove the plastic lids, and try placing the pots further apart in the tray so they aren’t touching. You can also run an oscillating fan over your seedlings to improve airflow.
Learn more about how to prevent mold growth on seedlings and pots here.
Tips For Planting Biodegradable Seedling Pots
When you are ready to plant your newspaper seed starting pots, here are a few helpful tips to ensure a successful transplant:
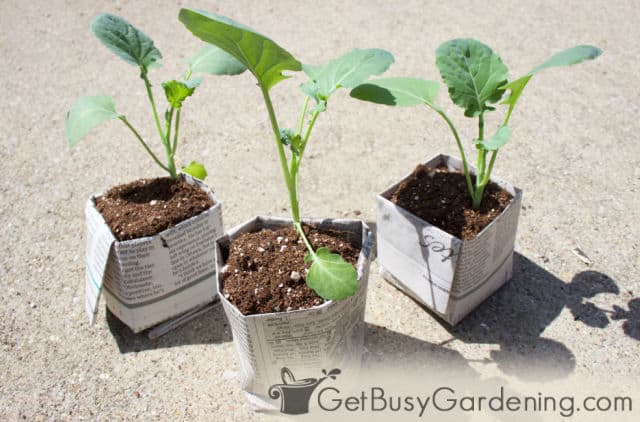
- Plant the entire pot – Leave the newspaper pot where it is. There’s no need to remove the paper, or rip holes in it before planting your seedlings into the garden.
- Water them well – After you plant the pot, water it really well to ensure the paper is saturated. This will help the pot break down faster, so that the seedling roots can easily break through.
- Ensure all of the newspaper is covered – While you don’t have to remove the newspaper, make sure none of it is sticking out of the soil after planting. If any part of the plantable pot sticks out above the soil, it can wick water away from the seedling root-ball. If some is sticking out of the soil after planting, simply rip the paper at the base of the soil.
Now you have your very own newspaper seed starting pots! I told you they were fun and easy to make. By making these newspaper pots for seedlings, you’re being kind to your seedlings and the environment. Plus you’ll be saving even more money.
If you’re tired of struggling, and want to learn how to grow any plant you want from seed, then enroll in my online Seed Starting Course. It’s a wonderful, fun, self-paced course that will teach you everything you need to know to easily grow your own seedlings. Enroll and get started today!
Or, if you just need a refresher, then my Starting Seeds Indoors eBook is for you! It’s a quick-start guide that will get you planting seeds in no time.
More Seed Starting Posts
- How To Make Your Own DIY Seed Starting Mix (With Recipe!)
- Seed Starting Peat Pellets vs. Soil: Which Should You Use And Why?
- How To Disinfect Seed Trays And Flats Before Starting Seeds Indoors
- How To Test The Viability Of Seeds With An Easy Seed Germination Test
Share your tips for using or making newspaper seed starting pots in the comments section below!
Print The Step By Step Instructions
How To Make Newspaper Seed Starting Pots
These round pots are the easiest and quickest to make. You only need a few basic household items to make them.
Materials
- Newspaper (don't use the glossy pages or inserts, they don't break down as fast as newsprint)
Tools
- A small round jar, aluminum can, or a newspaper pot maker
- Scissors
- Ruler
Instructions
- Cut the paper: Using your ruler as a guide, cut your newspaper into 5-7 inch wide strips. You only need one strip per pot.
- Make a crease in the paper: Lay one strip of newspaper lengthwise, and fold one inch of it to make a crease, then unfold. Making this crease now will help to fold over the top of the pot in the final step.
- Place the can on the newspaper: Line up the top of your jar, can or pot maker with one edge of the paper. There should be a couple of inches of paper sticking out at the bottom end.
- Roll the newspaper around the can: With your hand, hold one side of the newspaper, and guide it around the can as you roll it.
- Wrap the paper around the bottom of the can: Once the newspaper is completely rolled up around the can, fold the excess to cover the bottom of the can. Just like wrapping a present.
- Slide the can out of the paper: Once the paper end is folded, remove the can. The newspaper should be snug around the can, so be patient, and let it slide out slowly with the help of gravity.
- Fold in the bottom of the pot: To help hold the bottom in place, push the fold towards the inside of the pot. You can even use your fingers to enforce a crease along the edges.
- Fold over the top of the pot: Fold the top one inch of the top of the pot into the middle, using the crease you made in Step 1 to make it easier.


Leave a Reply