Propagating spider plants is quick and very easy, and there are a few ways you can do it. It’s so simple that soon you’ll have tons of extras to share with your friends and family.
In this complete guide, I will walk you through exactly what to do. You’ll learn every detail – from when to start, all the way through to potting up and caring for your new babies.
I’ll show you how to propagate spider plants step by step, including the different methods you can use, and give you my expert tips so that you will have the best success.
Spider Plant Propagation Methods
There are three main ways you can propagate your spider plant (Chlorophytum comosum, also called an “airplane plant”):
- Rooting the babies – This is the most common (and easiest) method, and the one I’ll focus on in this post.
- Division – You can split the rootball on mature plants to create more. I’ll briefly touch how to do that below.
- Seeds – If the flowers are pollinated, they will produce viable seeds. Here’s how to collect and grow spider plant seeds.
What Are Spider Plant Babies?
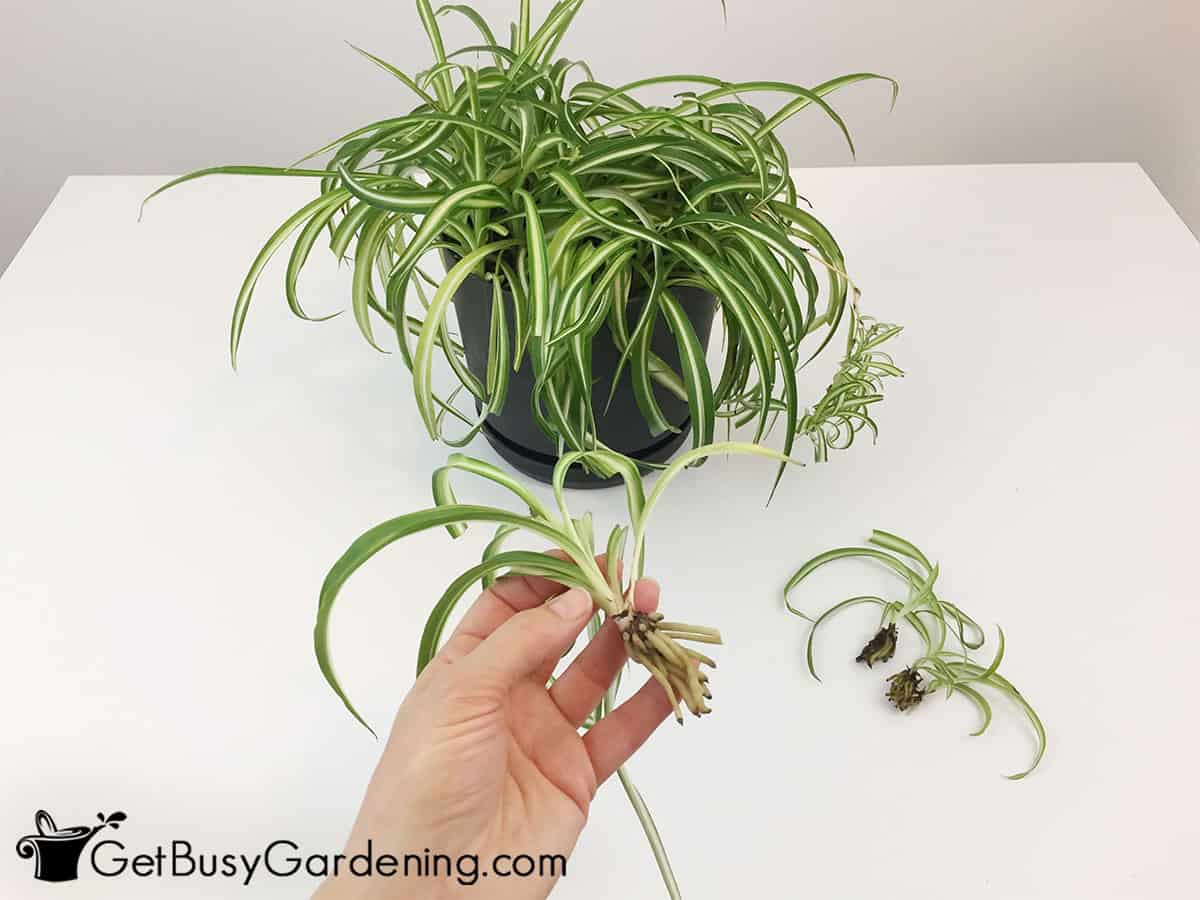
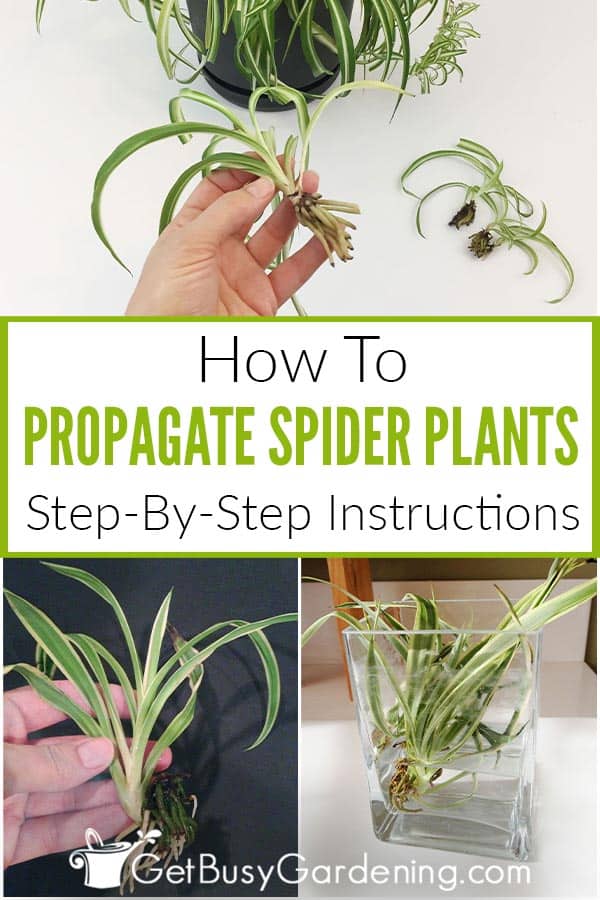
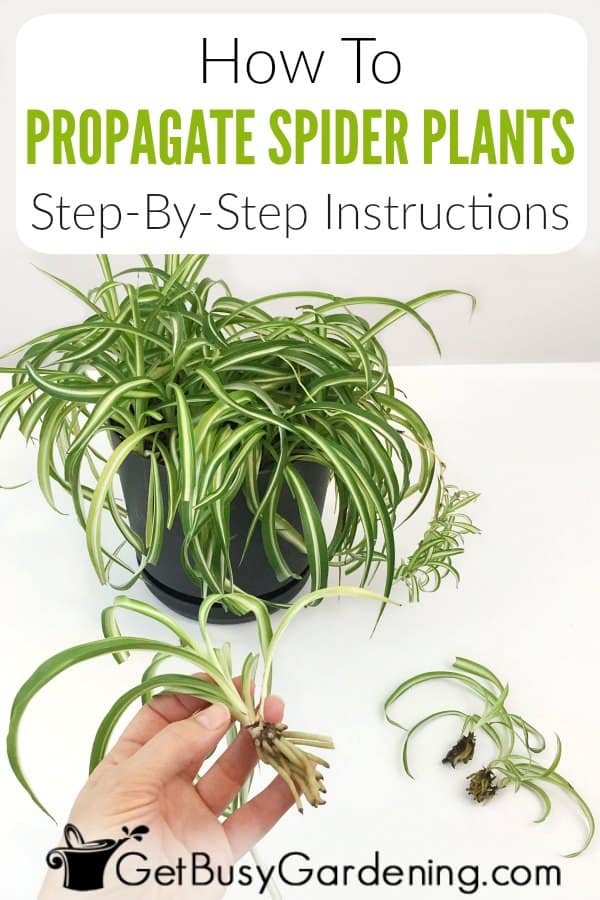
Spider plant babies are the identical offspring of the mother plant. They’re also called offshoots, spiderettes, spiderlings, pups, runners, or plantlets.
They will appear at the bottom of long stems that shoot out from the mother. Once they’re mature enough, you can use them to make new plants.
If yours never produces spiderettes, then it could be that the flowers are being pollinated, which is common when they’re outdoors. In that case they will produce seeds instead.
Related Post: Plant Propagation: A Detailed Guide For Beginners
When To Propagate Spider Plants
You can propagate your spider plants just about any time of the year. But it’s easiest and quickest to do in the spring and summer months.
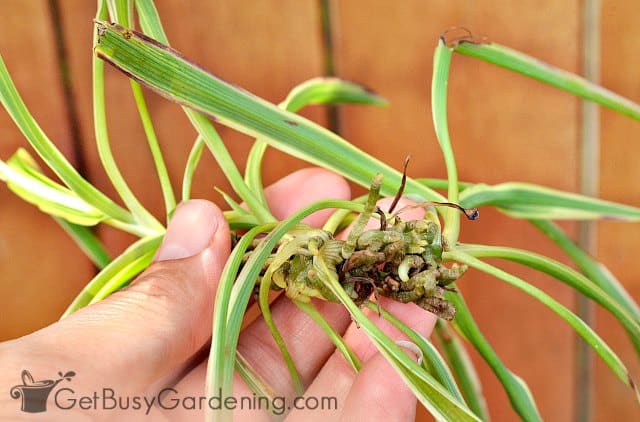
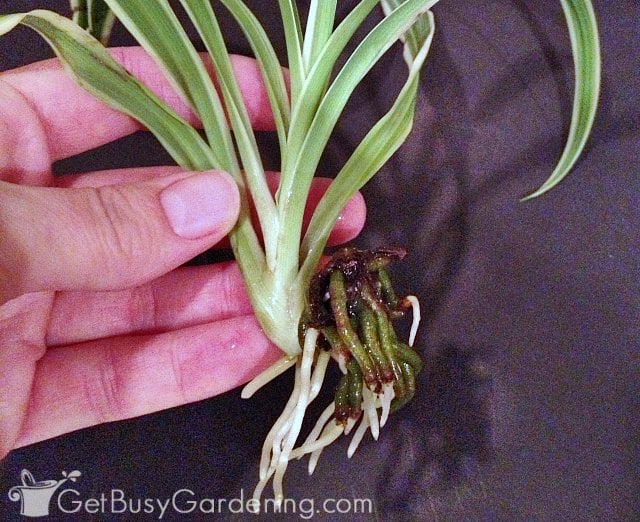
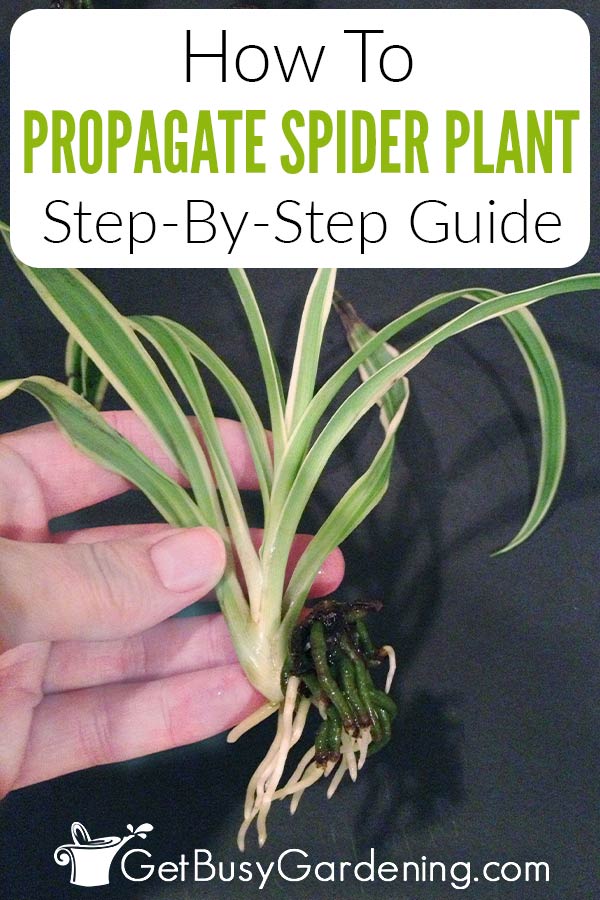
The best time to remove the babies is when they have their own roots forming. If they aren’t mature enough, it may not work. So I recommend waiting until they have a few starter roots of their own.
If there aren’t any, or you only see tiny nubs, then it’s best to wait until they’re a bit more mature before you try propagating them.
Related Post: The Best Plant Propagation Tools, Equipment & Supplies
How To Grow Spider Plant Babies
There are a 3 ways you can root your spiderettes, and each technique has its own pros and cons. Below I will discuss them in detail, and give you tips for the best success. Here’s an overview:
| Propagation Method | Advantages | Disadvantages |
| In Water | – Quick and simple method – Great for beginners | – Your spiderettes could rot – Roots tend to be weaker, and more likely to suffer transplant shock |
| In Soil | – Stronger plants that are more likely to survive on their own – Lower risk of rotting | – Requires more time and effort compared to other methods – You’ll need a little extra equipment |
| Layering | – No risk of transplant shock – Requires almost no effort on your part | – Takes longer than the other methods – Spiderlings may not root |
1. Propagating In Water
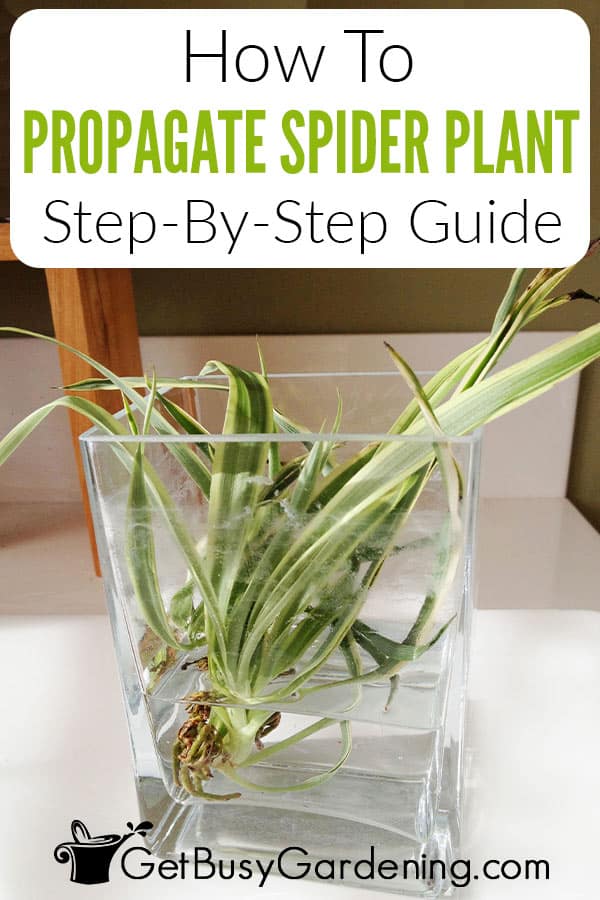
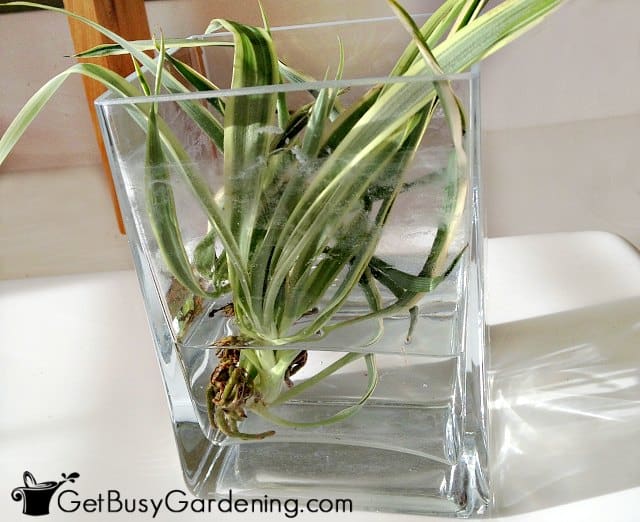
I’m starting with this one because it’s the method that most people are familiar with. For this, you simply put the spiderettes into a vase or cup of water, and wait for the roots to grow. Here are some tips:
- Only use this method if the baby has starter roots on it, otherwise it will likely end up rotting.
- Cut or pinch off all of the leaves that are around the base of the plantlet or under the roots. Any foliage that is fully submerged will rot.
- Use a shallow container, and fill it only enough to cover the roots. If it sits in deep water, it could rot.
- Pot it up as soon as the roots are 2-3″ long. The more time they spend growing in water, the higher the risk or transplant shock.
- Optional: I recommend using a clear vase because it’s fun to watch as the roots develop.
Related Post: Why Do Spider Plant Tips Turn Brown & How To Fix It
2. Rooting In Soil
You can also propagate your spider plant in soil, and this method will result in stronger starts. Though it’s a little more involved than using water, it’s my favorite method. Follow these tips:
- Use a propagation chamber or tent a plastic bag over the container to keep the humidity level high.
- Place the container on top of a heat mat to warm the soil, which really helps to speed things up.
- Don’t use regular potting soil, it’s too heavy. Instead, use a lightweight mix.
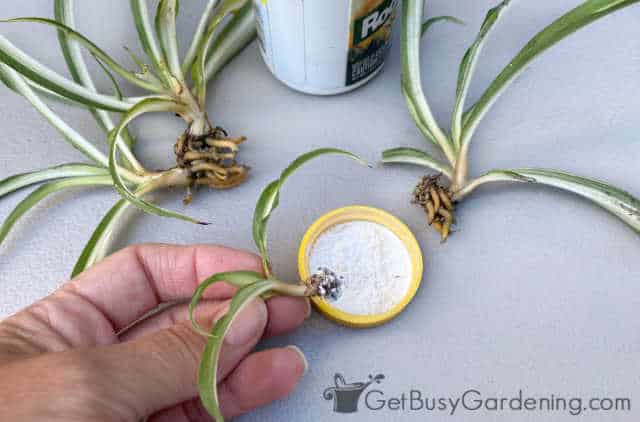
- Dust the bottom nubs with rooting hormone to stimulate them to grow faster and more reliably.
Related Post: Make A Cheap & Easy Propagation Box For Rooting Cuttings
3. Layering
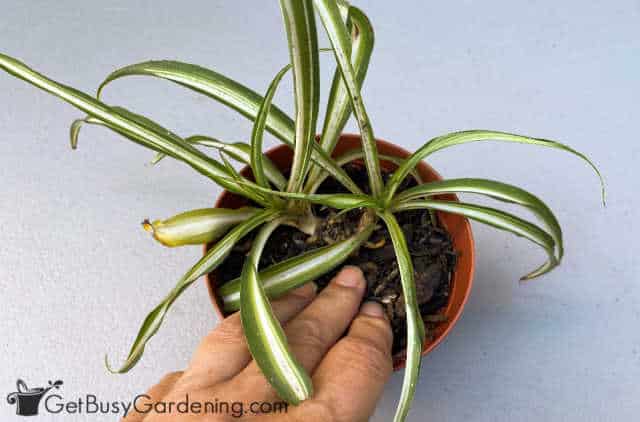
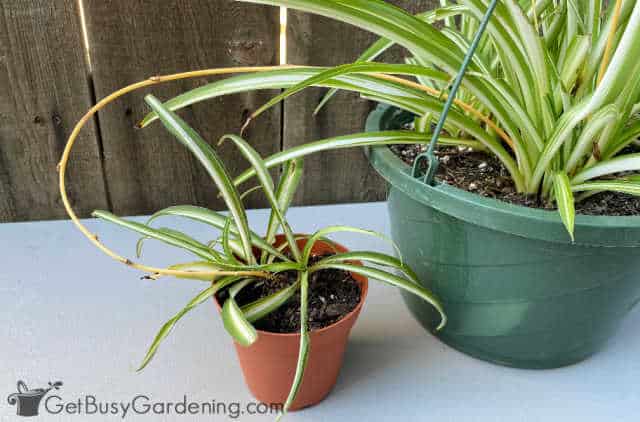
With this technique, you don’t remove the offshoot, you leave it on the stem. Then put a pot of soil next to the mother, and plant the baby into it while it’s still attached. Here are a few tips:
- With this method you could use either regular potting soil or try a light and fluffy mix – either one will work great.
- I recommend dusting the bottom nubs with rooting hormone first, otherwise your spider plant may not propagate.
- During the summer you could put your mother plant on the ground and place the spiderlings on top of the soil in your garden. Many times they’ll take root without any help from you (heck, this is how the do it in nature!).
Related Post: How To Choose The Best Spider Plant Soil
Where & How To Cut Spider Plant Babies
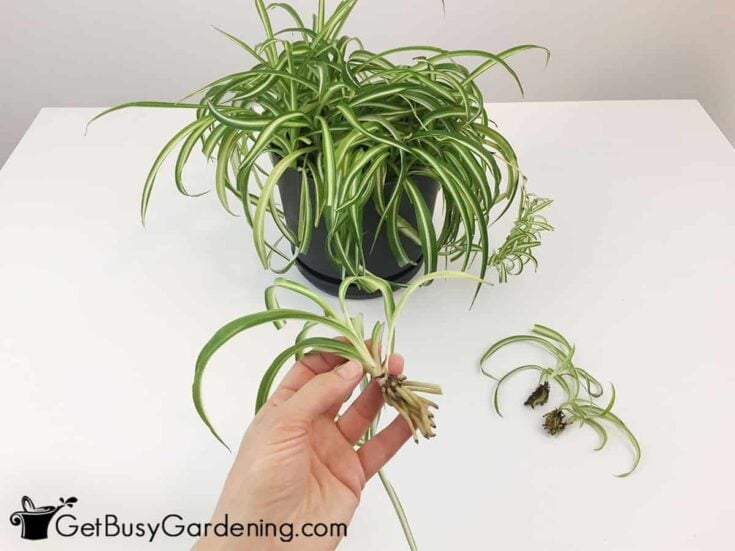
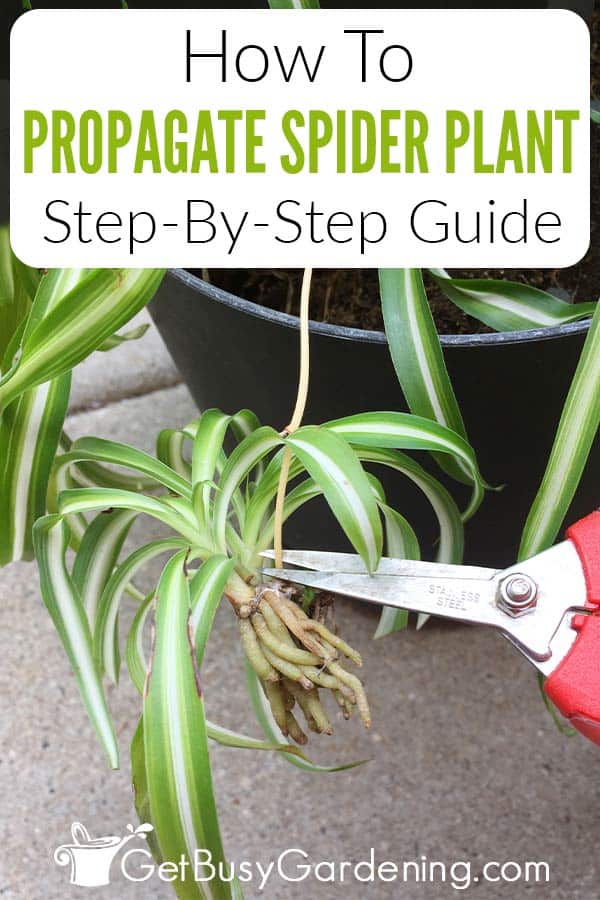
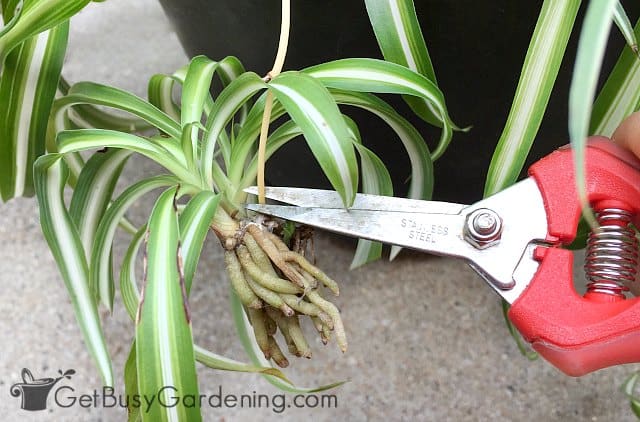
Once you determine a plantlet is ready to be propagated, you can remove it from the mother by cutting it off the stem.
It really doesn’t matter exactly where you make the cut. But I like to do it as close to the top of the spiderling as I can, just so there’s no ugly stem sticking out.
Sometimes they will drop off on their own when you disturb them. But I do recommend that you cut them off using a sterile pair of precision clippers, rather than pulling them off. That way you won’t risk damaging the mother or other immature spiderettes higher up on the stem.
Once you remove the baby, you can prune the long stem back to the bottom of the next one up, or all the way to the base of main plant. Nothing new will come from it, and it’ll eventually die back on its own anyway.
How Long Does It Take Spider Plant Babies To Grow Roots?
In the right conditions, spiderettes can develop roots very fast. You might see them forming in as little as 2-3 days. But it usually takes 2-4 weeks before they’re long enough to transplant.
The full time-range can be anywhere from a few days to a couple of weeks, depending on which method you choose and the environment.
Why Won’t My Spider Plant Propagate?
There are a few reasons why your spider plant might not propagate: the babies weren’t mature enough, they dried out, they were too wet and rotted, or it was too cold.
Only use mature spiderlings that already have their own roots forming, and make sure to keep them in a warm location. Using a heat mat and rooting hormone will give you faster, more reliable results.
Never let them dry out at any point, and make sure either the soil stays evenly moist, or the water is deep enough to cover the roots, but not the leaves.
Related Post: How To Water Spider Plants
How To Transplant Spider Plant Babies
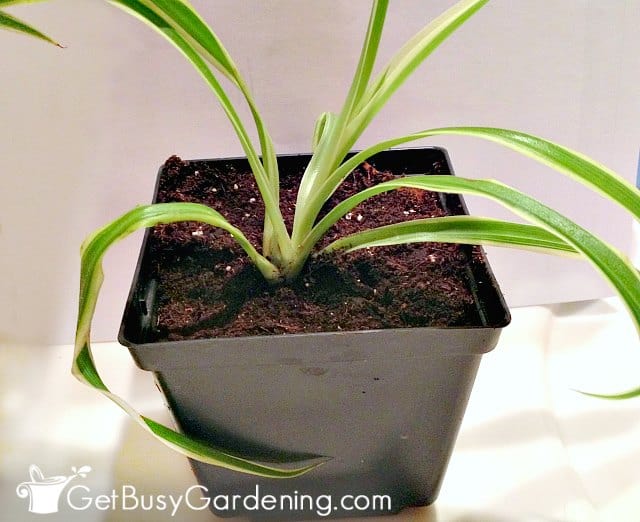
Wait until the roots are 2-3″ long before transplanting your baby spider plant into a container with fresh soil.
Then give it a deep drink, and allow the excess to drain out of the bottom holes. Keep the soil evenly moist until the start has become established in its new pot, but don’t overwater it.
It may droop for a few days after, but should pop back up in a week. Water-propagated spiderettes may take longer to recover after being potted up than the ones that you root in soil.
Learn all about how to grow your new babies in my detailed spider plant care guide!
How To Propagate A Spider Plant Without Babies
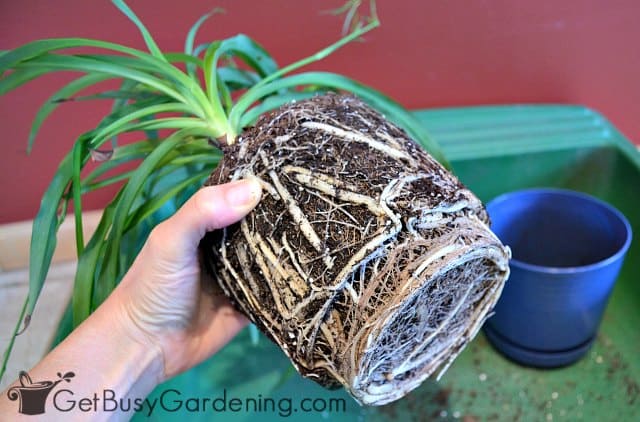
Dividing spider plants is another common way to propagate them, and the best option if your plant doesn’t have any offshoots.
Splitting them can be difficult when the plant is pot-bound. If the roots are really thick and tightly packed, then you will probably need to use a sterile knife to cut through them.
Otherwise, tease them apart until the clumps are separated, and plant them into a new container at the same depth they were before.
FAQs
No, you cannot propagate a spider plant from a leaf cutting. The only way to do it is by rooting the plantlets, splitting the rootball, or starting them from seed.
The best way to propagate a spider plant is by rooting the babies that form at the end of the mother plant’s offshoots.
It’s better to propagate spider plants in soil rather than water because the roots will be stronger, and there’s less risk of transplant shock. But either way usually works great.
Spider plants are easy to propagate, and perfect to start with if you’re just learning. Soon you’ll have tons of new babies to fill your home, or even share with your friends and family (they make a great gift too).
Do you want to learn how to multiply all of your plants? Then my Plant Propagation eBook is for you! It will show all you need to know to get as many new plants as you want from your existing ones. Grab your copy today!
More About Plant Propagation
- How To Propagate Pothos (Devil’s Ivy)
- Propagating Coleus Cuttings
- Propagating ZZ Plants
- How To Propagate Banana Plants
- Propagating Ornamental Sweet Potato Vine
- How To Propagate Snake Plant (Sansevieria)
Share your spider plant propagation tips in the comments section below.
Printable Step By Step Instructions
How To Propagate Spider Plants
Propagating spider plants is quick and easy. Follow the instructions below to root the babies in either water or soil.
Materials
- Spider plant babies
- 4” pot with drainage holes
- OR Small vase
- Rooting medium
- OR tepid water
- Rooting hormone
- Fresh potting soil
Instructions
Steps For Rooting Spider Plants In Soil
- Prepare the container - Fill your pot with a slightly moistened rooting medium. Or make your own by mixing potting soil with equal parts perlite and vermiculite.
- Dip in rooting hormone - Dip the bottom end of each baby into rooting hormone. This will encourage stronger starts and faster results.
- Make a hole - Use your finger or a pencil to make holes in the rooting medium deep enough to hold the babies upright.
- Plant the cuttings - Place the powdered end of each spiderette into the soil so the root nodes are completely covered, and gently pack it down to hold them in place.
- Place somewhere warm and bright - Put them in a bright location where they will get plenty of warmth, or place the container on a heat mat for even faster results.
Steps For Rooting Spider Plant Babies In Water
- Choose a container - Any shallow container that holds water and keeps the babies upright will work. But I like to use a clear vase or jar so I can watch the roots as they develop.
- Add water - Fill your vase with about ½” of tepid or lukewarm water. You want it deep enough to cover the root nodes, but the leaves should not be submerged or they will rot.
- Place somewhere bright - Put the vase in a warm and bright location, but keep it out of the direct sun.
- Keep the water clean - Check the water every few days to make sure it's not evaporated or cloudy, and refresh it as necessary.
- Pot up the rooted baby - Once the roots are 2-3" long, pot up your new baby into fresh soil. Monitor the soil with a probe tool to ensure it stays evenly moist for the best results.
Notes
- Rooting spider plant offshoots in soil results in hardier and stronger roots than water propagation, but can take longer.
- For better, faster results rooting spiderettes in soil, you can use a propagation chamber or tent the pot with a plastic bag. Never allow the leaves to touch the plastic though, or they will rot.
- Propagating spider plants in water is very easy, but don't leave them in there for too long or they can have a difficult time becoming established in soil.




CJ says
Where is the best location of the spider plant indoor? Can they also grow outdoors?
Amy Andrychowicz says
Yes, you can grow spider plants both indoors and outside. Indoors place them in a spot where they get indirect, bright light. Outdoors keep them in the shade and protect from frost (they hate cold weather). Here’s my full spider plant care guide for more information.
Joanie Mastrandrea says
Without “babies”, how do you split the plant to propagate?
Thank you.
Joanie
Amy Andrychowicz says
If there’s more than one spider plant in the pot, then you can divide the rootball. Check the base of the plant to see if there’s more than one set of leaves growing out of the soil. If so, then slide the whole plant out of the pot and gently tease apart the roots to separate them. You may have to cut apart the roots if they are thick and tangled. Good luck!