It’s very quick and easy to make your own DIY propagation box. It’s also a frugal project, it only takes about 10 minutes to set up, and you can start using it right away.
I made my first one way back in 2010, and I’ve added several more since then. I use them all the time, and it’s really amazing how well they work.
In this post, I will show you how to make your own homemade propagator, step by step, and I’ll also give you tips for how to use it.


Some plants are easy to propagate by simply putting a stem cutting in water. But others will only rot if you do that, because they need a more controlled environment.
That’s where a propagation box comes in handy, and it makes rooting cuttings easier. There are many different types and styles you could buy, but you can easily make your own for much cheaper.
What Is A Propagation Box?
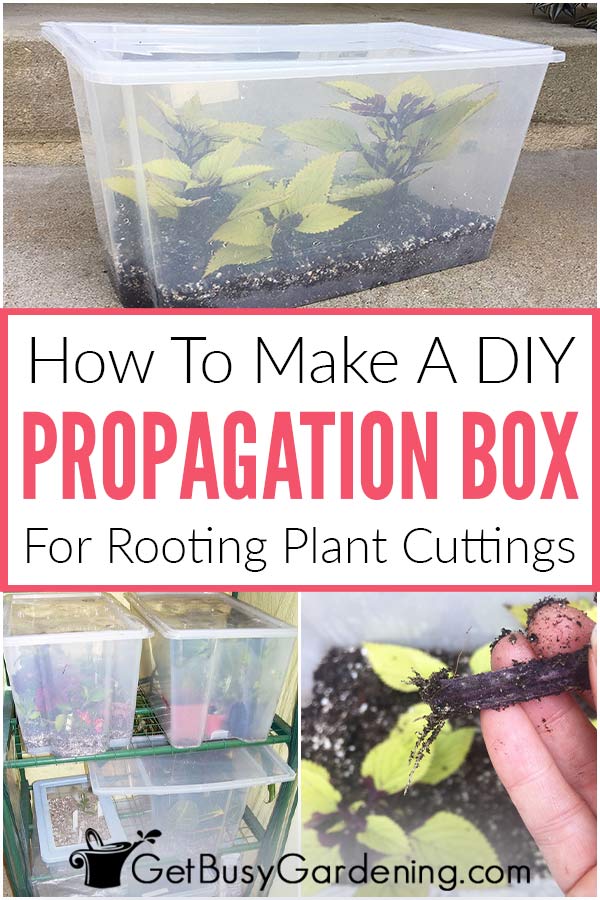
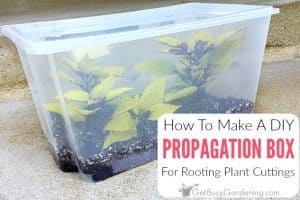
A propagation box, propagation chamber or propagator, is something you can use for rooting plant cuttings.
It works like a mini greenhouse that will protect the cuttings, and give them enough warmth, humidity, and moisture so they can survive until they form roots.
How To Make A Propagation Box
You only need a few supplies, and you may even have everything you need already on hand. Below is a list of what you’ll need, along with the steps for how to make it:
Supplies Needed
- Clear plastic bin with a lid
- Rooting medium (a seed starting mix works great)
- Water
- Drill (if needed for making holes in the lid)
Step By Step Instructions
Step 1: Prepare the propagation box – Find or purchase a clear plastic storage bin with a lid, and wash it with soap and water.
It’s important that the bin is completely clear, including the lid, so that light can reach the cuttings. The size of the box doesn’t matter as much, but be sure to get one that’s tall enough for your use.
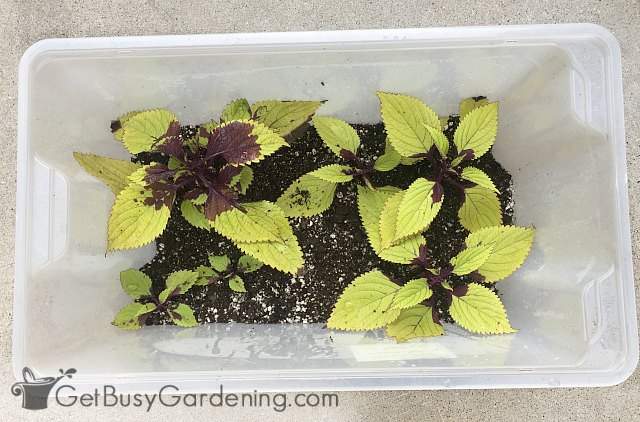
Step 2: Add the rooting medium – Add a 3-4 inch layer of medium or seed starting soil, and spread it evenly over the bottom of the box. Don’t use regular potting soil, it’s too heavy and may cause your cuttings to rot.
Step 3: Add water – Wet down the rooting mix with a light stream of water. Don’t pour or spray it in too fast, or you’ll make a mess. The rooting mix should be moist, but not soggy.
If you added too much water to your propagation box, you can leave the lid off of it for a day or two to allow the excess to evaporate before using it.

How To Use Your DIY Propagator
Now that you have your DIY propagation box all set up and ready to go, it’s time to add some plant cuttings. Here are the steps you should take to ensure success with rooting any type of cutting you want to propagate.
Step 1: Add plant cuttings – Dip the stem of the cutting into rooting hormone before putting it into the box. Make a hole in the medium with your finger (so the rooting hormone doesn’t rub off) and stick the cutting into the hole. Lightly press the medium around the stem to hold the cutting in place.
Step 2: Put the lid on the box – If the bin you plan to use is airtight, add a few ventilation holes in the lid to help prevent mildew and mold.
Don’t drill very many holes though. Otherwise your propagation box could dry out too quickly, and your cuttings may not root.
You may want to wait to add the ventilation holes until you’ve used the box a few times, to see how well it holds moisture.
Step 3: Give it some light – Place your DIY propagator in a location where it will get lots of light, but keep it out of direct sunlight.
An area near a sunny window is the perfect spot inside the house. Outside you should keep it in the shade. If you don’t have a lot of light in your home, hang a grow light directly over the top of the box.
Step 4: Add bottom heat (optional, but recommended) – Getting a soil thermometer to monitor the temperature of the medium is a good idea. Many types of cuttings won’t root it it’s too cold. If that’s the case, then you should add bottom heat, which really speeds up the process.
You can place your box on a heat mat, or near a warm vent in the winter (be careful if it’s near a vent, because the air will cause the soil to dry out faster).

Check on your cuttings every few days to see if there are any new roots, and to monitor the moisture of the medium. It should never be soggy or completely dried out.
I recommend getting yourself an inexpensive moisture gauge probe and keep the reading between 4-7. You can add water by slowly pouring it down the inside of the box, or mist it using a spray bottle.
Related Post: How To Propagate Spider Plants
Which Plants Can You Use It For?
There are many different types of plants that are easy to root using your homemade propagation chamber. I mainly use mine for houseplants, but you could use it for perennials, herbs, or annual cuttings too.
I use my propagation box for everything except for succulents and cacti. The box is too humid for them, and they will only rot. Learn how to propagate succulents here.
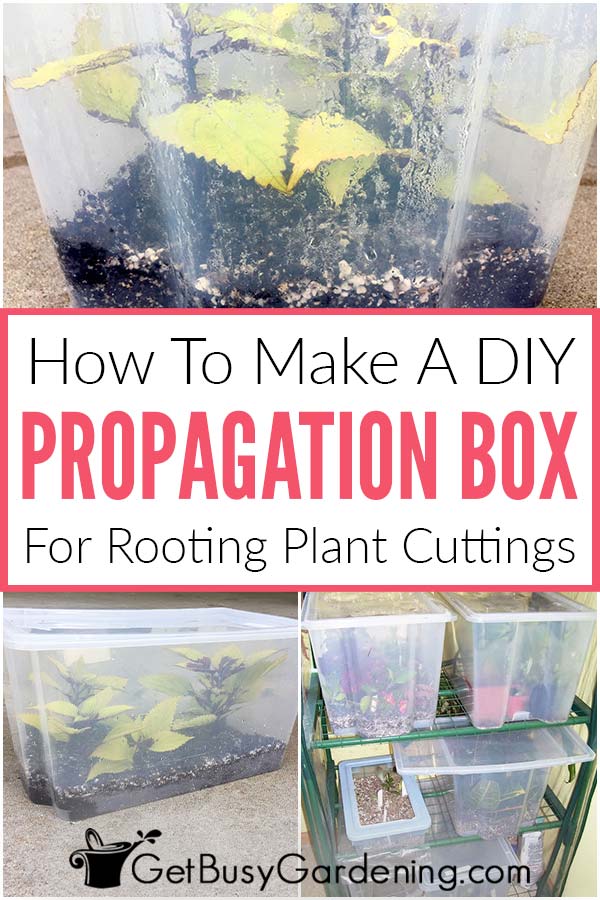
My Homemade Plant Propagation System
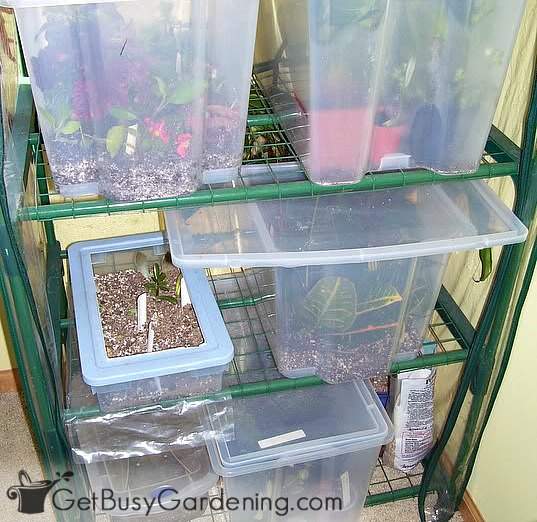
If you’re really serious about propagation, then you may be interested in building a larger system like I did. I built several homemade propagators, and then I put them into my mini greenhouse.
It’s set up near a south facing window in the spare bedroom. Whenever I prune a plant or a piece breaks off, I’ll stick the cuttings into one of my propagation boxes. I check them every few days to see if there are any new roots, and to monitor the moisture and humidity levels.
Related Post: Beginner’s Guide To Gardening On A Budget (19 Cheap DIY Tips)
If you’re serious about rooting cuttings, then you definitely need a propagation box. It’s super easy to make your own, or you can buy one instead. Either way, it’s fun to experiment with all of your favorite plants.

Do you want to learn how to multiply all of your plants? Then my Plant Propagation eBook is for you! It will show all you need to know to get as many new plants as you want from your existing ones. Grab your copy today!
More About Plant Propagation
- Plant Propagation Supplies
- Plant Propagation: A Detailed Guide For Beginners
- How To Propagate Lavender Plants From Cuttings
- Propagating Mint Plants From Cuttings Step-By-Step
Share your DIY propagation chamber plans in the comments section below.

Printable Step By Step Instructions
DIY Propagation Box
This DIY propagation box is easy to make with only a few supplies and about 10 minutes of your time. You can use it over and over again to root as many cuttings as you want.
Materials
Tools
- Drill (if needed for making holes in the lid)
Instructions
- Prepare the box – Wash the clear plastic bin and the lid with soap and water, then wipe them dry.
- Add rooting medium – Add a 3-4 inch layer of a lightweight medium, and spread it evenly over the bottom of the bin.
- Moisten the medium – Wet down the rooting mix with a light stream of water. Don’t pour or spray it in too fast, or it could make a mess.
Notes
- You can use your DIY propagation chamber right away. After adding your cuttings, place the box in a warm, bright location for best results.
- Don’t use regular potting soil. It's too heavy, which can cause your cuttings to rot.
- The medium should be moist, but not soggy. If you added too much water, leave the lid off the box for a day or two to allow the excess to evaporate before adding any cuttings.


Tammy Reynolds says
Should you only use 1 species per box or can you put different varieties of cuttings in same box? Thank you!
Amy Andrychowicz says
You can combine as many different types of cuttings in your propagation box as you want, as long as they aren’t overcrowded.
Val says
I’m having difficulty rooting mint in water this year so I’m going to try your method in soil. I noticed the leaves turning brown on your cuttings and wanted to know if those cuttings were still successful? I’ve experimented with a humidity dome before with varying results. If the leaves begin to turn brown or black I discarded the cuttings because I thought something went wrong. Thanks for your help!
Amy Andrychowicz says
The plants I have in the propagation box in the photos above are not mint, they are a type of coleus. The brownish color on the leaves is normal for that variety, they aren’t turning brown (they’re actually more of a burgundy color, very pretty!). Here’s my tutorial on how to root mint cuttings. And yes, they are very easy to root in soil using a propagation chamber like this.
Andrew says
Execellent idea! For the medium, I find well moistened 50/50 vermiculite/perlite gives very good results. I’ve propagated fuchsias, lilac, viburnum, clematis, geraniums, veronicas and penstemons.
Amy Andrychowicz says
Awesome, thanks for sharing the medium mixture that you use in you propagation box. 🙂
Christine says
You don’t need draining holes in the box ?
Amy Andrychowicz says
Not for a propagation box like this, because you want the soil to stay moist at all times. You just have to be careful not to overwater.