An automatic watering system for outdoor plants makes life easier, and saves you tons of time. It’s also very easy to install your own, and doesn’t take much time (it’s totally worth every second!). Follow these easy step-by-step instructions to install a DIY drip irrigation system for potted plants.
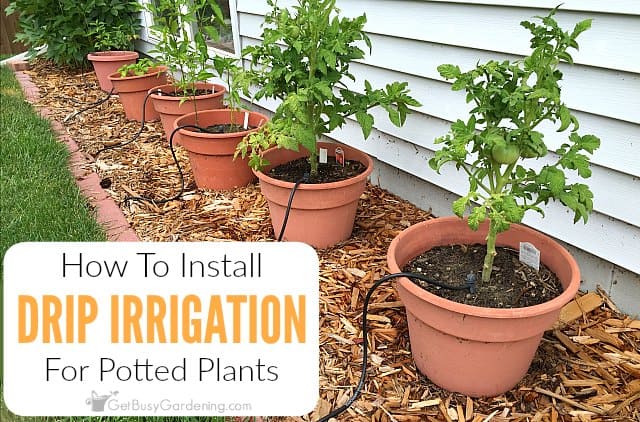
We have an area behind our house that gets full sun that I always thought would be perfect for growing, but it’s under the eaves of the house so it doesn’t get much rain.
My husband put a few pots of peppers there last year, but hand-watering all of those pots became a major chore in the heat of the summer. We were in a drought last year, so we had to manually water these pots a few times a day. Not fun!
My husband told me he wanted to line the area with pots of peppers this year, so we decided to add a drip irrigation system to make watering our container plants easy.
It turns out, putting in a DIY drip system for potted plants is just as simple as it was to add overhead sprinklers to our greenhouse.
Plus we had some of the poly tubing left over from that project, so we were able to use that for this project – bonus!
What Is A Drip Irrigation System?
Think of a drip irrigation system as an automatic watering system for pots and containers. It hooks right into your garden hose or spigot so when it turns on, all of your pots will get watered at the same time.
You could turn the water on manually, or set it up on an automatic timer to create a self-watering system for potted plants (trust me, a timer is totally worth it, and it’s not very expensive to buy yourself one!).
Benefits Of Installing DIY Drip Irrigation For Containers
Installing a drip water system for potted plants has lots of benefits to you, and to your plants. The main benefit is convenience, and let me tell you, an automatic drip irrigation system makes container gardening SO MUCH easier!
Not only do self-watering pots make your life easier, but it’s better for your plants too, and ensures they’re getting exactly the right amount of moisture.
Consistent watering not only keeps your potted plants happy and healthy, it also helps to prevent problems like blossom end rot.
Healthy plants have less problems with pests and diseases, and produce TONS more yummy food for us? What’s not to love?
Drip Irrigation Kits For Potted Plants
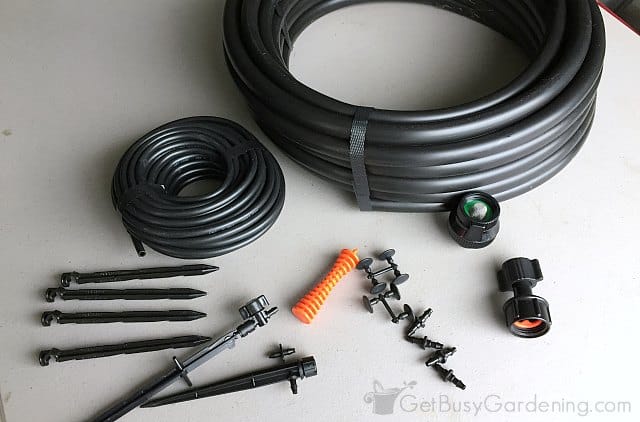
Depending on how many potted plants you have, a drip irrigation kit might be all you’ll need in order to install your entire system.
You can buy a smaller kit if you have 8 pots or less, or you can get a larger kit like this one that will work to automatically water up to 20 containers.
Drip irrigation kits are a great way to get started, and will include full instructions for setting everything up. Some kits even come with a timer.
But keep in mind that even when you start with a drip irrigation kit, you might still need to buy a few additional parts (for example, most don’t come with a pressure regulator). So be sure to read the details of what’s included in the kit.
How To Install Drip Irrigation For Potted Plants
Of course, you can also make your own custom drip irrigation system design, which is what we did for our setup since we already had the mainline tubing and a few other parts to get us started.
Supplies Needed
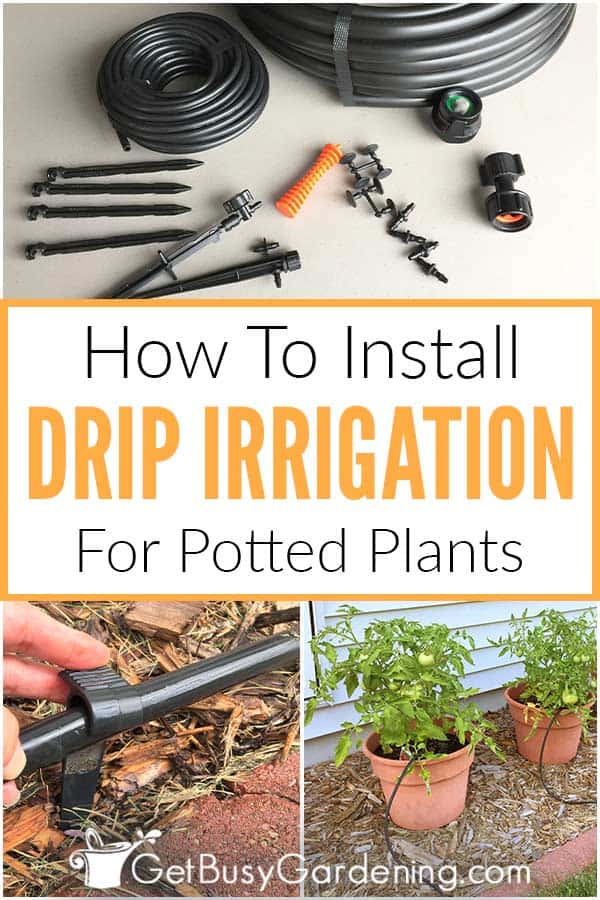
- Drip irrigation kit (optional – but if you want to use it to get you started)
- Mainline drip irrigation hose (1/2″ poly drip irrigation tubing)
- Drip irrigation backflow preventer
- Garden hose connector (1/2″ faucet fitting)
- Pressure regulator
- Poly tubing end cap
- Irrigation micro tubing (1/4″ vinyl)
- Irrigation drippers with spikes, one for each pot (we used these 360 degree adjustable drippers)
- Drip irrigation hole punch
- Drip line connectors
- Drip irrigation spikes (1/2″ tubing stakes)
- Drip hose goof plugs (just in case)
- Garden watering timer for drip irrigation
- Garden hose splitter (optional, comes in handy if you want to hook up another hose to the same spigot)
- PVC pipe cutting saw or a PVC cutting tool (for cutting the thicker tubing)
- Tape measure
Step By Step Instructions
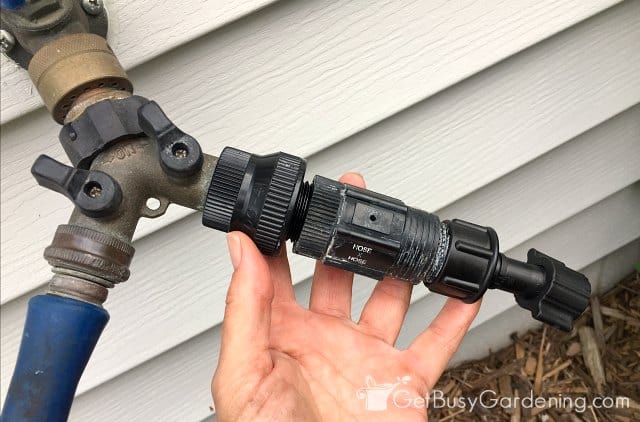
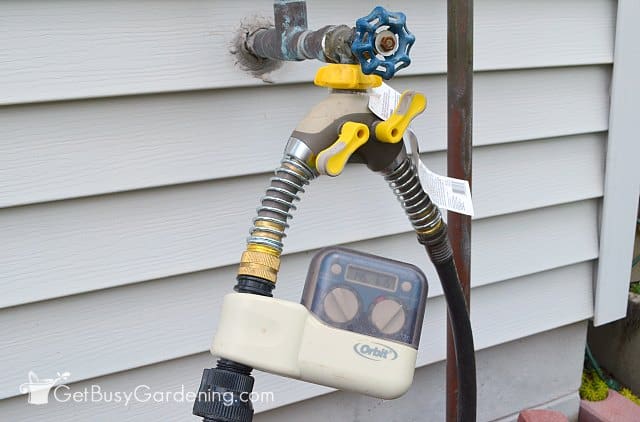
Step 1: Attach connectors to faucet, hose or spigot – It’s easier to hook everything in if you attach the connectors to your hose or spigot first. So grab the backflow preventer, the pressure regulator, and the faucet hose fitting for this step.
Start by attaching the backflow preventer onto your hose or outdoor spigot (it simply screws on). Next, you’ll attach the pressure regulator, and last the faucet fitting (this just screws on too – no tools needed!).
Basically, you’ll end up chaining the garden hose attachments together in this exact order (backflow preventer, pressure regulator, faucet fitting).
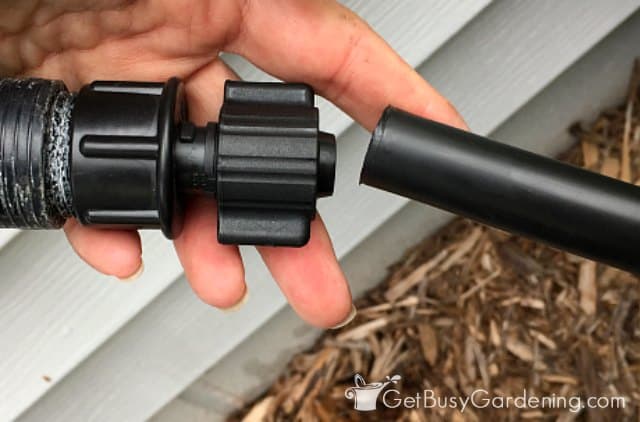
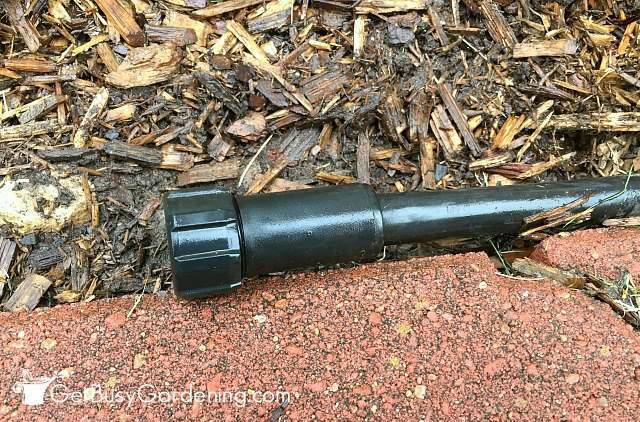
Step 2: Attach the 1/2″ poly tubing to the hose fitting – Take one end of your 1/2″ poly mainline tubing, and push it into the open end of the faucet hose fitting. Once you’ve pushed it in, pull down the collar on the hose fitting piece, and tighten it to secure the tubing.
You might want to kink the tubing and turn on the water to make sure there’s no leaking at this point, otherwise you can wait to test everything later on in step 7.
Step 3: Figure out your drip irrigation system design – The next drip system installation step is to determine how far apart the drip heads will be, so you know exactly where to install the micro tubing.
Figuring out the drip irrigation design sounds hard, but it was actually really easy.
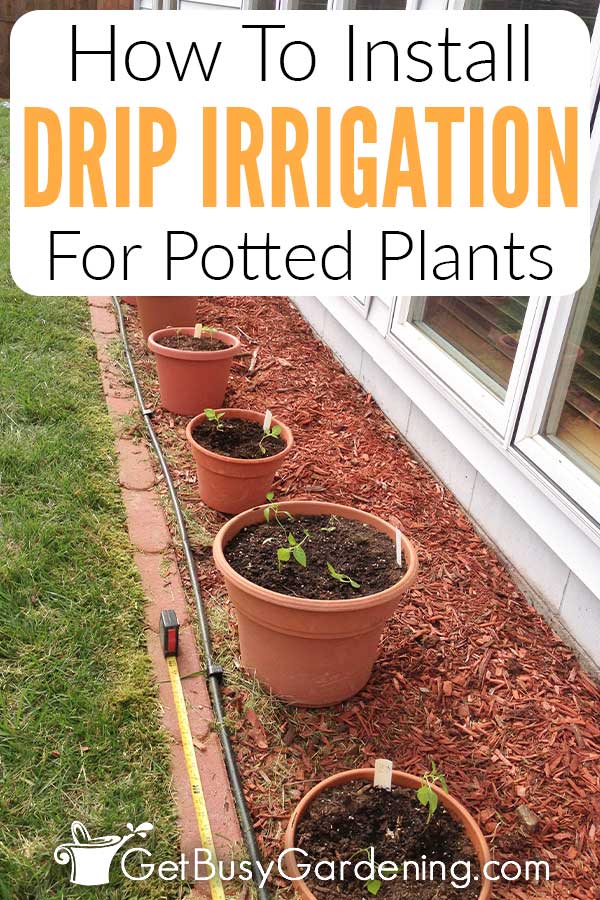
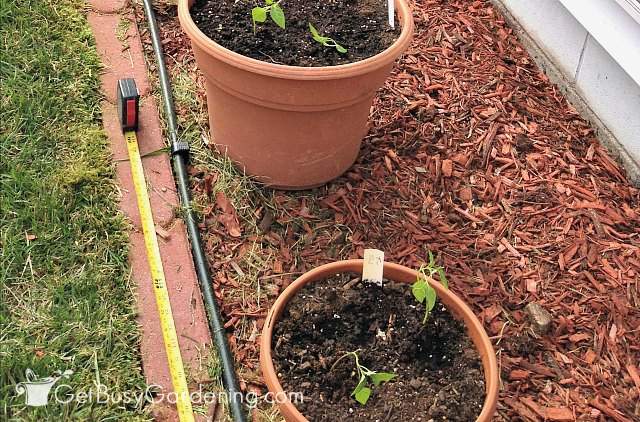
We simply spaced out the pots where we wanted them to be, and then laid down the poly tubing hose in front of them (Tip: let the tubing sit in the sun for a while to warm up first, it’s easier to lay it flat when it’s warm).
Then we measured where each pot was, and marked the poly tubing where we needed to add the drip tube lines for each of the drippers.
Once we measured it all out, we cut the tubing at the very end using using our PVC cutting tool (you could use a PVC pipe saw to cut the tubing instead), and caped the tube with the end cap.
Step 4: Figure out how long the drip lines will be – Next we measured how long each piece of the micro tubing needed to be for the drip lines.
That’s simply the length from the spot you marked on the mainline tubing, up to the spot where the drip head will be inside the pot.
We added several extra inches to the length of each piece of the micro tubing so it would be loose enough to allow room for us to move the pots around a bit if we wanted to (which we have done, and it works out really well).
Step 5: Install the micro tubing – It’s easy to add the drip lines and the micro sprinkler heads.
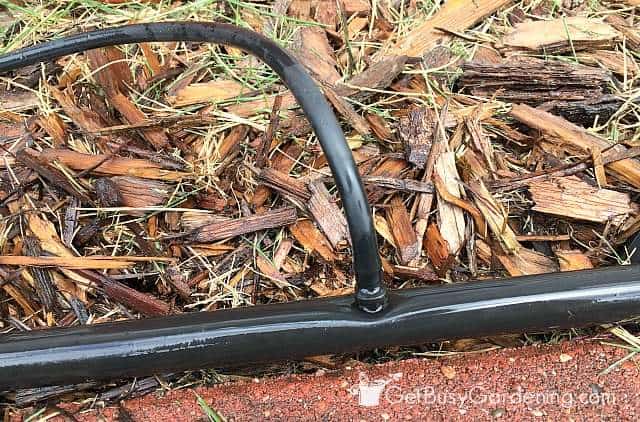
For drip line installation, you simply punch a hole in the mainline poly tubing (using the drip irrigation hole punch) where you want to add the drip lines (these are the spots you marked on the tubing in step 3).
Don’t panic if you punch a hole in the wrong spot. I know that making a mistake isn’t ideal, but if you do end up punching a hole in the wrong spot… well, that’s why they make goof plugs! It’s good to have them on hand just in case.
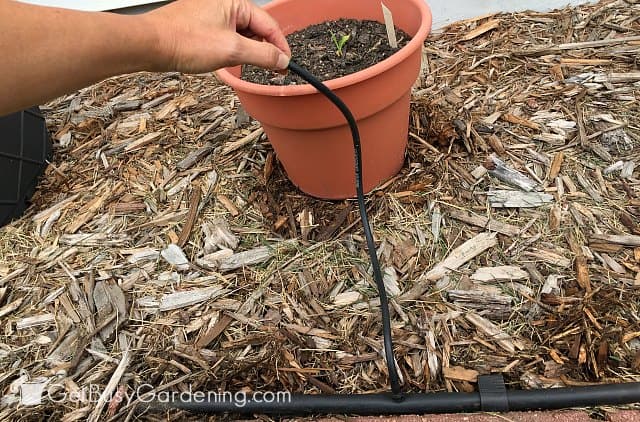
Next you’ll attach the drip line connector first to the mainline tube, then attach the micro tubing drip hose onto the other end of the connector. Boom!
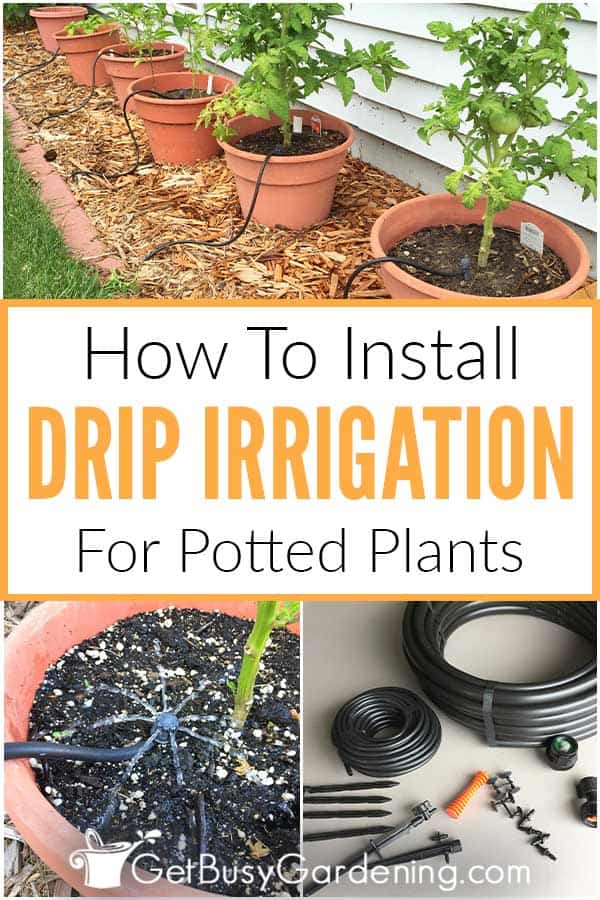
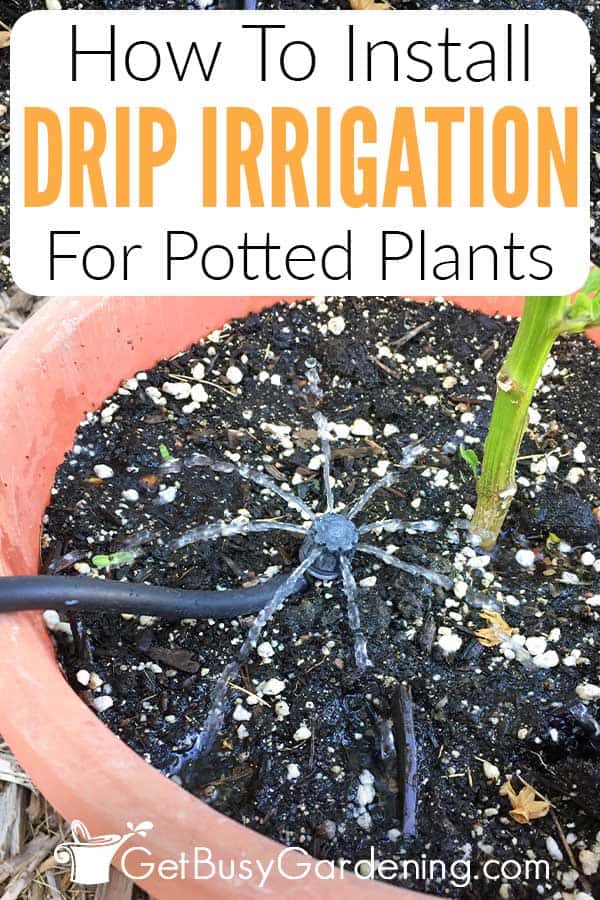
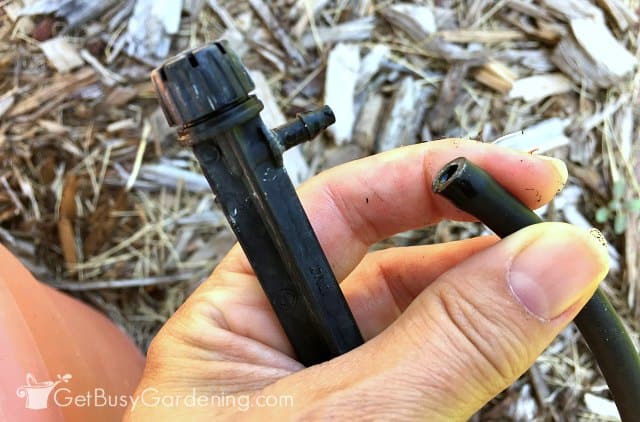
Step 6: Install the irrigation drippers – Installing the dripper heads is super easy too. You basically just plug them into the open end of the micro tubing, and then put them into your container.
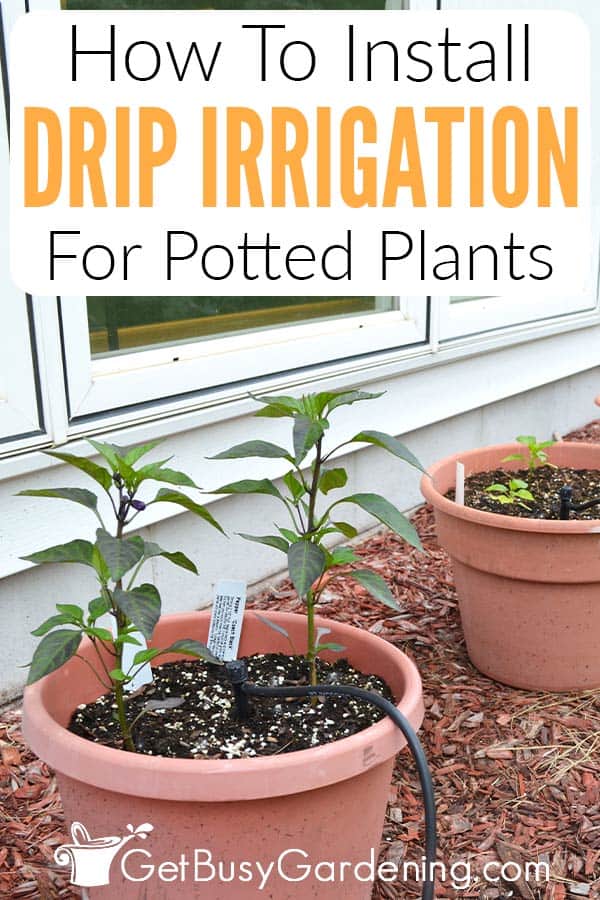
Our dripper micro heads came with spikes to hold them in place, so they stay where we put them.
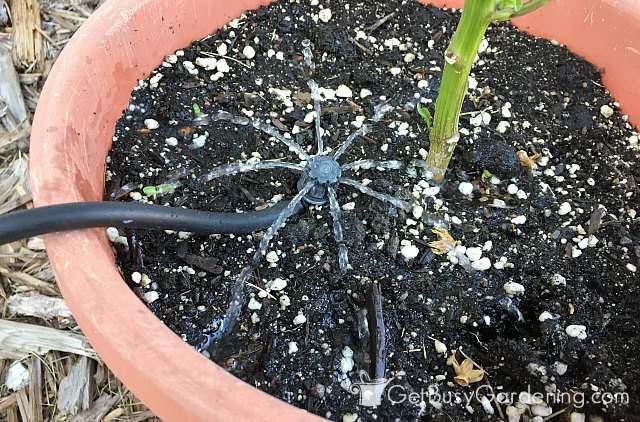
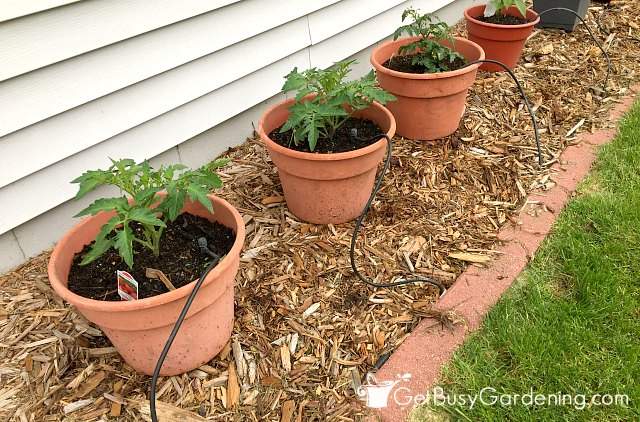
We centered the micro heads in each of our pots, just to one side of the base of the plant(s). Be careful not to damage any tender roots or seedlings when you’re pushing the irrigation spikes into the soil though.
Step 7: Test out your irrigation setup – Before burying the mainline, test everything out to make sure it’s all working with no leaks. You definitely don’t want anything leaking.
At this point it’s also a good idea to adjust the drip heads. The tops of the heads twist so you can control the amount of water that comes out.
We adjusted each one to make sure they weren’t spraying outside the pots, and that they were all working correctly.
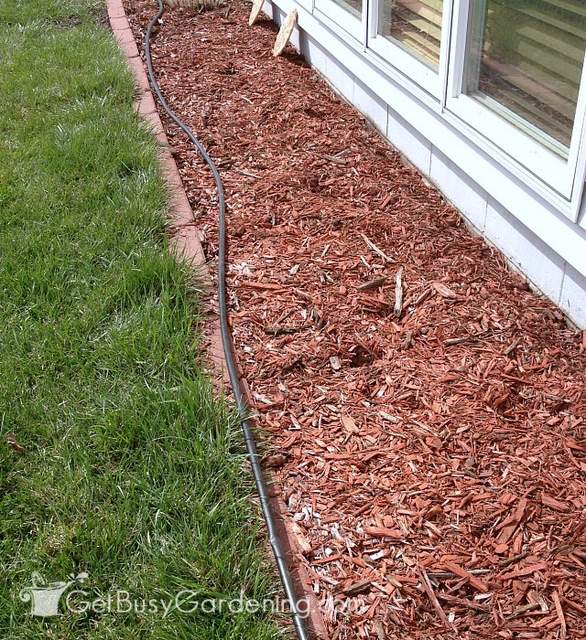
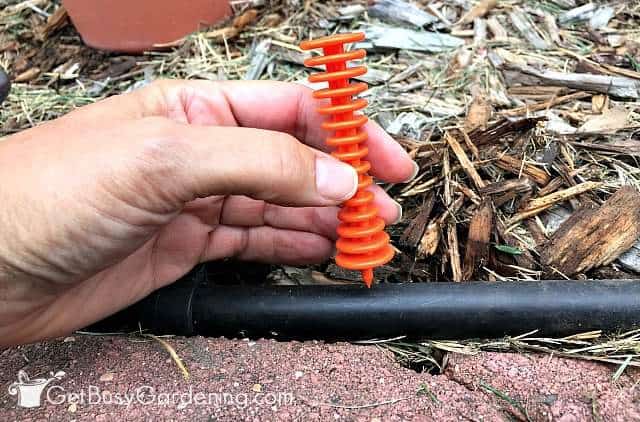
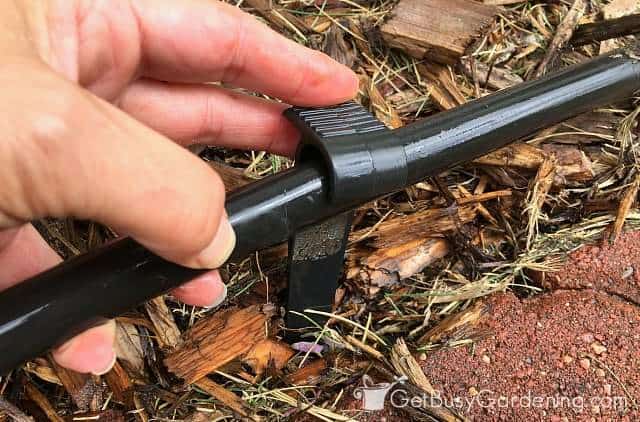
Step 8: Secure the poly tubing – Once everything was installed and tested, we secured the mainline tubing into the ground with some 1/2″ drip irrigation tubing stakes.
The stakes clip onto the mainline tube, which makes securing it easy. Then we simply buried the tubing in the mulch to give it a cleaner look.
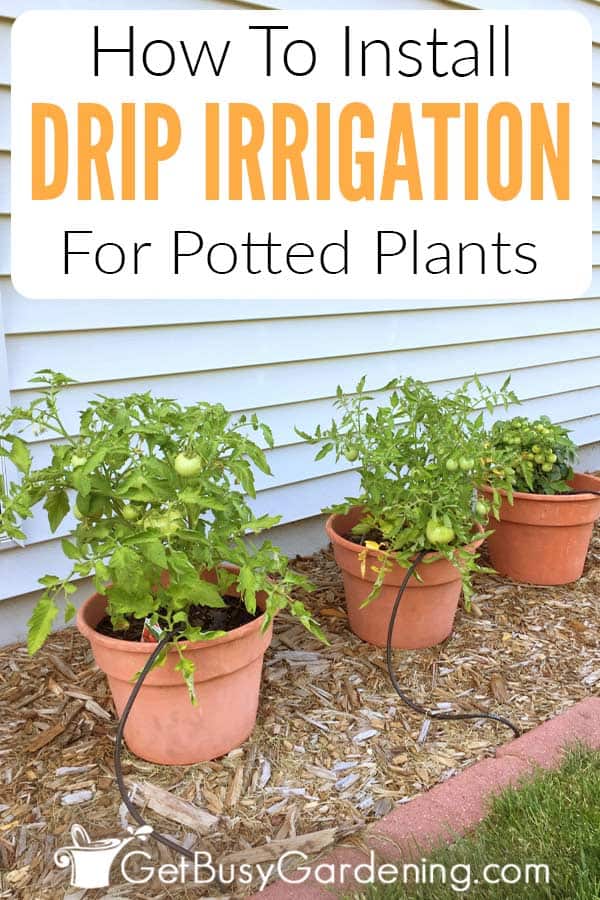
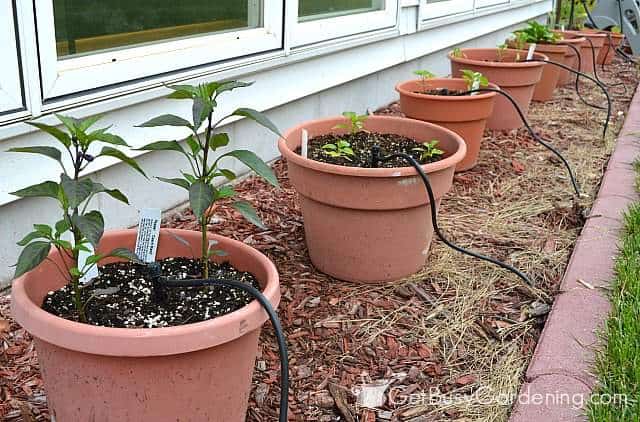
Note, you can install your poly tubing behind your pots rather than in front of them like we did here. That way, the micro tubing will run up the backs of the pots, and won’t be so obvious.
But it’ll work just fine either way. (We just installed ours in front to make it easier to take photos for you)
Step 9: Set the timer for automatic irrigation – Last, we set our hose timer to run on a schedule so we never have to worry about watering these pots again (which is especially nice while we’re on vacation!).
Once your automated drip irrigation system is running, I recommend checking on your pots regularly to make sure they are getting the right amount of water. Then you can adjust your timer accordingly to get it just right.
We’ll turn the drip irrigation timer off when we get a lot of rain, and increase the length, or how often the drippers run during dry periods or hot spells.
Not only is this DIY drip irrigations system great so we don’t have to water these pots, but it makes it much easier to ensure our peppers and tomatoes are getting a consistent amount of water.
Hopefully this will help prevent blossom end rot, which was a problem for our container grown peppers last year. Drip irrigation systems are great for potted plants, as well as the garden.
Installing drip irrigation for potted plants is simple, and doesn’t take much time. (It will actually end up saving you a ton of time and effort!) I know it seems like there are a lot of steps involved with drip irrigation installation, but trust me it really is very easy to do! Believe me, if I can do it, anyone can!
More Container Gardening Posts
- How To Design Stunning Container Gardens
- How To Fertilize Outdoor Potted Plants & Containers
- Choosing The Best Potting Soil Mix For Container Gardening
Share your tips and experiences for installing a DIY drip irrigation system in the comments section below.


Kg says
Is there a certain height my petunia plants should be before transplanting? I live in Lakeville, MN and they have broken ground. I’m hoping to get about 150 plants for the entire property. I’ll be setting up the irrigation setup once the snow melts.
Amy Andrychowicz says
Wait until they have outgrown their seed trays before potting them up. Here’s my detailed guide for when and how to repot seedlings that will give you all the details.
Sue Lease says
I’m planting 16 inch hanging flower baskets. Will one little drip keep the soil moist or should I add one in each side of the plant base. I just don’t understand how far the moisture will spread
Amy Andrychowicz says
One drip head per pot should be plenty. Get the ones with adjustable heads like I recommend in the post, so you can adjust how wide the spray goes for the size of your pot.
Mekan says
Hello. I’m interested of your irrigation system. I have a rivulis dripper that run 2ltr/hour. And some of them doesn’t drip. I checked pressure that was good. I think my water is salty. Is that could be my problem?
Amy Andrychowicz says
The drippers are probably clogged with minerals/salt buildup from the water. You can try soaking them in vinegar to break down the crusty buildup, and they should work again.
Rachel L Chappell says
I have ma y regular pots but I also have several self watering pots. I don’t wa t buy a lot of new pots cam I put the end of the quarter inch hose in the fill holes and let the water run into the well of the self watering pots. Should I attach a dripper or sprayer to the end of the hose to regulate pressure?
Amy Andrychowicz says
Humm… I’ve never tried that before, so I’m not sure it would work. But I think the water would come out of the hose too fast. Is there a way you can remove the bottom of the self-watering pots so the water runs out instead? Otherwise, you can set up your drip irrigation system as I describe in the instructions, then just monitor it to make sure the plants aren’t getting overwatered. With self-watering pots, you won’t need to run the drippers as often as you would with pots that have drainage holes in the bottom.
Julianne says
Is there a maximum length for doing this? I have pots that are quite far away.
Amy Andrychowicz says
As far as I know, there’s no maximum length for adding a drip irrigation system to potted plants. I ran a hose out to my garden, and that’s at least 50′ away from the spigot. I also have a 15 pot drip system set up along the back of my house, which is probably 60′ or more long, and there’s no problems with water pressure there either.
Julie Traxler says
How can one hide the hose attachments? Mine are out in the open where it will detract from my garden.
Amy Andrychowicz says
I burying the mainline under the mulch, and that works great. That way, you’ll only see the hose where it comes up to attach to the spigot. Then I run the drip lines up the back of the pots (I have them in the front of the pots in these photos for demonstration purposes). They are hardly noticeable, especially once the plants fill in.
Jing says
Thank you so much for this! It really makes watering my pots so much easier. I have installed one with different zones because of various plant needs. I think I’m overwatering my plants and I have no idea how long to run the system. Do you have like a rule of thumb to share? Thanks!
Amy Andrychowicz says
You’re welcome, so glad you were able to set up your own drip irrigation system for your pots. That’s awesome! There’s not really a rule of thumb to follow for how long to run them. I only run mine for about 5 minutes in the morning and 5 minutes at night. I will run the drippers longer during periods of drought, and turn the system off when we get a lot of rain. The best thing to do is to check your pots daily to see how damp the soil is. If it seems really dry, then run them a little longer. If it seems too wet, then run them for less time. It doesn’t take long to find that sweet spot.
Lois says
We like to have large potted hanging plants of flowers at different locations around our house. Is there a way to use clear tubing to water these plants? Perhaps we will need to keep the pots closer to the home. Some plants will be about 4 feet or more high if they are hanging from under the soffits. What do you suggest?
Amy Andrychowicz says
Humm… as far as I know, there’s no type of drip irrigation hosing that is clear. You could check your local home improvement store to find out if they have any options for you there. Otherwise, the dripper tubing is really skinny (like the diameter of a pencil), so you could use that to run it discretely up the side of the house, maybe hiding it under a gutter, and then run it along the underside of the soffits. I haven’t tried that myself, so I can’t give you dimensions or anything. You’d have to experiment. If it gets really long, it could impact water pressure though, but I can’t say for sure.
Nancy Nixon says
I recently installed a patio system for her 31 potted plants (I use them everywhere) but she has some plants that don’t require a lot of water. We turned the head way down but it just drips down the spike & out the bottom of the pot so the sides are dry. Any suggestions for fixing this problem?
Amy Andrychowicz says
I would turn the drip heads up so they spray out more evenly over the soil, and just run it for a shorter duration.
Caroline says
Love this post! I’ve just moved into a new house and decided I couldn’t just leave our garden to the new owners (they couldn’t care less, anyway…) Unfortunately, there is no space in our new home to make a garden directly on the ground.
So, two days ago, I transplanted my 5 peppers, 4 tomatoes, 2 cucumbers, parsley, rosemary, coriander, stevia, thyme plants into containers. So far nothing seems to be dying but I really need a solution to make watering easier.
Thanks for the step by step instructions and hope you’re having a great harvest!
Amy Andrychowicz says
You’re welcome, so glad that I could help you out! Hope the drip irrigation system works great to keep your potted plants thriving.
Jason says
Just an idea. You could run those lines up through the bottom of each pot. Just bury the hose under mulch and run it up through the drainage whole in the bottom of the plant. Run it all the way up and put whatever type of fitting you want on the end. That way you won’t see any of the hose only the fitting at the end.
Amy Andrychowicz says
Haha, thanks! We usually run the drip lines up the back of the pots to keep them hidden, but I wanted them to be showing for the purpose of the photos on this post. 🙂 I do prefer to keep them outside of the pot, rather than running the drip lines through the bottom of the pots. I need to move the pots inside during the early fall frosts, and having the lines in the pots would make it more difficult to move them inside and then back out.
S Nanda Kumar says
Great work. Keep it up and wish you many more contributions in the field of gardening.
Amy Andrychowicz says
Thank you very much for you nice comment! 🙂
Bobbi says
I am in need of advice in how to winterize this lovely self watering system. My longest tubing runs a good 80 ft with the smaller lines going to individual plants along the way. Can I remove the individual small lines from the 1/2” tubing and try to gently blow out the tubing and then hopefully reinstall the small individual tubing again next year?
Amy Andrychowicz says
Yes, removing the drip lines and unhooking it from the spigot will probably work if you live somewhere with mild winters. But if you live somewhere with harsh winters (like ours here in MN), then I recommend pulling it up, draining it, and then bringing it into the garage or a shed. That’s what we do with ours. And if you do that, then you don’t have to worry about removing the drip lines, you can just leave it all in once piece.
Nola says
What size tubing is the best to use? 1/4 0r 1/2
Amy Andrychowicz says
I use a 1/2″ poly tubing for the mainline irrigation hose (the hose that I buried under the mulch in my photos), and the 1/4″ micro tubing to hook the drippers up to the mainline (the tubing that runs from the ground up into the pots). Hopefully that makes sense.
Tamara says
Thank you for the great tutorial! What would you suggest if my pots are in a greenhouse very far from the spigot on the house? I currently run several 100 ft of hose out there and water by hand, but would love a set up like this! Can I just add the parts you have at the spigot, to the end of the hose and go from there?
Amy Andrychowicz says
Yes, absolutely. Just attach your long hose to the drip irrigation hose connectors attached to faucet, then you can hook the poly tubing to the end of your hose. Easy peasy! 🙂