Greenhouse irrigation systems make watering a snap, saving you tons of time. But they can be very expensive to buy.
So we came up with our own inexpensive design, and it works great. It’s quick and easy to install, and you can make it with basic items you can find at any home improvement store where they sell irrigation equipment.
In this post, I will show you step by step exactly how to design, assemble, and install your own DIY overhead sprinklers for your greenhouse.


Our Overhead DIY Greenhouse Watering System
There are lots of different greenhouse irrigation systems out there, but they are crazy expensive to buy. Plus, they’re usually designed for large commercial greenhouses, not a small hobby one like ours.
So, my very handy husband came up with an idea for a DIY project. It’s super simple, and it only took him about 20 minutes to build and install it. Plus it is a pretty inexpensive project too, which is a huge added bonus.
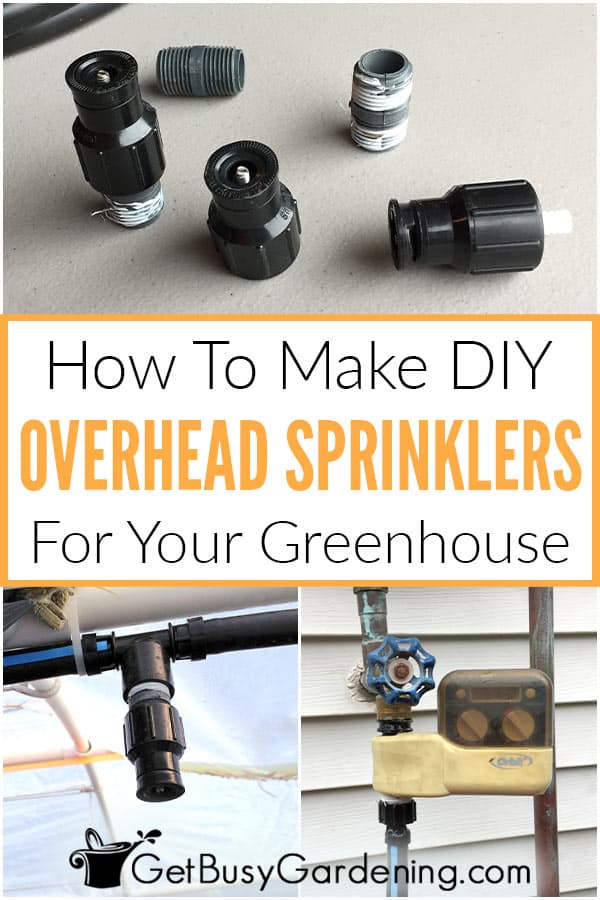
Supplies Needed
- 1/2″ poly drip irrigation tubing (the mainline hose)
- Full (360 degree) spray pattern shrub sprinkler heads
- 1/2″ poly tee connectors (you’ll need one per sprinkler head)
- 1″ long 1/2″ sprinkler risers (you’ll need one per head)
- 1/2″ faucet hose fitting
- Poly tubing end cap
- Pipe thread tape (optional, creates a watertight seal on the pipe threads)
- Digital watering timer (optional, for automating your system)
- Garden hose splitter (optional, comes in handy if you want to hook up another hose to the same spigot)
- PVC pipe saw or a PVC cutting tool (for cutting the poly tubing)
- Zip ties or 1/2″ pipe straps
- Tape measure
Tips For Designing Your Own
Every greenhouse is different, so you will likely need to make a few modifications to our watering system design to fit the size and shape of yours. For perspective, mine is about 20′ long by 18′ wide.
We just ran the mainline poly tubing down the center beam at the very top of our greenhouse. So we only needed 3 sprinkler heads spaced evenly down the center for total coverage. Here are a few tips to figure out yours.
- Each 360 degree sprinkler head sprays up to 15 feet. So first you should measure the area of your greenhouse to determine how many heads you’ll need.
- Keep in mind the corners of your greenhouse that are farthest away from the sprinkler heads will get less water, so the spray from the heads should overlap each other to ensure full coverage.
- If your greenhouse is wider than mine, you may need to modify our design slightly. One idea is to install two sets of overhead sprinklers on each side in a U shape, connecting them with 1/2″ poly elbow connectors.

DIY Greenhouse Sprinkler System Installation Steps
Step 1: Figure out how many sprinkler heads you’ll need – The 360 degree heads we used spray up to 15 feet, and our greenhouse is 20′ long by 18′ wide.
Depending on how large yours is, you may need more or less heads. The spray from each head should overlap to make sure that every corner will get watered.
We spaced our heads about 6-7 feet apart to ensure plenty of overlap, but you could space them out a bit more if you want.
Related Post: How To Build A DIY Greenhouse

Step 2: Cap one end of the tubing – It’s easiest to cap one end of the mainline tubing first using the poly end cap before installing the sprinkler heads. Simply press the cap firmly onto one end of the tubing and you’re done.

Step 3: Measure and cut the mainline tubing – To install the first sprinkler head, measure from the end cap to the spot where the head will go on the mainline irrigation tubing. Then cut the tubing using the PVC cutting tool or a PVC pipe saw.

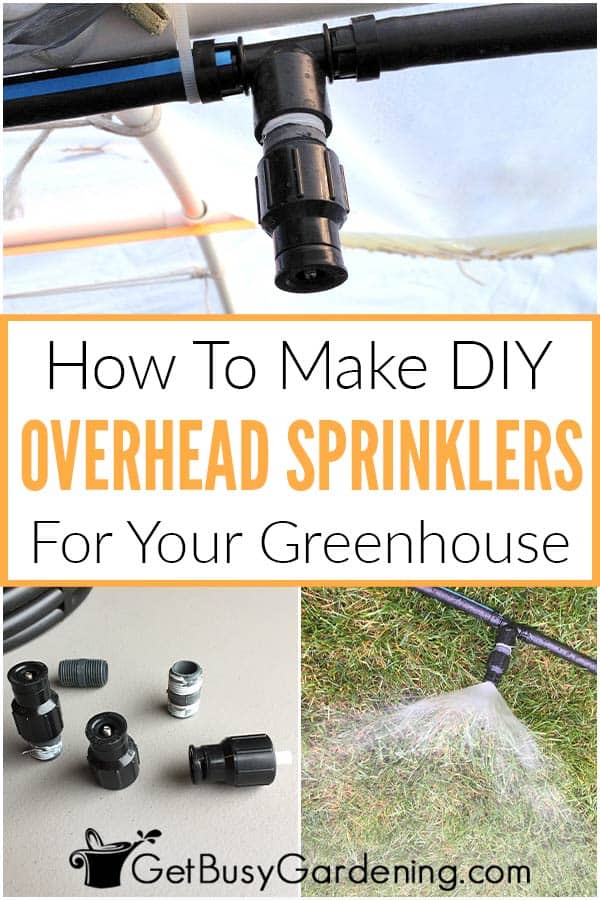
Step 4: Install a tee and riser – Insert a pipe tee connector into both ends of the mainline at the spot where you just cut it. Once that is secure, screw one of the head risers into the top.
I recommend wrapping some thread tape around the bottom and top of the riser before installing it for a watertight seal.

Step 5: Install a sprinkler head – To install the head, simply screw it into the top of the riser to secure it.
Once that is in place, measure the distance from this first sprinkler head to the spot where the next one will go. Then simply repeat these steps for the rest of the heads you’re installing along the poly tubing.

Step 6: Install the hose fitting – Once you’re done installing all of the sprinkler heads, measure to see out how long the end of your mainline needs to be. Be sure to allow plenty of room to reach your garden hose from your greenhouse.
Then cut the tubing and attach the faucet hose fitting onto the end by simply pushing it in until it’s secure.

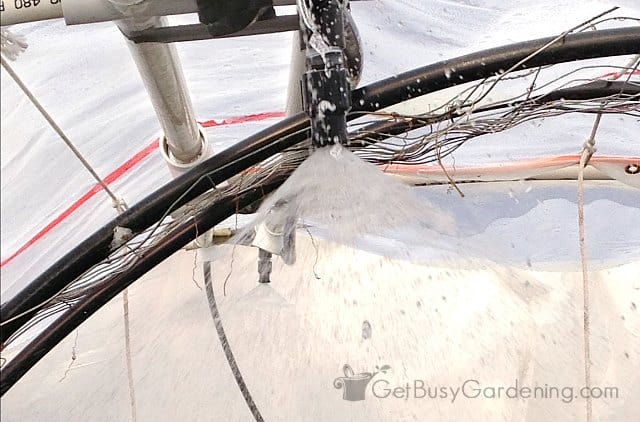
Step 7: Test your greenhouse irrigation system – Now that you have everything put together, test it out to make sure it’s all working with no leaks before installing it.
It’s much easier to fix any leaks while it’s laying on the ground, rather than having to get up on a ladder in your greenhouse to try to fix them overhead later on.

To test your system, simply screw the hose attachment end of the poly tubing onto your garden hose and turn on the spigot. If there aren’t any leaks, then you’re good to go.

If you find some leaks, many times you can easily fix them using thread tape. This helps to create a more snug fit and a better seal on the pipe threads, helping to prevent leaking.

Step 8: Install your overhead greenhouse sprinkler system – My greenhouse frame is made out of PVC pipes, so we simply used zip ties to attach the irrigation tubing to the frame. If yours is made out of wood, you can use 1/2″ pipe straps to attach the tubing instead.

Step 9: Run your new system – You can use your new overhead sprinklers right away to water your greenhouse, or manually turn it on anytime you need to irrigate.
Step 10: Automate your watering system (optional) – You can manually run your greenhouse sprinklers any time you want, but why not automate them? It’s super easy with a hose timer, and you can simply set it and forget it.
If you want to use the spigot for more than one hose, you can plug your timer into a basic garden hose splitter.

If you decide to use the timer, I recommend checking on your greenhouse regularly to make sure everything is getting enough water.
You may find that you need to adjust the timer after testing it out for a few days, or as your plants start to grow larger.

More Cold Season Gardening Posts
- 17 Winter Interest Plants For Your Garden
- Beginner’s Guide To Cold Frame Gardening
- 7 Tips For Protecting Plants From Snow Damage
Share your tips and ideas for a custom greenhouse irrigation system in the comments section below.

Printable Instructions
How To Make DIY Overhead Greenhouse Sprinkler
This DIY greenhouse sprinkler system is quick and easy to make, and requires minimal tools. Follow these step by step instructions to learn how to build your own.
Materials
- 1/2″ poly drip irrigation tubing
- Full spray pattern shrub sprinkler heads
- 1/2" pipe tee connectors (one per sprinkler head)
- 1" long 1/2" risers (one per sprinkler head)
- 1/2″ faucet hose fitting
- Poly tubing end cap
- Pipe thread tape (optional)
- Digital hose timer (optional)
- Hose splitter (optional)
- Zip ties
- OR 1/2" pipe straps
Instructions
- Determine how many heads you'll need - Measure the area of your greenhouse. You'll need one 360 degree sprinkler head for about every 8-9 feet. We spaced our heads 6-7 feet apart, but you could space them out a bit more if you want.
- Cap one end of the tubing - Firmly press the end cap into one end of the mainline poly tubing until it's secure.
- Measure and cut the mainline tubing - Use your tape measure to figure out the spot where the first sprinkler head will go. Then cut the tubing with a PVC cutting tool, or use a PVC saw.
- Install a tee and riser - Insert a pipe tee connector into both ends of the tubing where you just cut it to attach it back together. Wrap both the top and bottom threads of a sprinkler risers with pipe tape, then screw one end of the riser into the top of the tee.
- Install a sprinkler head and repeat - Screw one sprinkler head on top of the riser to secure it. Then measure the distance from this first head to the spot where the next one will go. Repeat these steps to install the remaining heads along the length of the poly tubing.
- Install the hose fitting - Measure how long you need the mainline tubing to be so it will reach your garden hose. Then cut it to that length, and attach the the faucet hose fitting to the end.
- Test your greenhouse sprinkler system - Screw the end attachment onto your garden hose, and then turn it on. If you find any leaks in your system, simply remove that head, wrap some pipe thread tape onto the riser, and reattach the head securely over the tape.
- Install your sprinkler system - If your greenhouse is made out of some type of piping or thin metal bars, then you can simply use zip ties to attach the poly tubing to the frame. If yours is made out of wood, use 1/2" pipe straps instead.
- Automate your sprinklers (optional) - If you don't want to have to manually run your greenhouse sprinklers, then use a hose timer to automate your system, and attach it to a splitter so you can still use the spigot.
Notes
Make sure to test the sprinkler system for any leaks before installing it in your greenhouse. It's much easier to fix leaks while the system is laying on the ground than it will be once it's hanging overhead.

Carla says
I was thinking about using these in my poly
Tunnels and hanging them downward from the hoops. The nozzle would hang 3 feet from the soil. Is this too close?
Amy Andrychowicz says
I haven’t tried that myself, so I can’t speak from experience. It might be too close, or you may have to use different sprinkler heads. I would test it out to make sure they don’t wash away the soil when they’re that close.
Sharon says
You can hang them as high as you want and the sprinkler heads rotate and have flow control
Sharon Kunzer says
1/2″ poly insert pipe tee connectors don’t seem to be obtainable. There is no link on the web page to Amazon or anywhere. I have purchased everything else but can’t get the right part. HELP!
Thanks, Sharon
Amy Andrychowicz says
You should be able to find that part at any hardware or home improvement store.
Sharon says
I finally found them last year.
Joanna says
This is great, I just made one for my hoop house. I added a 90 degree elbow at the doorway of the greenhouse so I could bring the tubing and hose attachment down the side of the first hoop.
Amy Andrychowicz says
Awesome, glad to hear my sprinkler system works for your greenhouse. Thanks for sharing your adaption.
Phyllis Fischer says
Thanks for the info . I just put up an arbor / pergola for my vanda orchids . I’m going to try this tomorrow!
Amy Andrychowicz says
You’re welcome!
frank andrews says
I’m setting up system for ceiling placement dust suppression over 40,000 SF dirt floor here in Michigan year round. We’d only operate it when our temps are well above freezing, but in between we may have freezes. If the PEX supply lines are drained, with these sprinkler heads also drain or otherwise be protected from freeze damages? Any other potential sprinkler head projects to use? Thanks
Amy Andrychowicz says
The best way to winterize the overhead sprinkler system would be to blow it out with an air compressor. That will get all the water out of both the tubing and the heads. Personally, I take mine down and overwinter it in the garage.
Philip says
What’s the minimum required water pressure
Amy Andrychowicz says
Humm… I’m not sure. The products I used to make the greenhouse sprinklers don’t say anything about a minimum water pressure requirement. I just hook it up to my outdoor hose spigot, and it works great. I’m not sure what the water pressure is for that though.
Lisa L Andberg says
I have a small greenhouse that is about 8′ x 12′ and have added 3 shelves on one side, for plants. I’m having trouble designing a sprinkler system that doesn’t give my plants ‘too much’ water because the shelves are pretty close together. Any ideas?
Amy Andrychowicz says
There are a few options. You could use less sprinkler heads in your smaller greenhouse, use a half pattern spray head (rather than the 360 degree one I used), and/or use adjustable heads, and turn them down so the water comes out slower. Hopefully this helps, good luck! 🙂
Brenda says
Where did you get the sprinkler heads?
Amy Andrychowicz says
These are the sprinkler heads that we bought.. Full Pattern Shrub Head. You can also find them in the irrigation section at your local home improvement store.