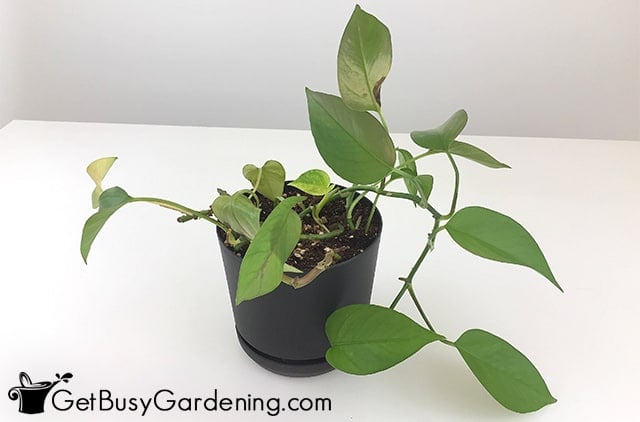
Propagating pothos plants is easy, and a fun way to expand your collection. In this post, I’ll show you step by step exactly how to multiply devil’s ivy by rooting the cuttings or by division.
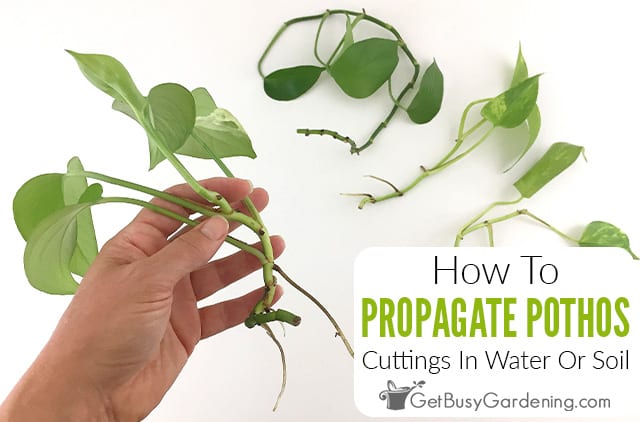
The common pothos plant makes a wonderful addition to any home. Learning how to propagate them is a fun and quick way to expand your collection.
It’s so simple that they’re perfect for beginners or anyone who want to try experimenting with plant propagation.
In this pothos propagation guide, you’ll get a list of essential supplies and step by step instructions for how to do it using two different methods. You’ll be able to multiply your devil’s ivy like a pro in no time.
Pothos Propagation Methods
There are two methods you can use for propagating pothos (aka: devil’s ivy) – either rooting stem cuttings in water or soil, or by dividing them.
It doesn’t even matter what variety you have. Whether yours is variegated, silver, golden, or neon, they can all be multiplied using these steps.
From Cuttings
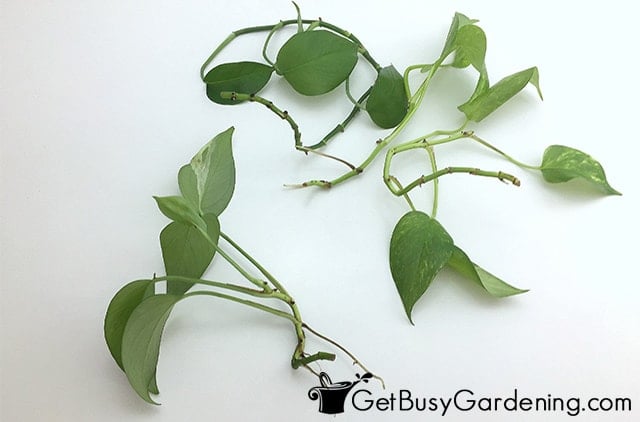
Stem cuttings are a very easy and reliable way to expand one pothos plant into many. They can be rooted in either water or soil.
Unfortunately, the individual leaves cannot be rooted. You’ll need a stem segment with at least one node for this method.
By Division
You can also propagate pothos by division, which simply means splitting a mature devil’s ivy into several smaller sections.
This is the best method to use if you want to quickly establish larger plants, and it can be done during repotting.
When To Propagate Pothos
You can propagate pothos cuttings any time during the year, but rooting them can take longer in the colder months. Often gardeners do it after pruning in the spring and summer.
If you want to divide them, it’s best to do it in the spring to give the new plants plenty of time to become established over the summer.
Supplies Needed For Propagating Devil’s Ivy
Before we get into the steps, it’s a good idea to gather all of your tools so everything goes smoothly. You may only need some of these, depending on which method you use.
- Vine cuttings
- Micro snips or precision pruners
- Rooting hormone
- Rooting medium or water
- A pot, vase, or propagation chamber
- Heat mat (optional)
- Trowel
- New container (for potting up)
- Potting soil
Propagating Pothos From Cuttings
As the most common and simplest way to propagate pothos, I’m going to walk you through rooting stem cuttings first. Before we begin, you’ll need to know how to take and prepare them for the best results.
How To Take Devil’s Ivy Cuttings
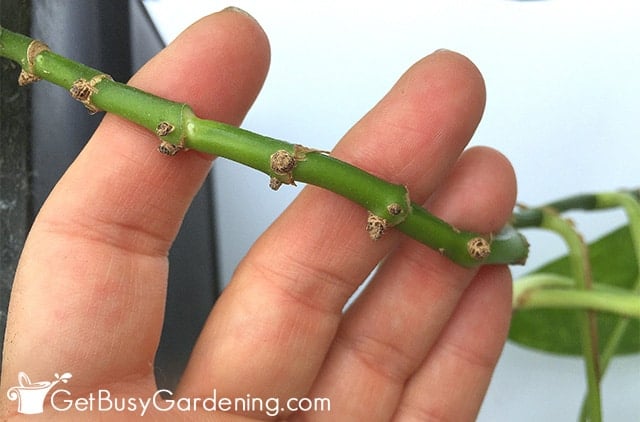
Roots will emerge from nodes along the stems, so you’ll need at least one on each. But the more the better.
Ideally, your cuttings should be at least 4-6 inches long with several lower leaves or nodes on each.
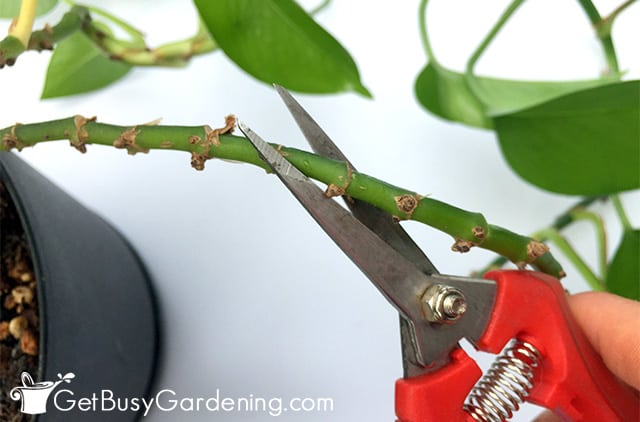
Use a sharp, sterilized pair of pruners or micro snips to make a clean cut about ¼” or so below a node on your target stem.
Preparing Pothos Cuttings For Propagation
To prepare your pothos cuttings for propagation, remove the leaves from the lower section to expose a few inches of the stem.
You can either pinch or snip them off. Just make sure to keep at least a few of the top leaves on each stem.

How To Root Pothos In Water Or Soil
With your prepared devil’s ivy cuttings in hand, you can follow these step-by-step instructions to root them in either water or soil.
Steps For Propagating Pothos In Water
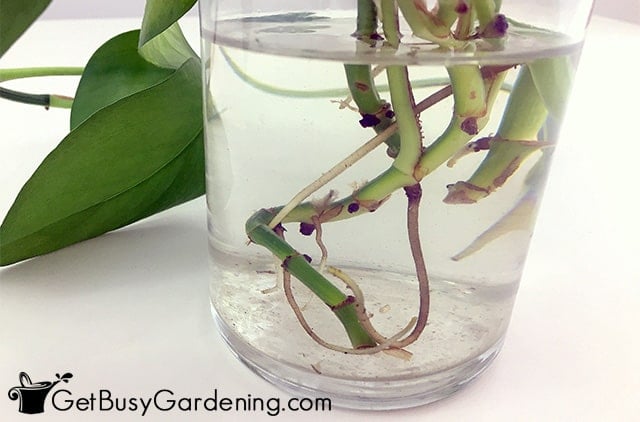
Propagating pothos cuttings in water is quick and easy. But they can have a tough time transitioning back to soil if left submerged for too long. So be sure to pot them up as soon as the roots are hardy enough.
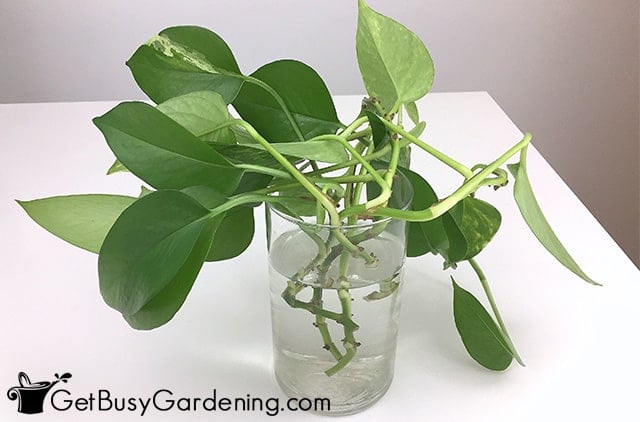
Step 1: Fill the vase – I like to use a clear vase or jar so I can watch the roots develop, but any will do. Just be sure to use lukewarm or tepid water instead of cold.
Step 2: Put the stems in – Make sure at least one node is submerged, but the more the better. Ensure that none of the leaves are touching the water, or they may rot.
Step 3: Place in a warm, bright location – Keep them out of direct sunlight, but they’ll do better in a warm room with plenty of indirect light.
Step 4: Refresh the water – Every week, or anytime it gets murky, rinse out the vase and refill it with fresh, lukewarm water.
Step 5: Wait for roots to develop – When they’ve formed white roots that are at least 1-2” long, they’re ready to pot up.
Steps For Propagating Devil’s Ivy In Soil
Propagating pothos in a soil medium encourages hardier roots and stronger starts. They’re less likely to experience transplant shock after potting them up too.
You can use starter pots with a plastic bag tented over them. But I find that putting them into a propagation chamber works much better.
Step 1: Prepare the rooting medium – A medium that is fast draining but also holds moisture works the best.
Try mixing potting soil with half perlite and vermiculite, or use a seedling blend. Moisten it lightly before filling your container.
Step 2: Poke holes – Make small holes in the medium for the cuttings with either a pencil or your finger, and space them out evenly to avoid overcrowding.
Step 3: Dip in rooting hormone – Make sure the exposed nodes that will be buried are lightly coated in rooting hormone to encourage stronger roots.
Step 4: Plant the cuttings – Bury the leaf nodes, and gently pack the medium around them to keep them upright.
Step 5: Cover the container – Close the lid on your box, or tent a plastic bag over the top of the pot. Make sure none of the leaves are touching the plastic, or they may rot.
Step 6: Place them in a warm and bright spot – Keep your pothos cuttings in a warm and bright location with lots of indirect light. A heat mat can speed up rooting, but it is optional.
Step 7: Keep them evenly moist – Never let the medium dry out completely, but also don’t saturate it to the point of being soggy or puddled.
How To Propagate Pothos By Division
Dividing the rootball is a great way to get larger plants faster. You can split it into two or more sections, depending on the size of your plant. Here’s the steps for how to propagate pothos by division.
Steps For Dividing The Rootball
Before propagating a devil’s ivy by division, make sure it’s well hydrated. Water it deeply 24 hours before you plan to split it.
Step 1: Prep new containers – Choose containers with good drainage and fill them part way with a pre-moistened potting mix.
Step 2: Remove the rootball – Carefully slide the entire plant out of the current pot. If it’s severely pot-bound, tap on the side of the container, or slide a knife around the inside edges to loosen it.
Step 3: Tease apart the roots – Break away the excess soil and tease the roots apart, separating the chunks where there are natural gaps between the sections.
You may need to use a sharp, sterile knife or pruners to slice through stubborn roots.
Step 4: Pot up the divisions – Place the sections into the prepared pots at the same depth they were before, and fill soil in around them. Gently pack it down to remove any air bubbles.
Step 5: Water your new starts – Lightly moisten them, just until you see it begin to flow out of the drainage holes. Let all the excess drip away, and place your new plants in a warm and bright location out of direct sun.
How Long Does It Take For Pothos To Root?
How long it takes pothos cuttings to root depends on the environment. But generally they will begin sprouting within 2-4 weeks. It can take several months if it’s cold or dark, or if they dry out.
Why Won’t My Pothos Cuttings Root?
There are many reasons why your pothos cuttings may not root. Insufficient light, cold temperatures, or too little moisture can all be factors.
Make sure the soil stays evenly moist, or that the nodes are always submerged in water. Give them plenty of indirect light daily. Adding a grow light is helpful if that’s difficult for you.
Warmth is also important. A heat mat can be very helpful if you’re trying it during a colder time of year, or your home is cool.
How To Care For Devil’s Ivy Cuttings
No matter which method you use for propagating devil’s ivy cuttings, they don’t require much care during rooting.
Keep them warm and give them lots of light away from direct sun. If you have them rooting in soil, ensure they stay covered, or mist them daily to increase humidity.
How To Pot Up Rooted Pothos Cuttings
Once your starts have developed roots between 1-2” long, or you see new leaf growth, it’s time to pot them up.
Fill clean containers with quality potting soil that’s premoistened. Bury the stems at the same depth they were in the water or rooting medium.
Moisten them, and return them to a location with bright, indirect light while they settle into their new homes.
Learn all about how to care for your new baby plants in my detailed guide.
FAQs About Propagating Devil’s Ivy
Here I’ve answered some of the most frequently asked questions about propagating pothos. If you don’t see yours, please ask in the comments section below.
Can pothos be rooted in water?
Yes, pothos stem cuttings can be rooted in water, as long as they have at least one node on them. It’s a hands-off and quick way to multiply them.
Can you propagate pothos in winter?
You can propagate pothos in the winter, but the process may take a little longer. I’d recommend waiting until the warmer months for the best results.
Is it better to propagate pothos in water or soil?
Whether it’s better to propagate pothos in water or soil is a personal preference. Water is the fastest method and very hands off, but can lead to rot and severe transition shock. Soil takes a bit more attention, but leads to hardier starts.
Can you propagate pothos without a node?
No, you can’t propagate pothos without a node. Roots will only develop from the nodes, so there must be one or more on each cutting.
Can you propagate pothos from just a leaf?
No, you can’t propagate pothos from just a leaf. You must use stem cuttings that contain one or more nodes.
Propagating pothos is a great way to multiply one plant into many new ones. With either soil, water, or by division, even beginners can enjoy new devil’s ivy plants without much effort.
If you want to learn how to multiply any type of plant you have, then my Plant Propagation eBook is exactly what you need. It will teach you all you need to know, so you can expand your collection as much as you want. Download your copy today!
More About Plant Propagation
- Spider Plant Propagation – The Complete Guide
- How To Propagate Wandering Jew (Tradescantia) In Water Or Soil
- Propagating Peperomia In Water Or Soil
- Propagating Ornamental Sweet Potato Vine Cuttings Or Tubers
- Propagating Coleus Cuttings In Soil Or Water
- How To Propagate Snake Plant (Sansevieria) In Water Or Soil
- Propagating ZZ Plants From Cuttings Or Division
Share your tips for how to propagate pothos plants in the comments section below.




Rachel Fagan says
This was very informative. Thank you!
Once my cuttings have roots (via water method), can I stick them back into the pot of the parent plant?
Also, can I combine cuttings from different Pothos plants when I’m potting them?
Amy Andrychowicz says
You’re welcome! Yes, to both questions. You can combine as many of your cuttings as you can fit into a pot, and mix and match different types too.
suzanne thomas says
im lazy and wanted to propagate longer strips of pothos leaves so they looked more impressive when giving them as gifts. Will this method work or should you only use short cuttings to propagate? I worry the roots are maybe not sufficient to feed the longer leaf stems ive planted (e.g one is about 30cm long with a few leaves on). Thanks!
Amy Andrychowicz says
You can root long pothos vines, that will work.
Donna says
Last summer my cat ate my potros and my spider plant down to the roots (she’s ok). This year when I was going to use the pot for another flower I noticed long roots at the nodes. Is it possible to revive them? Should I use water or just plant in soil. The roots are around 2-3 inches long. Thanks for your help!
Amy Andrychowicz says
Unfortunately, if there aren’t any stems on your plants, then the roots won’t grow anything new.
Sandra Murkerson says
Can I leave my pothos in water? It’s easier for me.
Amy Andrychowicz says
Yes, pothos cuttings can live in water for a long time. The stems may rot once in a while, but you can prune them off. Also, be sure to keep the water clean at all times. It should never be cloudy or stinky.