Peat pellets vs seed starting soil – people are always asking me which medium I like best. I’ve got decades of experience and have put them to the test over the years.
I’ve learned a lot, and there are things that I like and dislike about both of them. I used to think the choice came down to personal preference alone, but there really is a reason to use one over the other.
So I thought it would be fun to do a side-by-side comparison with the pros and cons of soil vs pellets, and also give you advice for how to choose which one you should use for starting your seeds.
Seed Starting Peat Pellets vs Soil
If you’re new to growing seeds, then you might not know the difference between these two mediums. Here’s a basic overview of what they are:
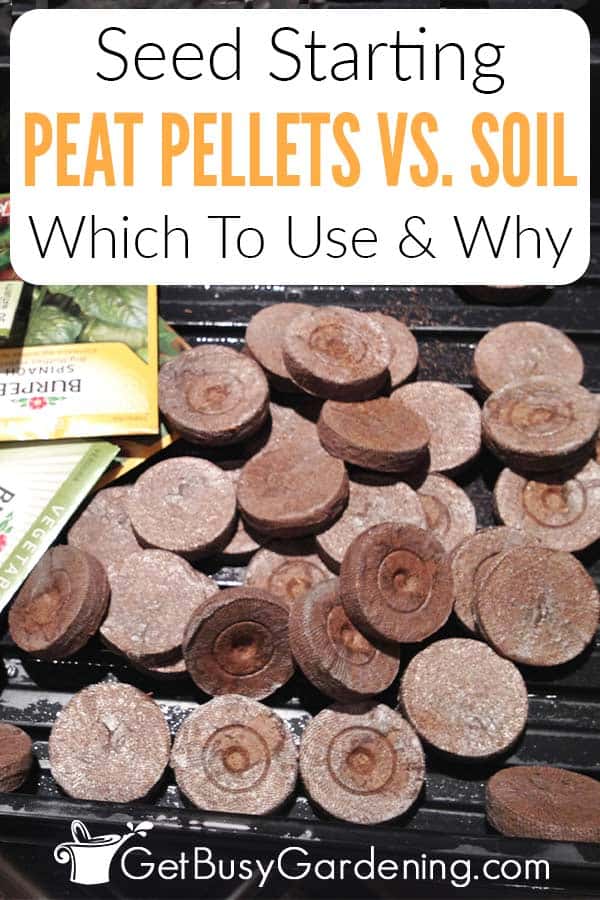
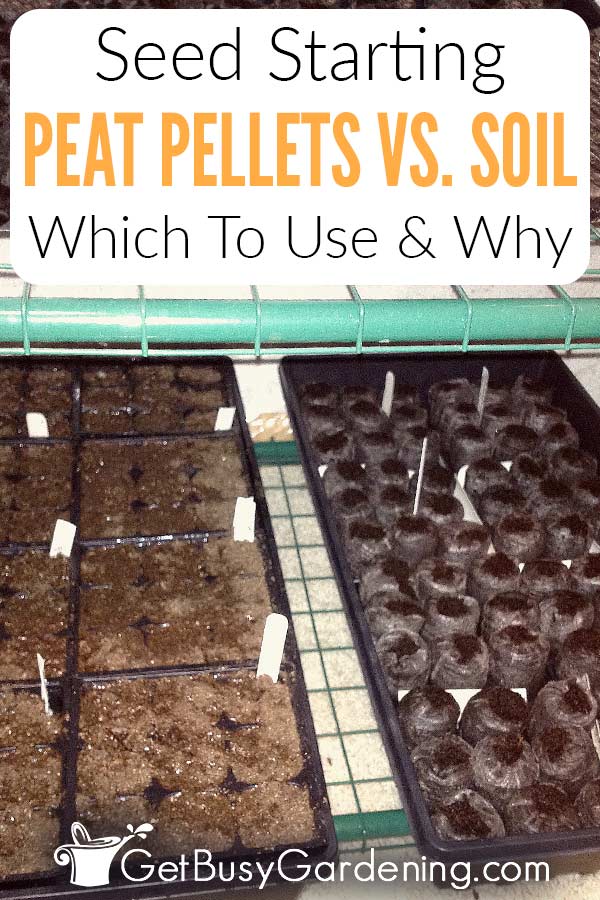
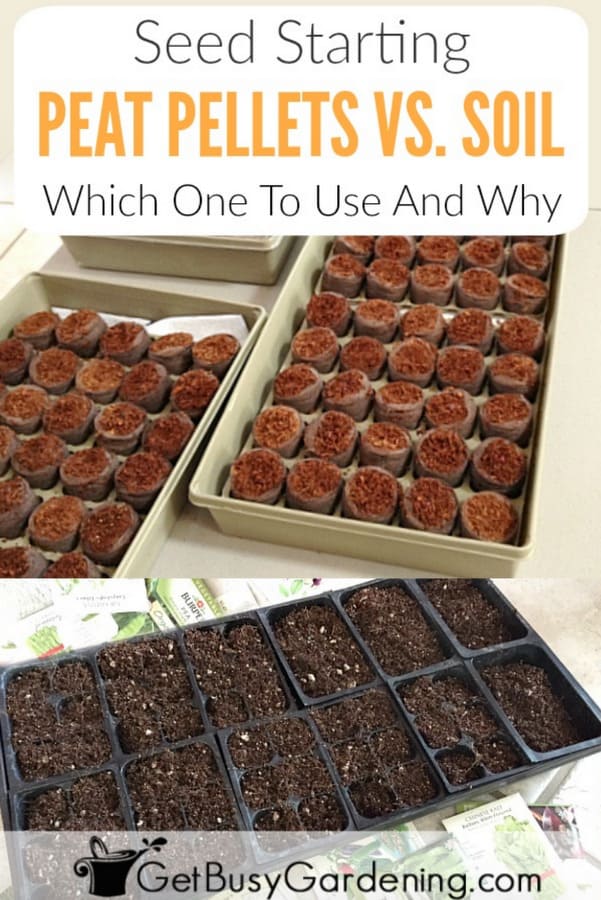
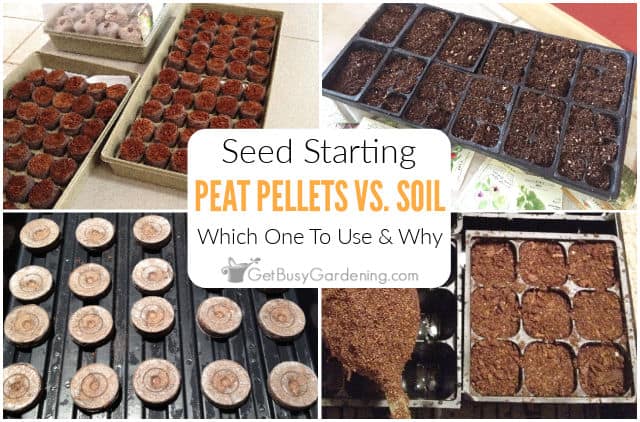
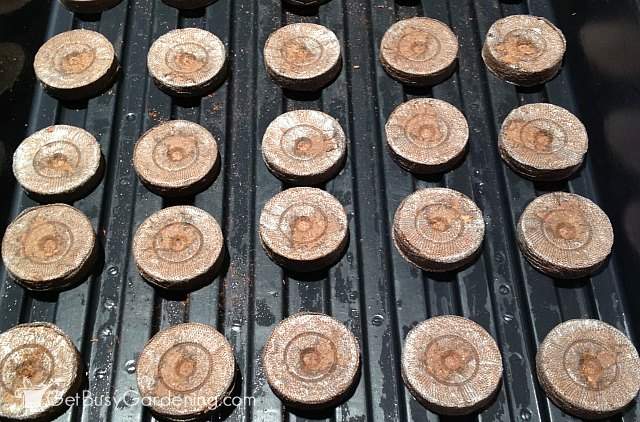
- Peat pellets – Also called pods, discs, or pucks, these pellets are most commonly made out of peat moss, but you can find them in other materials. They are compressed flat and expand when you add water.
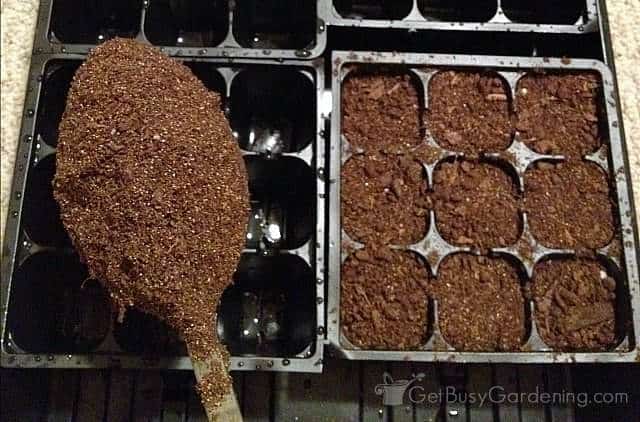
- Seed starting soil – Despite the name, this is a soilless mix that is lightweight and designed for starting seeds. It’s also commonly made from peat moss, but contains other ingredients, like perlite and vermiculite.
Peat Pellets Pros & Cons
When I decided to try using peat pellets several years ago, the first thing that jumped out at me was the cost. They’re definitely more expensive than just buying a bag of soil.
But what I love the most about them is the convenience and how easy they are to use. Here’s my full list of the pros and cons:
| Pros | Cons |
| Fun to watch the discs expand | Not as economical |
| Easy start up, just add water | Thin mesh netting on the outside doesn’t break down |
| You only need trays, and not the cells | The pellets dry out faster |
| Less mess | Need to buy a bigger size for larger seeds |
| Faster to use | Nowhere to stick a plant marker, so they’re harder to label |
| Reduces risk of transplant shock | It’s easy to lose track of what’s planted in each one |
Related Post: How To Make Newspaper Seed Starting Pots
Seed Starting Mix Pros & Cons
I solely used a seedling potting soil for many years, and it was always very economical for me. It’s even cheaper when you make your own seed starting mix.
Although I don’t like that it takes longer to fill all of those tiny plastic cells, and it can get pretty messy. Here are the pros and cons:
| Pros | Cons |
| The plastic cells are reusable | Extra work to clean and disinfect the cells |
| Cheaper to buy soil vs pellets | Messy to fill with soil |
| The plastic holds moisture so soil won’t dry as fast | More time consuming |
| You can add a plant tag to individual cells | Can be difficult to remove individual seedlings |
| Easier to keep track of groupings of seeds | Risk of transplant shock is higher |
Which One Should You Use?
When it comes to choosing between peat pellets vs soil, I’ve learned that the one that you should use depends on the type of seeds you’re planting. Here’s how to figure it out:
- When to use peat pellets – You should use plantable pellets for seeds that hate to be transplanted. Examples are root crops (carrots, radish, beets, onions, kohlrabi, etc), squash (including pumpkin, zucchini, gourds, etc), melons, cucumber, beans, spinach, and peas.
- When to use soil – You can use soil for pretty much any other type of seed. For example: peppers, tomatoes, eggplant, broccoli, cauliflower, okra, most flowers, herbs, chard, cabbage, tomatillos, kale, and brussels sprouts.
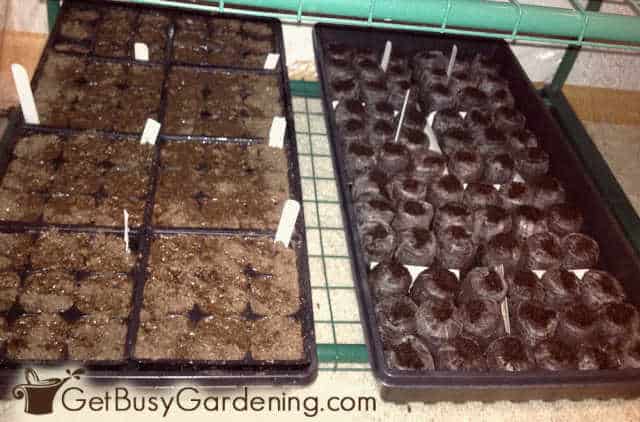
Now that you know why and when it’s best to use peat pellets vs soil, seed starting will become easier for you. Try both and see which one you like the best.
If you’re tired of struggling, and want to learn how to grow any plant you want from seed, then enroll in my online Seed Starting Course. It’s a wonderful, fun, self-paced course that will teach you everything you need to know to easily grow your own seedlings. Enroll and get started today!
Or, if you just need a refresher, then my Starting Seeds Indoors eBook is for you! It’s a quick-start guide that will get you planting seeds in no time.
Leave a comment below to share your experience with using peat pellets vs. seed starting soil, and which method you prefer.


Rosemary Ogilvie says
Agree 100% with your assessment, having tried both methods this year. There’s a lot of waste associated with the pellets, primarily the mesh encasing them.
Greg says
When the plant is ready to move to the ground or a larger pot, should you remove the fabric liner of the peat pod?
Thanks!
Amy Andrychowicz says
I peel the mesh liner off of the peat pellets because it doesn’t break down very quickly in the garden, but you could leave it on if you want.
Kristen says
I haven’t bought pellets yet. Can the mesh be removed before placing the seed? I plan on sticking the pellet into a cell starter.
Amy Andrychowicz says
Sure, you could remove the mesh from the seed pellets any time you want after they have expanded. It’s just there to hold them together. However, if you’re planning to put them into the plastic cell trays, then there’s no need to buy the pellets. You can just use seed starting soil instead, which is usually cheaper than buying the pellets.
Neil says
Yes easy to remove
Hilary Richrod says
Like the peat pellets very much, and are able to get them for 10 cents each locally (and luckily) – very much. I did make a fun discovery this year – using toilet paper tubes AND peat pellets – together (but not at the same time)… for those leggy tomato starts.
Using clear salad containers (those plastic ones with the clamshell or removable lids) or such like to put the peat pots in creates the “greenhouse” effect inside, and will sprout tomatoes no problem – much less expensive that starting trays, too. So the toms quickly grow too much for the salad box to have the lid on – THEN push the peat pellet plants to the bottom inside a TP tube – they fit just perfectly! Add some soil around your start to fill it to the brim – even if you have just a bit of tomato plant sticking it, it works perfectly, it’ll root all the way up the tube. Add soil around your plant in the TP tube, and water. You can stick them all back in the clear box until you are ready to transplant out, and they all fit – if they fit in there before!
TP rolls often mold a bit on the outside but this doesn’t seem to bother the plants any. I did a second transplant from my first peat & TP tube experiment into clear plastic cups (leftover from a latte’ stand) and they rooted like mad.
I just started Saguaro cactus seeds with halved peat pellets and one of those clear egg-cartons. Inflate the peat pellets with boiling water, wait ’til they cool down, squeeze them as dry as you can with your fingers (fun for the whole family!) and cut them in half – and into the egg carton. Add your seeds – I got a germination rate of about 90%. Don’t push the pellets to the bottom of the egg carton, they’ll sit out of any extra moisture. It took only 2 days for the first Saguaro to germinate. You can leave them in there just fine for months!
Amy Andrychowicz says
Great idea about using the toilet paper rolls to support your tomato seedlings! Thanks for sharing all of your great tips for starting seeds too, how fun! 🙂
January says
Btw, you are supposed to pull back the netting from the top of the pellet. I wondered why this was important until one of my seeds shifted (possibly while watering) and sprouted under the mesh. Luckily I was able to tear off the mesh without damaging the seedling.
Also, I don’t think it’s necessary to plant two seeds per pellet, as insurance against poor germination percentage. I had nearly a 100% germination of the tomato seeds, and the pods are cheap enough for me to “bet” one seed per pod. If you don’t get germination in one of the pods, you can still reuse it for a later crop.
January says
I’ve had good luck with the pellets. One thing to consider is to select seeds for each tray and dome that germinate in about the same number of days. I put tomato and bell pepper seeds in the same tray, and then had to uncover once the tomatoes had sprouted but the peppers hadn’t.
I think the pellets hold the right moisture content for sprouting seeds better than any seed starter mix or potting soil that I’ve ever used. I mostly water from the bottom (pouring water between the cells and letting it fill the bottom of the tray). I water each day once the trays are outdoors. Sometimes I transplant the pellet to a slightly larger peat pot or plastic pot (from a previous plant purchase) before planting in garden. This is usually due to the plant getting too big for the pellet at a time when I cannot yet plant in the big garden.
Amy Andrychowicz says
Nice! Thanks for your added tips and your input on using peat pellets vs seed starting soil. Hope all of your seedlings will thrive in your garden!
Sam Smith says
Just like you, I prefer seedling trays with soil over the peat pellets. I was never successful with the latter.
Amy Andrychowicz says
Great, thanks for sharing your experience!
John butler says
I used seed pellets last year with great success almost every seed germinated tomatoes cabbage caulis sprouts lettuce and more
Amy Andrychowicz says
Wonderful, glad to hear it! Thanks for sharing your experience with using peat pellets for starting your seeds.
Tom says
Thanks for the post. Seems, as you said, it will come down to preference. I’m new to seeding as an adult (gardened with my mom in the traditional soil packs as a kid). Do you germinate prior to using the pellets? Or do they take care of the germination process?
Amy Andrychowicz says
Totally. It’s good to experiment to see which method you prefer. I never pre-germinate any of my seeds. As far as germination goes, the pellets work the same as the soil packs do.
Teri says
I used the Peat pellets for the first time this year and I really don’t think they work well for larger seeds like beans or peas. My seedlings started busting out of them quickly, with roots invading other pellets. I had to transplant them to a bigger container after like 2 weeks.
Amy Andrychowicz says
Yes, that is definitely a disadvantage of the small peat pellets. They do make larger sized pellets now for bigger seeds, I haven’t tried the larger size. Large peat pellets
troutbirder says
Mmmm. I guess I was always the vegetable gardening is cheaper and the product is fresher type. As to dirt is was all home composted. The flower gardens were mostly perenials. Now, I do farmers markets, since the kids are grown up, and I'm converting lawn to to wildflower gardens. And the woods to the same… Nice blog here.
Amy Andrychowicz says
Wow, you have enough produce to sell it at Farmer's Markets? Good for you! That must be a lot of work. Thanks for your nice comment about my blog.
Amy
PlantPostings says
Good info, Amy. If I ever get around to starting plants from seed indoors I think go with the cells. You could almost just plant the seeds directly in the soil this year–it's getting so warm so fast! Happy Spring!
Amy Andrychowicz says
Yes, it's so nice outside I'm feeling like I'm way behind on seed starting. I have to keep reminding myself it's only March and we could still get snow. It feels like June this week. I love it!
RandomGardener says
I bought 3 sets of cell (multi pack) from Lowe's and it was very cheap last year- 5 or 6 bucks if I remember right! Also, I've seen individual cells this year, at Walmart, if you're interested. I think Linder's/Gertens nursery should carry them too, just individual pieces, seed tray cells or domes etc., and they're cheap too.I absolutely hate pellets, they dry out too fast!
Amy Andrychowicz says
Thanks for the info. I scored a bunch of used seed starting trays and cells at a garage sale a few years back for free, so I have enough to last me a while. I thought it was interesting that HD only carries the peat pellet seed starter kits now.
I agree about the peat pellets. I've been checking them daily to maintain the moisture. I think it'll get really annoying once I start to harden off my seedlings, then they'll need to be watered several times a day!
El Gaucho says
I've tried both methods (I did like the cells better) and actually settled on a soil blocker. It's like a tiny little press and makes blocks of soils to start seeds in. From there I usually put the larger ones (melons, squash, tomatoes) into their own little pots once they get big enough, and the smaller ones just go straight in the ground.
Amy Andrychowicz says
I just watched a youtube video about the seed blocker, looks cool! It's like the seed pellets but without the mesh. Does the soil start to fall apart after a few weeks of sitting in the seed flat?
Simne says
I did the cells last year, but then I learned about making your own seed starting containers using toilet paper rolls. I basically cut the rolls in half, place them in a tray and fill with seed starting mix or potting soil. It's a lot cheaper than the pellets and it's reusing something we all have! I also do this when I'm wintersowing so the transplanting will be easier.
Amy Andrychowicz says
I haven't tried the toilet paper rolls yet. You'll have to let me know how you like them. Great job on the reuse! The cardboard will make it easier to plant them, and it'll break down fast too.
Luanne Ralph says
tried the toilet paper they did not hold up
once they got wet they fell apart
Billie Jo says
Last year was my first year using the pellets and I'm using them again this year. I'm frustrated to hear that the mesh doesn't decompose. YUCK! Thanks for the tip to remove it before planting. I agree, not economical at all! The replacement pellets cost as much as the pellets with the tray that I purchased last year.
Amy Andrychowicz says
You're welcome. It's too bad that the pellet refills cost as much as buying a whole new seed starting kit, I'm bummed to hear that. I hate to think that people will just throw away the seed trays every year, not very eco friendly! Hopefully they’ll at least toss them into the recyling bin rather than the garbage.
Daniel Schulz says
Well, send one of those extra seed trays my way. I could really use the humidity dome. I use dixies cups (w/starter mix or potting soil), and a cookie sheet.
Amy Andrychowicz says
LOL!