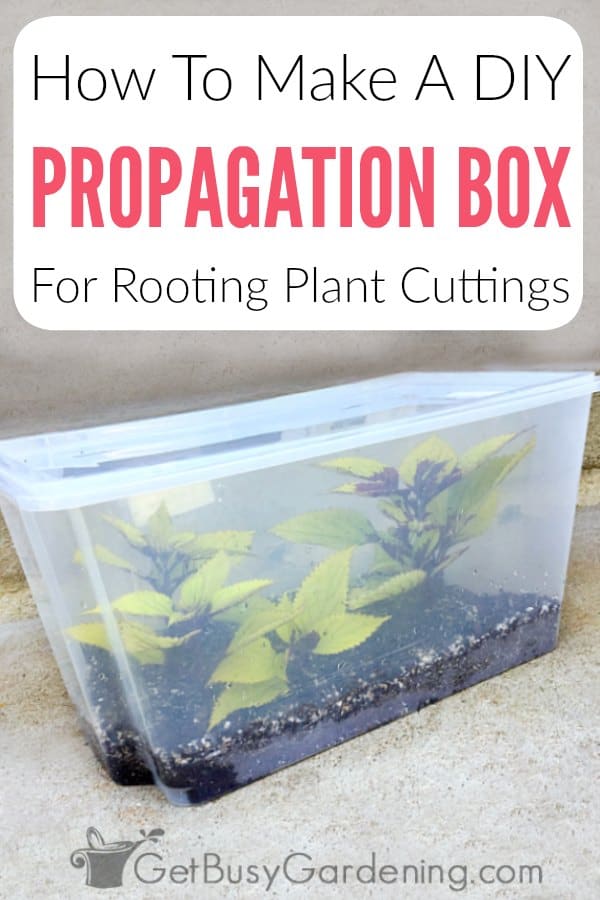
It’s very quick and easy to make your own DIY propagation box. It’s also a frugal project, it only takes about 10 minutes to set up, and you can start using it right away.
I made my first one way back in 2010, and I’ve added several more since then. I use them all the time, and it’s really amazing how well they work.
In this post, I will show you how to make your own homemade propagator, step by step, and I’ll also give you tips for how to use it.
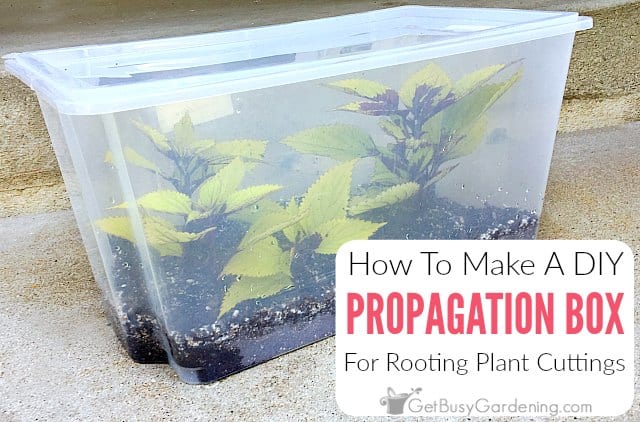
Some plants are easy to propagate by simply putting a stem cutting in water. But others will only rot if you do that, because they need a more controlled environment.
That’s where a propagation box comes in handy, and it makes rooting cuttings easier. There are many different types and styles you could buy, but you can easily make your own for much cheaper.
What Is A Propagation Box?
A propagation box, propagation chamber or propagator, is something you can use for rooting plant cuttings.
It works like a mini greenhouse that will protect the cuttings, and give them enough warmth, humidity, and moisture so they can survive until they form roots.
How To Make A Propagation Box
You only need a few supplies, and you may even have everything you need already on hand. Below is a list of what you’ll need, along with the steps for how to make it:
Supplies Needed
- Clear plastic bin with a lid
- Rooting medium (a seed starting mix works great)
- Water
- Drill (if needed for making holes in the lid)
Step By Step Instructions
Step 1: Prepare the propagation box – Find or purchase a clear plastic storage bin with a lid, and wash it with soap and water.
It’s important that the bin is completely clear, including the lid, so that light can reach the cuttings. The size of the box doesn’t matter as much, but be sure to get one that’s tall enough for your use.
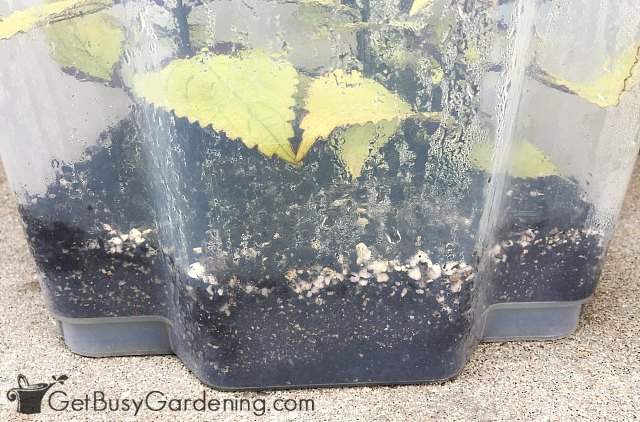
Step 2: Add the rooting medium – Add a 3-4 inch layer of medium or seed starting soil, and spread it evenly over the bottom of the box. Don’t use regular potting soil, it’s too heavy and may cause your cuttings to rot.
Step 3: Add water – Wet down the rooting mix with a light stream of water. Don’t pour or spray it in too fast, or you’ll make a mess. The rooting mix should be moist, but not soggy.
If you added too much water to your propagation box, you can leave the lid off of it for a day or two to allow the excess to evaporate before using it.
How To Use Your DIY Propagator
Now that you have your DIY propagation box all set up and ready to go, it’s time to add some plant cuttings. Here are the steps you should take to ensure success with rooting any type of cutting you want to propagate.
Step 1: Add plant cuttings – Dip the stem of the cutting into rooting hormone before putting it into the box. Make a hole in the medium with your finger (so the rooting hormone doesn’t rub off) and stick the cutting into the hole. Lightly press the medium around the stem to hold the cutting in place.
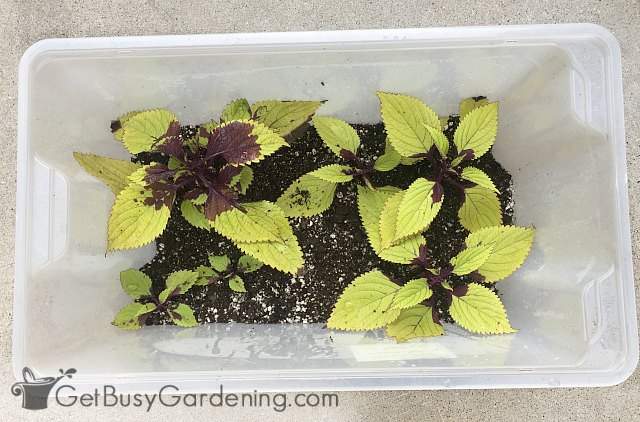
Step 2: Put the lid on the box – If the bin you plan to use is airtight, add a few ventilation holes in the lid to help prevent mildew and mold.
Don’t drill very many holes though. Otherwise your propagation box could dry out too quickly, and your cuttings may not root.
You may want to wait to add the ventilation holes until you’ve used the box a few times, to see how well it holds moisture.
Step 3: Give it some light – Place your DIY propagator in a location where it will get lots of light, but keep it out of direct sunlight.
An area near a sunny window is the perfect spot inside the house. Outside you should keep it in the shade. If you don’t have a lot of light in your home, hang a grow light directly over the top of the box.
Step 4: Add bottom heat (optional, but recommended) – Getting a soil thermometer to monitor the temperature of the medium is a good idea. Many types of cuttings won’t root it it’s too cold. If that’s the case, then you should add bottom heat, which really speeds up the process.
You can place your box on a heat mat, or near a warm vent in the winter (be careful if it’s near a vent, because the air will cause the soil to dry out faster).
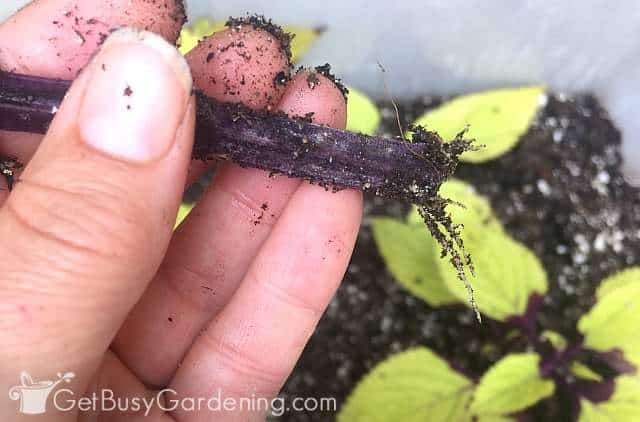
Check on your cuttings every few days to see if there are any new roots, and to monitor the moisture of the medium. It should never be soggy or completely dried out.
I recommend getting yourself an inexpensive moisture gauge probe and keep the reading between 4-7. You can add water by slowly pouring it down the inside of the box, or mist it using a spray bottle.
Related Post: How To Propagate Spider Plants
Which Plants Can You Use It For?
There are many different types of plants that are easy to root using your homemade propagation chamber. I mainly use mine for houseplants, but you could use it for perennials, herbs, or annual cuttings too.
I use my propagation box for everything except for succulents and cacti. The box is too humid for them, and they will only rot. Learn how to propagate succulents here.
My Homemade Plant Propagation System
If you’re really serious about propagation, then you may be interested in building a larger system like I did. I built several homemade propagators, and then I put them into my mini greenhouse.
It’s set up near a south facing window in the spare bedroom. Whenever I prune a plant or a piece breaks off, I’ll stick the cuttings into one of my propagation boxes. I check them every few days to see if there are any new roots, and to monitor the moisture and humidity levels.
Related Post: Beginner’s Guide To Gardening On A Budget (19 Cheap DIY Tips)
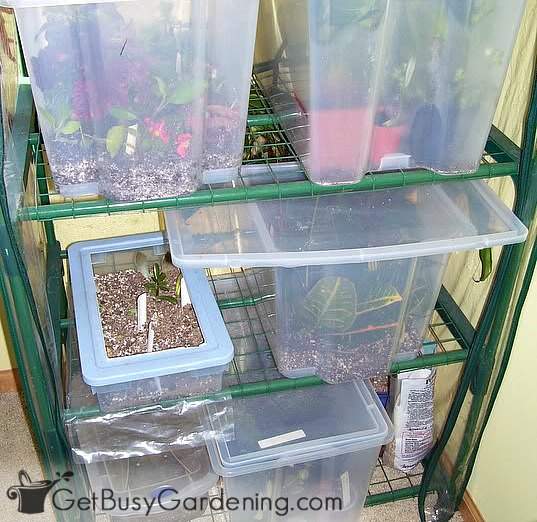
If you’re serious about rooting cuttings, then you definitely need a propagation box. It’s super easy to make your own, or you can buy one instead. Either way, it’s fun to experiment with all of your favorite plants.
Do you want to learn how to multiply all of your plants? Then my Plant Propagation eBook is for you! It will show all you need to know to get as many new plants as you want from your existing ones. Grab your copy today!
More About Plant Propagation
- Plant Propagation Supplies
- Plant Propagation: A Detailed Guide For Beginners
- How To Propagate Lavender Plants From Cuttings
- Propagating Mint Plants From Cuttings Step-By-Step
Share your DIY propagation chamber plans in the comments section below.
Printable Step By Step Instructions
DIY Propagation Box
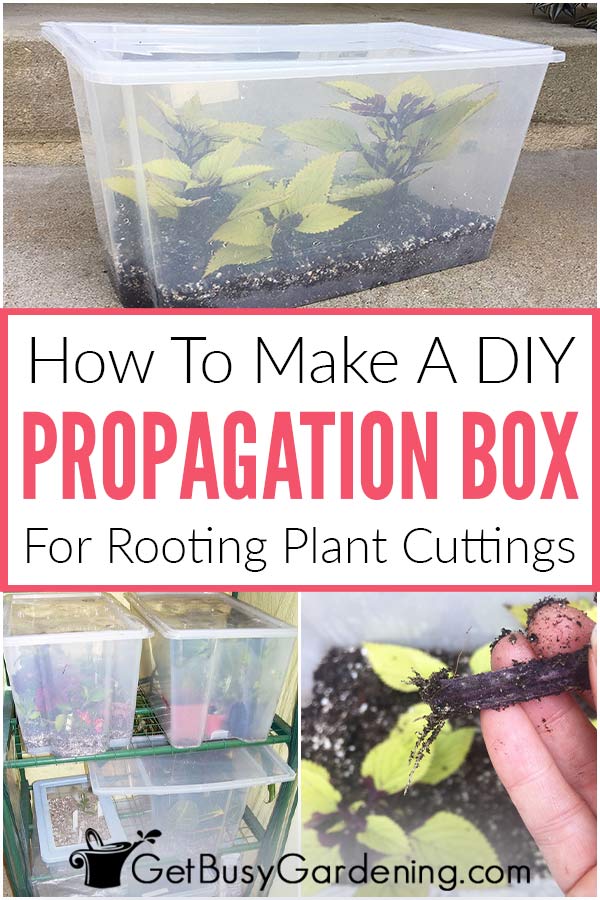
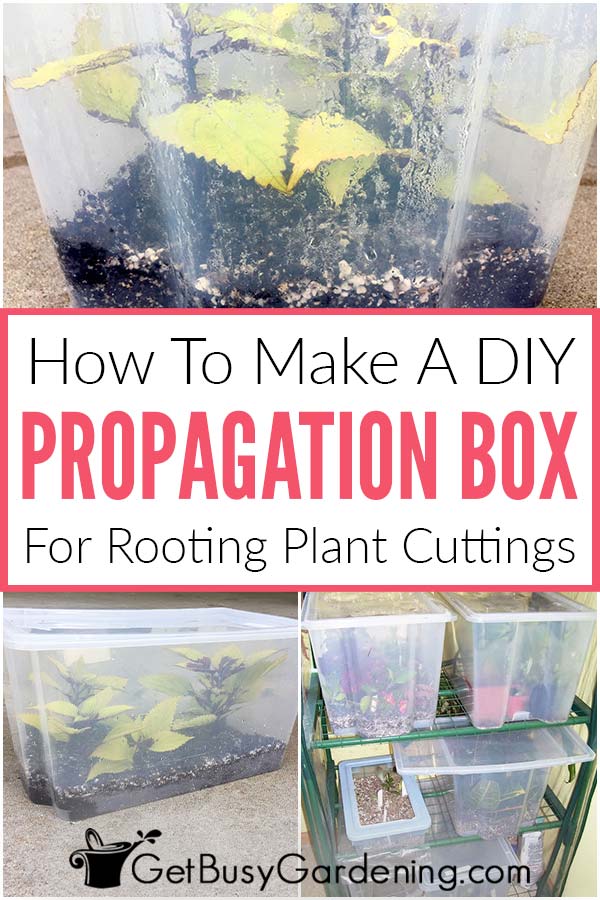
This DIY propagation box is easy to make with only a few supplies and about 10 minutes of your time. You can use it over and over again to root as many cuttings as you want.
Materials
Tools
- Drill (if needed for making holes in the lid)
Instructions
- Prepare the box – Wash the clear plastic bin and the lid with soap and water, then wipe them dry.
- Add rooting medium – Add a 3-4 inch layer of a lightweight medium, and spread it evenly over the bottom of the bin.
- Moisten the medium – Wet down the rooting mix with a light stream of water. Don’t pour or spray it in too fast, or it could make a mess.
Notes
- You can use your DIY propagation chamber right away. After adding your cuttings, place the box in a warm, bright location for best results.
- Don’t use regular potting soil. It's too heavy, which can cause your cuttings to rot.
- The medium should be moist, but not soggy. If you added too much water, leave the lid off the box for a day or two to allow the excess to evaporate before adding any cuttings.



Gisela Kibler says
Hello, this seems like a very practical idea for cuttings. Just wanted to know whether you have tried this method with voilet cuttings? That is the plant I want to propagate. I found a nice square, clear plastic box at Target. It is probably much deeper than necessary for violets. Thank you.
Amy Andrychowicz says
Yes, this DIY propagation box would work great for rooting violet cuttings!
Wayne Ryder says
HI AMY THANKS FOR THE GREAT TIPS ON PROPAGATION . THE BOXES U DESCRIBE ARE IDEAL AND I WILL USE FOR PROPAGATING MY CYCAD SEEDS AS WELL AS PLANT AND SHRUB CUTTTINGS .
HAVE ALWAYS BEEN FIDDLING WITH SMALL PLASTIC POTS BUT NOT ANY MORE . THANKS WAYNE
Amy Andrychowicz says
You’re welcome! Enjoy your new DIY propagation box. 🙂
EnlightenedGardener says
I don’t know how I never thought of this! I’ve been using random combinations of tupperware and clear plastic bags; it works but it takes lots of fiddling around. This is so clean and easy! Thanks for sharing 🙂
Amy Andrychowicz says
You’re welcome! Yes, having a dedicated propagation box makes it much easier to root cuttings whenever you want. 🙂
Jan says
Making a propagation box is something I hadn’t thought of… great idea and good use of the boxes that look to be in brand-new condition!
Amy Andrychowicz says
Awesome, glad I could give you some inspiration! I love my propagation boxes, and I hope you’ll try making some of your own. 🙂
FlowerLady says
I LOVE your DIY propagation boxes and look forward to trying that myself.
Amy Andrychowicz says
Good luck with the propagation box, it works great. But look out, because soon you’ll have tons more plants too! 🙂
Patty says
I have just started trying to propagate and am very excited about it. When you say to check the cuttings to see if any roots are starting, how are doing that? Pulling them right out and then re-inserting them?
Amy Andrychowicz says
If you use a clear box like mine, then many times you can see the roots growing right through the box. Just lift the whole propagation box up and look underneath. Otherwise, you can gently pull on the cuttings to see if they give any resistance, which would indicate that the roots are growing. Try not to pull them all the way out though, that could break off tender new roots. New growth on the top of the cuttings is also a good indication that it’s growing roots.
jody a egan says
New to propagating….have a plastic container with 12 newly planted oakleaf hydrangea stems that are planted in an orchid mix soil. After 10 days the soil has developed a gray, whispy mold. What do I do?
Can I pull them out and restart in new soil such as vermilutlite or scrape away the mold and apply cinnamon or hydrogen peroxide. I have opened the lid to ventilate and plants look healthy although I’m not sure roots have started after 10 days. Would appreciate any help.
Thanks!
Amy Andrychowicz says
If there’s mold growing in your propagation box, you’re either overwatering it, or using the wrong type of rooting medium. I would scrape the mold off the top, and ventilate it more to allow it to dry out a bit. Then keep the soil moist, but never soggy. If the mold problem doesn’t go away, then I would start over with a fresh propagation medium, using a mix made from the ingredients I mention in step 2. Just be sure you never use potting soil, compost, or garden soil in your propagation box.
Claire says
Hi Amy, doing a little research and found your site this morning,,,great info! I’m not much of a gardener but am excited about trying propagation. I want to start with Alstroemeria, any special tips? Claire, CA central coast
Amy Andrychowicz says
Awesome, glad to hear you found the propagation info helpful! 🙂 I’ve never grown Alstroemeria myself, but you should be able to divide the bulbs to propagate it.
Yogesh Anil Gaonkar says
Hi Respected AMY Madam. Thanks a lot for your nice and innovative tips.
But please tell me how many days are required for rooting of cutting by using homemade propagator.
Amy Andrychowicz says
It depends on the type of cuttings you’re rooting. Some types of plants will root in a week or less in the propagation box, while others can take several days or weeks.
John says
This is my go-to resource for remembering how to propagate seedlings in a propagation box and it’s been used to get numerous free blueberry, currant, and blackberry bushes from propagating cuttings from other folks gardens. Thanks so much for the awesome information, I’ve bookmarked this article and referred back to it a number of times.
Amy Andrychowicz says
Wonderful, so happy to hear that you’ve been able to use your DIY propagation box to grow so many wonderful cuttings! 🙂 Thanks for sharing!
Kathy says
Finally someone from mn to follow.:)
Amy Andrychowicz says
Yeah!! 🙂
Maggie Morish says
As always, another excellent guide from you Amy. Thanks for sharing this.
Amy Andrychowicz says
You’re welcome!
Davinder Kaur says
This is so informative .I love your ways of propagating and making soil mix….thanks a ton for the information
Amy Andrychowicz says
Awesome, glad you found it helpful! You are very welcome!
cora lee wallin says
I just found your site by acterdint,and I love it.going to make my own succulent mix from now on.can make it 6 to 1 of the cost of buying it thank you so much. I have found a new addition and love succulents. I am 79 andlove succulents and have sign up forall help i can get.TIA
Amy Andrychowicz says
Great, glad you found my site and are learning all you can about plant propagation! 🙂
Keith Phipps says
A friend told me the other day that she uses Cinnamon for a rooting hormone. Will this work? She said she uses it all the time.
Amy Andrychowicz says
I have heard of that before too, but haven’t tried it. My understanding is that cinnamon doesn’t actually work as a hormone to stimulate root growth, but it helps with propagation success because it is has anti-bacterial qualities. Rooting hormone powder actually contains a hormone that stimulates root growth, as well as anti-bacterial qualities. It would be interesting to experiment and test to see the difference between using the two.
Del Bouton says
what about a wooden box for outside propagation ? any suggestions for this ?
Amy Andrychowicz says
Hi Del,
Plants are very easy to propagate outside during the summer. You could cover the wooden box with plastic to help speed up the process on plants that are harder to propagate (don't allow the plastic to touch the plant). If you do this, keep it out of the sun. Once you start to see new growth or signs of roots in your propagation box, you can take the plastic cover off.