Propagating mint is a great way to get free plants that you can use in your garden, as fillers in your pots and containers, or to share with friends. In this post, I will show you how to take and root cuttings in water or soil.

Propagation Methods
There are a couple different methods you can use for propagating mint: from seed, by division, or rooting cuttings.
Below I’m going to show you how to root cuttings in either water or soil. But there are pros and cons for each of these two techniques, so keep this in mind when you’re deciding which one to use.
- Rooting cuttings in soil – When you propagate your mint cuttings in soil, the roots and the plants will be much stronger, and there’s a lower risk of them dying from transplant shock. But this method is a bit more complicated.
- Water propagation – Starting the cuttings in water is super easy, but the roots and the plants tend to be thinner and weaker. Also, if they stay in the water for too long, it can be difficult for them to adjust to growing in soil again – which means they’ll have a higher risk of dying after being transplanted.

When To Propagate Mint
The best time of year for propagating mint is during the late spring or early summer once the plant starts to grow taller, but before it starts blooming.
Flowering takes a lot of energy, and a stem that hasn’t bloomed yet will be able to put its energy into forming new roots instead of flowers.
How To Take Mint Plant Cuttings
Mint cuttings will begin to wilt very quickly after you remove them from the plant. So be sure to prepare the soil or your vase of water before taking your cuttings. That way you can get them into the medium before they start drooping.
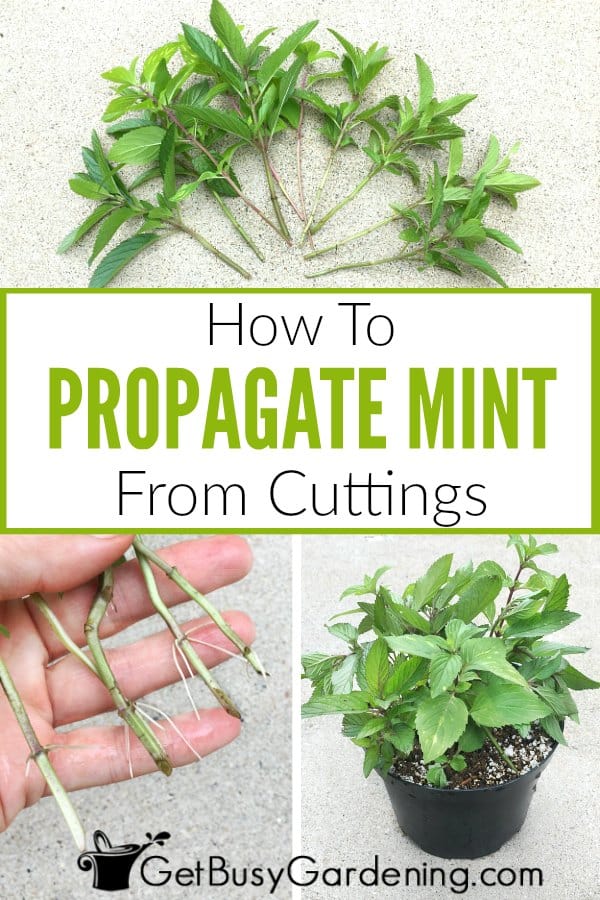
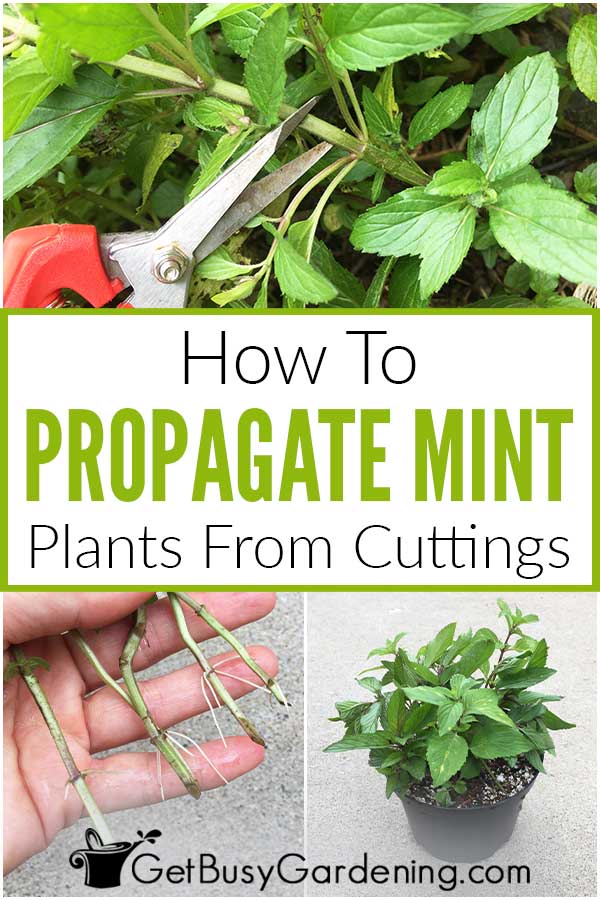
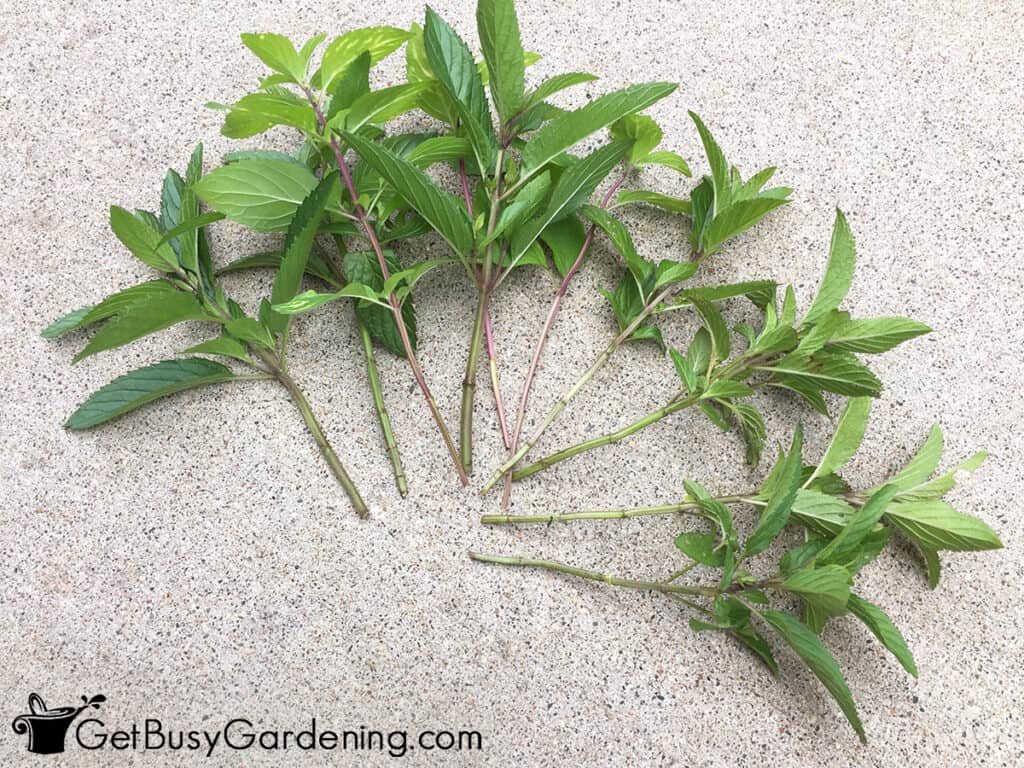
Use a clean, sterilized pair of micro snips or precision pruners to take 3-5 inch long cuttings. Longer stems are easier to propagate than short ones, since there’s more area for roots to form.
Preparing Your Cuttings
Once you have your cuttings, remove 2-3 sets of lower leaves to expose the nodes on the bottom of the stem.
You can carefully pinch the leaves off with your fingers, or use a sharp pair or pruners to remove them so you don’t accidentally damage the stem.

How To Propagate Mint Step By Step
You can either root your cuttings in water or soil. Both methods are very easy, and the one you choose really just comes down to personal preference. Below are the steps for each.
Steps For Rooting Your Cuttings In Water
For this method, all you need to do is put the stems into a vase of water, just like you would do with a bouquet of flowers.
Instructions:
Step 1: Choose your vase – I like to use a glass vase so it’s easy to see when the roots begin to develop and to monitor the water level so it doesn’t get too low.
It’s best to use a vase that’s tall and narrow, rather than a shallow and wide one. That way the cuttings will stay upright, and won’t settle down into the water and rot.
Step 2: Add the cuttings – Fill your vase with tepid (room temperature) water, then put the stems in so that the leaves are above the water line. If any of the leaves are touching the water or submerged, they will likely rot.
Step 3: Watch for roots – Mint cuttings can propagate very quickly, so check on them often. You could start to see the new roots forming in as short as a few days.
Step 4: Pot them up – For best results, wait until each cutting has several thick 3-4 inch long roots before you transplant them into soil. Keep in mind that they may droop after you plant them, but they should recover within a few days.
Expert tip: Don’t keep your rooted mint cuttings in water for too long, or it can increase the risk of transplant shock.

Steps For Rooting Mint Cuttings In Soil
This method is a bit more involved than simply using a vase of water, but it’s still pretty easy as long as you provide the right environment.
Supplies Needed
- Propagation soil (I mix my own using perlite, vermiculite, and peat moss)
- A pot or a propagation chamber
- Sterile and sharp pruners or bonsai shears
- Heat mat (optional)
Related Post: The Best Plant Propagation Tools, Equipment & Supplies
Instructions
Step 1: Prepare the container – Fill your pot with a damp rooting medium, or add a 3-4″ deep layer into the bottom of your propagation chamber.
Step 2: Make a hole – You can use your finger or a pencil to make holes in the medium deep enough to fit the entire stem of each cutting.
Step 3: Place the cuttings – Plant the leafless end of a stem into each prepared hole, and gently pack the soil around it so it makes good contact with the exposed leaf nodes.

Step 4: Add water – Dampen the medium with water and drain off any excess. This will also help to settle any air pockets, so you can add more soil if necessary. The medium should be moist, but not saturated or soggy.
Step 5: Cover the container – This is optional, but placing the lid on your propagation box or covering the pot with a tented plastic bag will help trap moisture and encourage faster, healthier roots. Make sure no plastic is touching the leaves though, or it will cause them to rot.
Step 6: Place somewhere warm and bright – Set the container in a warm location where the cuttings will receive plenty of indirect light. Use a grow light to supplement in a dark room. Placing the container on a heat mat can speed up rooting.
Step 7: Wait for roots – You’ll know your mint cuttings are rooted once you see new leaves forming on top, and the stem doesn’t move when you give it a gentle tug.

How Long Does It Take To Propagate Mint?
In the right environment, it only takes about 3-7 days for mint cuttings to start developing roots, and your new babies can be mature enough to pot up within a matter of a few weeks.
To get the fastest results, keep them in a warm, humid, and bright location while they’re propagating. If it’s too cool or dry, it will take much longer for them to root.
Transplanting Your Mint Cuttings
Once your mint cuttings have developed a healthy root system, it’s time to transplant them into the garden or a pot.
Harden them off before moving them out to your garden to prevent transplant shock. Then amend the soil with worm castings or compost, and plant the cuttings in a well-draining area.
Otherwise, fill a container with general purpose potting soil. Then transplant your cuttings deep enough so the roots are fully covered, water them, and place them in a bright, warm location.

Propagating mint is fun and easy, and it’s a great way to share your favorite varieties with friends, or give them away as gifts. Now that you know how to root the cuttings, you’ll have plenty of new baby plants to go around.

Do you want to learn how to multiply all of your plants? Then my Plant Propagation eBook is for you! It will show all you need to know to get as many new plants as you want from your existing ones. Grab your copy today!
More About Plant Propagation
- Plant Propagation: A Detailed Guide For Beginners
- How To Propagate Lavender Plants From Cuttings
- How To Propagate Basil
- Propagating Rosemary Cuttings In Water Or Soil
- Propagating Coleus Cuttings In Soil Or Water
- How To Propagate Banana Plants
Share your tips for propagating mint plants in the comments section below.


Ethalfrida says
I just started some stems in few days ago, using water. The roots are pretty long but on some, after having removed the bottoms leaves, are sprouting branches UNDER the water; completely brand new branches. They show no signs of rotting. What should be done? TIA…
Amy Andrychowicz says
The reason those mint plant cuttings aren’t forming roots is because they are using all of their energy growing new branches instead. I would cut off the new branches that are forming under the water all the way back to the main stem. That should trigger them to grow roots instead.
Cameron Lloyd says
Amy,
I decided to propagate my mint in water during late Spring. 2 days after cutting the stems & placing them in a vase, the mint looked pretty healthy so I decided to place the vase in direct sunlight along with my other plants & it wilted a few hours later. Once I noticed the mint wilting I placed it back under a CFL bulb and I’m hoping it will recover. Was this the wrong decision? I appreciate any advice!
Amy Andrychowicz says
Yes, it’s best to keep your mint cuttings out of the direct sunlight. Keeping them under the grow lights is a good idea, and I expect that they will recover after a few days.