Digging up and storing bulbs for winter is super easy, and a great way to keep your favorite tropical plants and flowers year after year.
In this post, I’ll show you when and how to lift your tender bulbs along with step-by-step instructions for curing, packing, and storing them indoors over winter.
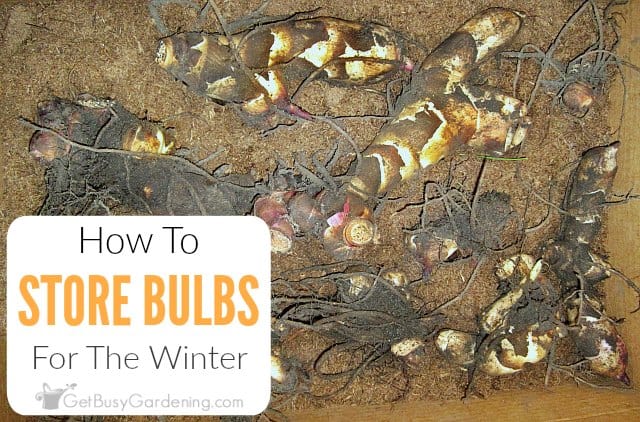

Types Of Plant Bulbs To Overwinter Indoors
Did you know that some of your favorite summer flowers have rhizomes, corms, tubers, or bulbs (commonly referred to as bulbs) that you can store over the winter and regrow year after year?
With a little bit of dirty work, and a small amount of storage space, you can easily overwinter any of these popular bulbs. Here are a few of my favorites.
- Canna lily
- Spider lillies
- Voodoo lily
- Dahlia
- Elephant ear
- Crinum lily
- Tuberous begonias (not all types are tuberous)
- Gladiolas
- Caladium
- Calla lilies
- Sweet potato vine
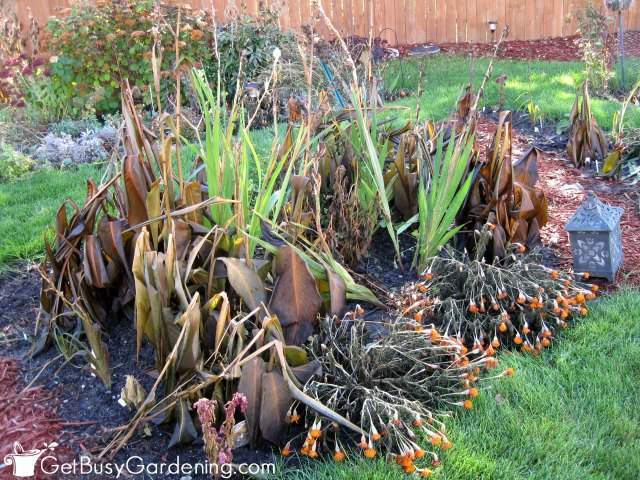
When To Dig Up Bulbs For Winter
The best time to dig up your bulbs for winter is in the fall after the first few frosts have turned the leaves brown or killed back the foliage. This will trigger them to go dormant naturally.
Once this happens, you can lift them any time that’s convenient for you, but you must do it before the ground freezes.
Related Post: How To Overwinter Plants: The Complete Guide

How To Dig Up Bulbs
Lifting the bulbs and getting them ready for winter storage is the longest part of this whole process, but it’s not difficult. Follow these steps for the best success.
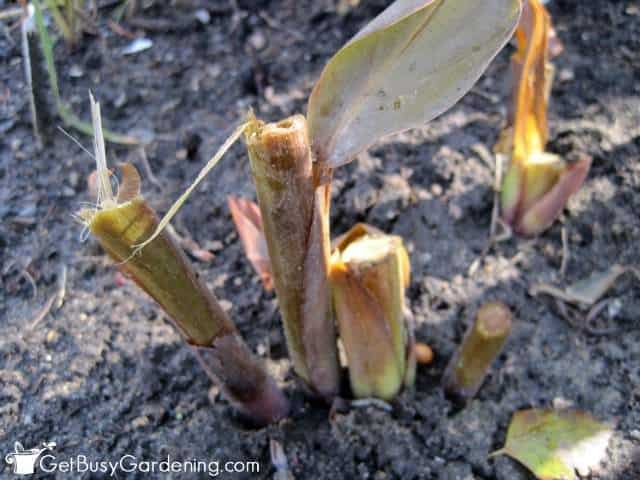
Step 1: Cut back the plant – You can cut the plant all the way down to the ground first, or you can wait until after you’ve dug up and cleaned the bulbs to remove the foliage.
I prefer to cut most of it off before I start digging, leaving enough of the stalk to use as a handle, if possible, to make it easier to lift the bulbs.
Step 2: Dig up the bulbs – To avoid damaging the bulbs, start digging several inches away from the stems of the plant.
Use a spade shovel or garden fork to dig around the entire rootball to loosen it up, and then lift the whole thing out of the ground.
If you have more than one type of plant or variety you’re pulling out, make sure that you keep track of what is what (unless you like surprises).
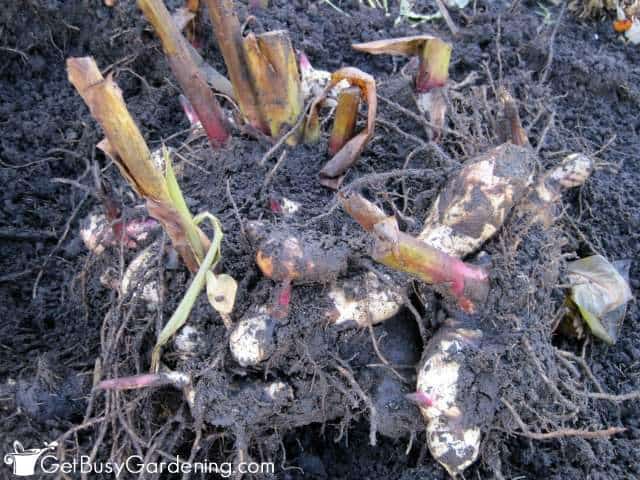
Step 3: Separate large clumps – If your bulbs came out of the ground in one large chunk, carefully loosen it up to remove as much dirt as possible and separate them. Cutting off tightly bundled roots will help with this process.
You don’t need to cut off all the roots though. The goal is to loosen them up, remove the bulk of the dirt, and separate the individual bulbs as much as possible.
Some people store their bulbs in one big clump, but I recommend splitting them apart. This helps them cure better and prevents rot and mold.
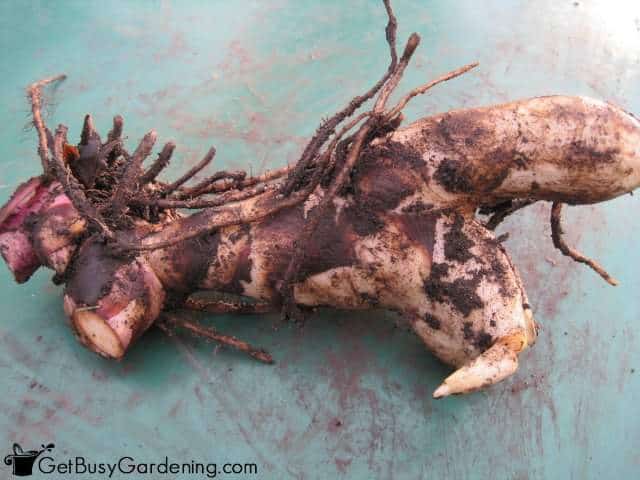
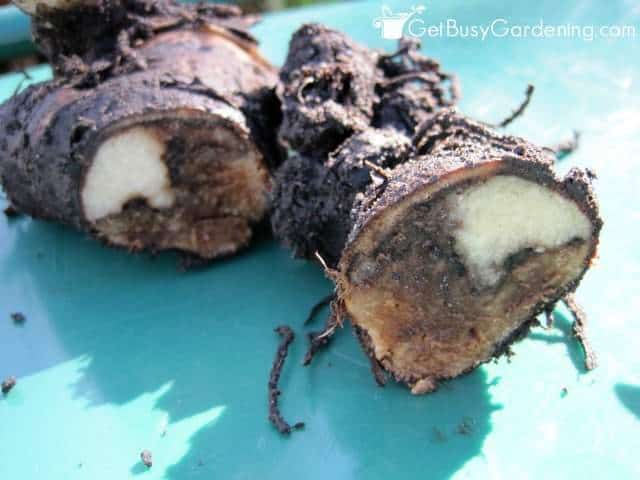
Step 4: Check each bulb for rot or damage – As you separate each one from the clump, inspect it to make sure it’s healthy and firm.
Discard any bulbs that show signs of rot or were cut or damaged when you dug them up, as those will not store well. Otherwise, remove the plant stem and any foliage that’s still attached.
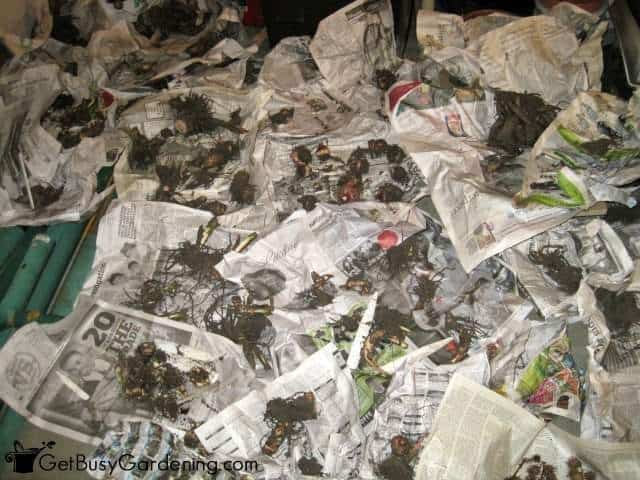
Step 5: Cure them – To reduce the chance of your bulbs rotting or molding over the winter, you should cure them (dry them out) for several days before storing them.
To do this, I lay newspaper on the garage floor and then spread my bulbs out so they aren’t touching each other. You can cure them outside if you prefer, as long as it stays above 40°F and remains dry.
The largest ones will need to cure the longest. I recommend curing small bulbs for 1-2 days, and large ones for 3-5 days.
How To Store Bulbs For Winter
Once your bulbs are cured, it’s time to pack them up for winter storage. I use a cardboard box so it’s easy to stack on a shelf in my basement, but you could use a fabric or paper bag instead.
I do not recommend using any type of plastic container for this, or it can hold too much moisture and cause your bulbs to rot or mold.
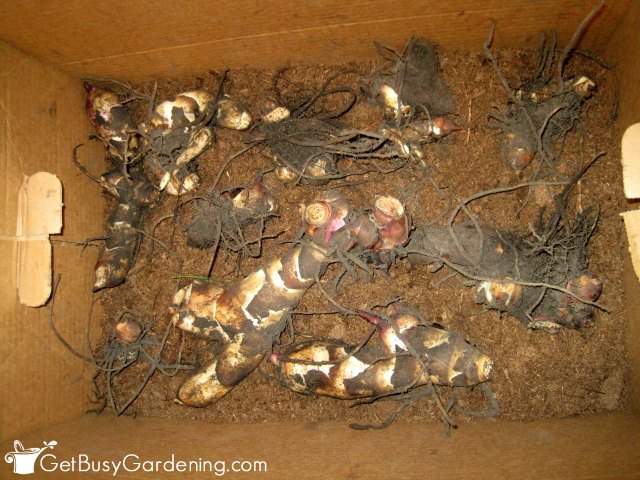
You can wrap each bulb in newspaper or pack them in a dry, loose material like peat moss, coco coir, wood chips, pet bedding, saw dust, vermiculite, or perlite.
Place your bulbs into the box so that they aren’t touching each other. Then add packing material between each new layer of bulbs. Continue layering the packing material and bulbs until the box is full.
Don’t forget to label your box or each layer so you know what you have come spring. You can also write on each bulb with a permanent marker, it won’t hurt them.
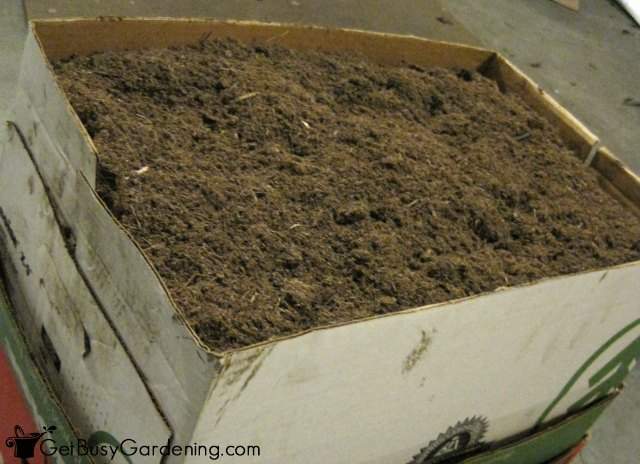
Store the box indoors in a cool (above freezing) and dark location for the winter. You can check them periodically to make sure there aren’t any signs of mold or rot, and that they aren’t drying out.
More About Overwintering Plants
- How To Overwinter Coleus Plants Indoors
- How To Overwinter Brugmansia Plants Indoors
- How To Bring A Plant Out Of Dormancy
- Dormant Cyclamen Care: When, What To Do, & How To Revive It
Share your favorite method or tips for storing bulbs over winter in the comments below.

Judy Powell Miller says
Amy – Of all the many sites I consulted for information about overwintering my tubrous begonias, yours was by far the most helpful but I am still confused. I am in Milwaukee so zone 5, with no garage, so will have to cure them indoors. Most sites say cure in a sunny or light place – my 100-year old basement is dark and feels a bit damp, which means curing in the house where the heat will be turned on starting in October. I would think that after a week (or several as suggested by some) the tubers would be very dry. This is where I am most confused. Sawdust, sand, vermiculite are all very dry (no site recommends DAMP sand, sawdust, etc.), so what is going to prevent these dry tubers in dry sand in a cardboard box in my basement from becoming desiccated? Tubrous begonias were very expensive and I only bought them (a dozen) because my house was in the Garden Walk this year. I desperately want to keep them alive because I can’t afford to buy them again and they really were spectacular all summer!
Amy Andrychowicz says
If your tuberous begonias are in a pot, you can just leave them in there, bring them into your basement, and not water all winter. Otherwise, if you’re digging up the tubers, then yes, you don’t want them to dry out too much. Let them cure until the soil on them is dry, but not to the point where the tubers start to shrivel. The best way to prevent them from drying out too much over the winter is to check on them monthly, and lightly mist them if they are drying out too fast.
Karen Martin says
I live in Winnipeg, Manitoba so our winters are even harsher than yours. I bring in my calli and canna lillies as well as gladiolus. My question is about splitting the canna lily bulbs. How big should they be before I split them and when is the best time?
The calli lillies have already sprouted. How long before I can plant them indoors? Or should I just wait until the last frost is gone?
Thank you.
Amy Andrychowicz says
Once your canna bulbs grow large enough where they have two or more tips on them, you can split them. The best time to do that is in early spring before planting. After splitting them, I would recommend allowing them to cure (dry) for a couple of days so that the wounds can callus over before planting them.
If your bulbs are starting to sprout, then you can pot them up at any time. You could certainly wait, and just plant them into the garden once it’s warm enough. But potting them up now will give them a nice head start. 🙂
Susan says
Love all your friendly, knowledge. Thanks for sharing for FREE.. ??
Going to try the sweet potato vine ‘dry wintering’. Hope I can find some peat moss.
Enjoy the Fall.
Amy Andrychowicz says
You’re welcome! Good luck overwintering your bulbs. 🙂
Emily says
I was just wondering how I should overwinter some lily bulbs; perfect timing!
Amy Andrychowicz says
You’re welcome!
Christine says
Great tips! I always want to buy tropicals for my zone 5 garden and always pass. I am going to have to treat myself to some next year!
Amy Andrychowicz says
Yes! Tropical bulbs are great. You just buy them once, overwinter them in the house, and regrow them year after year for free. LOL!
Tracy says
I tried storing bulbs in my basement last year, but they dried out and were no good come spring. My basement does not get cold. With enough packing using paper and dirt, is it possible for them to survive in a garage when temperatures fall below freezing?
Amy Andrychowicz says
It sounds like you need to pack the bulbs a bit better so they won’t dry out. Peat moss is a good packing material that will help keep your bulbs from drying out over winter. I definitely wouldn’t recommend storing bulbs in your unheated garage, the below freezing temps will likely kill them.
Linda dunning says
I purchased elephant ear bulb & was told to plant flat cut end down, round pointy end up, but nothing has happened in one mo. Is this right?
Amy Andrychowicz says
Yes, that is correct. I would carefully dig around the bulb to see if there’s any signs of growth. Maybe you planted it too deep?
lori says
This is my first time caring for canna bulbs. So you stated to dig after frost, but then stated it can be done at convenience…can I dig them up before frost if it is more convenient without fear of losing them? Thanks for your help, I am sort of new at this. 😉
Amy Andrychowicz says
Yes, you sure can dig up bulbs before frost. I can’t bring myself to cut them down when they’re still looking good in the garden, but you can do it anytime you want. Frost helps to trigger the bulbs to go dormant, but it’s not necessary to wait that long before you dig them up and store them.
Amy Andrychowicz says
After I wrote this post, I decided to do some experimenting with the types of containers I used for storing my bulbs.
Helen Malandrakis says
Cannas are the only tender bulbs I have. They are planted very close to my house. I do not dig them up, because I do not have the proper storage for them. I cut off the foliage after the freeze, and I mulch them very heavily. They have made it through the winters for at least 4 years, now.
Amy Andrychowicz says
Wow, that’s wonderful Helen. Glad to hear you found a technique that works for you so you don’t have to store your bulbs. It gets too cold here in MN for me to be able to leave them in the ground over winter, so I’m jealous! 🙂
Nikki Gwin says
Where do you live Helen? And what planting zone? I am 7b and am going to hope for the best.
🙂 gwingal
Helen Malandrakis says
Nikki, I live in Zone 6a. We used to be 5b. As I said, my husband piles about 18 inches to 2 feet of leaves on top of the area where I have the Cannas planted. It’s very close to the house with my garage on one side and front porch behind that area. It’ really not a pretty sight, but I don’t care. It really is not visible from the street because of the plants in front of this area.