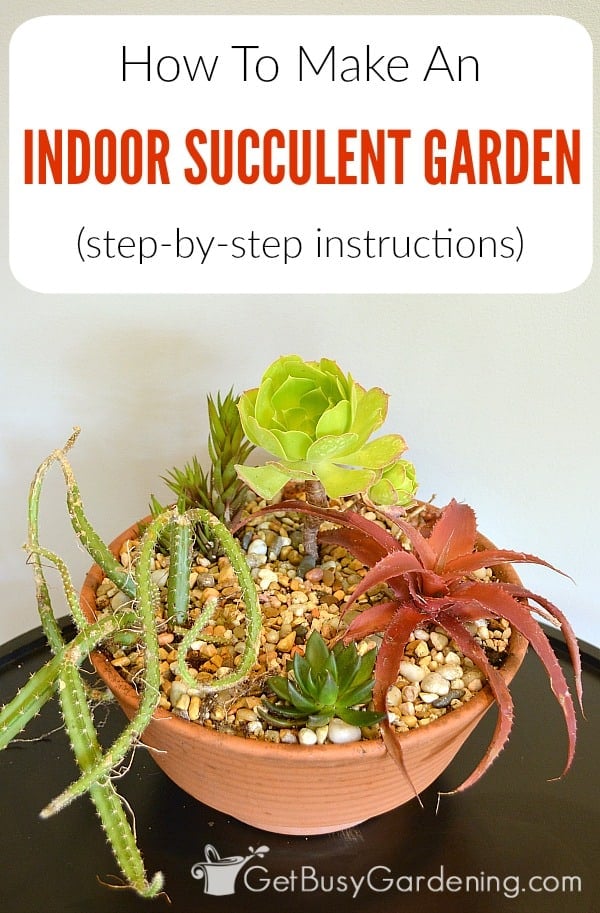
Indoor succulent gardens are fun and easy to make. In this post, I will show you exactly how to make your own, with detailed step-by-step instructions.
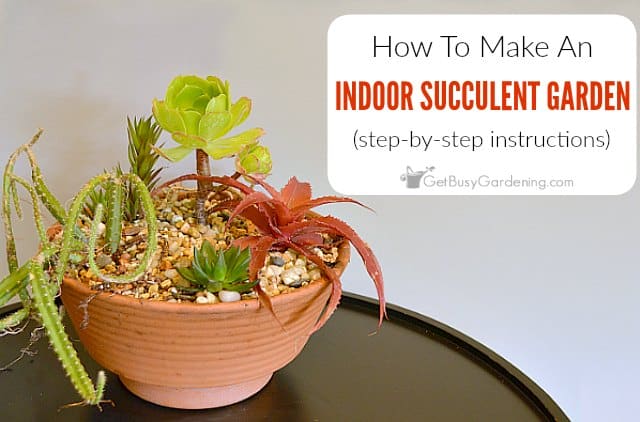
I love combining my succulents into miniature indoor gardens! They have shallow roots, so they are perfect for planting in mixed containers.
Plus, combining a bunch into one pot makes them easier to care for. It means less maintenance! I’m all for making life easier.
In this tutorial, I am going to show you step-by-step how to create a small indoor succulent garden for displaying in your home, or to give away as a gift.
Choosing What To Plant Together
There are tons of different types of succulent plants you could combine in your indoor dish garden. They come in just about any shape, size and color.
You can order them online, find small ones for sale at your local garden center, or use ones you already have. Heck, you could even propagate cuttings from your own collection, and use those.
Wherever they come from, be sure to choose a good variety of colors, ones with variegated leaves, as well as various shapes and sizes. This helps to add tons of depth and color to your mixed arrangement.
The number of plants you choose to use depends on what you like. You’re only limited by the size of your container.
To help get you started, I recommend choosing one tall plant (the focal point/thriller), a couple of shorter ones (fillers), and at least one that cascades over the side of the pot (spillers).
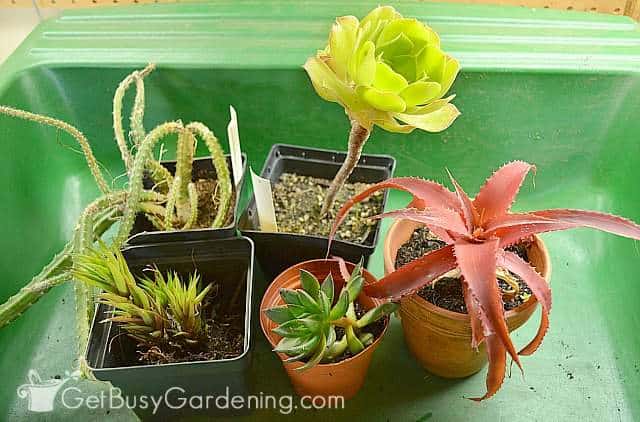
The plants I’ve chosen for my DIY indoor succulent garden are: (top left to bottom right) rat tail cactus, aeonium, aloe (the red one on the right), haworthia, and echeveria.
Best Container For Making An Indoor Succulent Garden
You can choose any decorative container you want. However, I highly, highly recommend using ones that has drainage holes in the bottom.
If the container you want to use doesn’t have holes, you can easily drill a few into the bottom yourself (be sure to use a masonry bit for clay or ceramic pots).
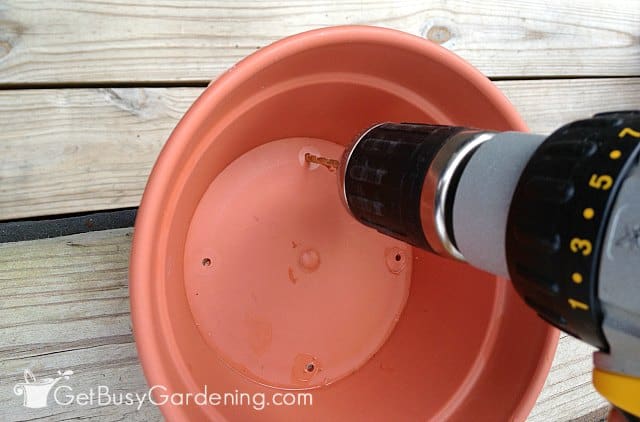
For this project, I chose to use a large terracotta bowl that I had on hand. Clay pots are wonderful, and I use them whenever I can.
The reason they are my preferred choice is because they absorb moisture, and help the soil dry out quicker. Which is exactly what you want for your indoor succulent garden.
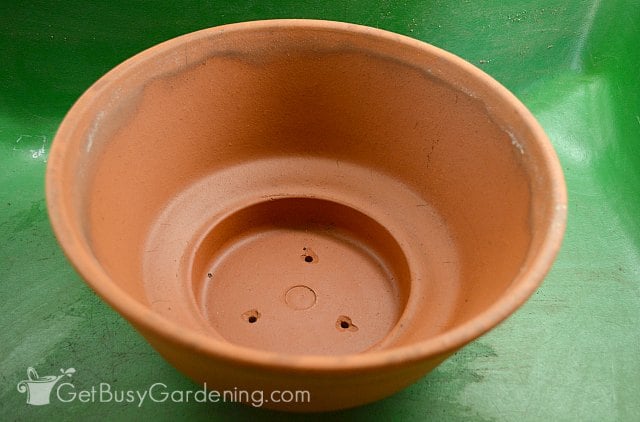
How To Make An Indoor Succulent Garden
Now that you’ve picked out the container and plants for your DIY indoor succulent garden, it’s time to put everything together. Here’s what you’ll need…
Supplies Needed
- Decorative container with drainage holes
- Plants (here’s a great online source)
- Soil
- Decorative rock (optional)
- Drainage netting (optional)
Rather than buying potting soil and rock separately, you could start with a planter kit, which makes creating your dish garden a snap!
Related Post: How To Plant Succulents Indoors Or Outside
Steps To Make Your Own Indoor Succulent Garden
Step 1: Cover the holes and add soil – If the holes in the bottom of your planter are large, then you should cover them with drainage netting before adding soil.
This will keep it from washing out of the holes, but still allow the water to drain. A piece of window screen or landscaping fabric would also work, if you have some on hand.
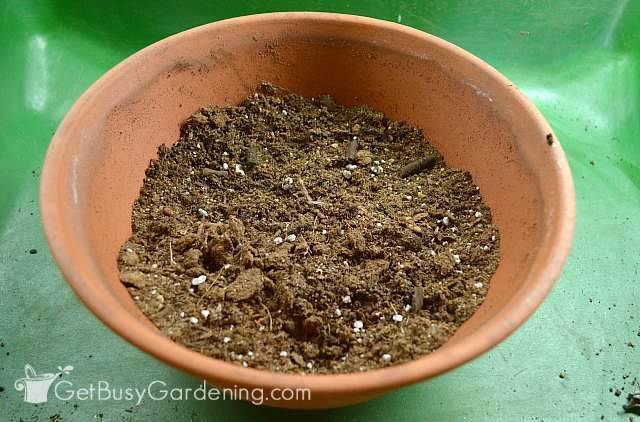
Next, fill the container about half full with soil. You can buy the pre-made stuff, or you can make your own succulent soil using my recipe.
Related Post: How To Repot Succulent Plants
Step 2: Add your focal plant – The first thing you should add to your DIY miniature indoor succulent garden is the focal plant (the tallest one).
Depending on how your arrangement will be displayed, you can put the focal one in the center if the garden will be viewed from all sides. Or you can put it in the back, if your display will only be seen from the front.
Tip: Instead of centering your focal plant, moving it slightly off to one side sometimes adds more interest.
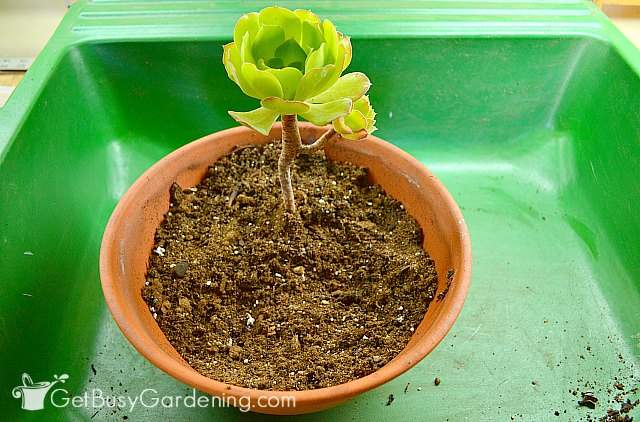
Step 3: Add the filler plants – After you figure out where you want your focal plant to go, add the filler plants around it. These will be the bulk of the arrangement, so they will take up the most space.
While you play around with different placements, just set the plants on top for now. This will to help you figure out the best design for your indoor succulent garden.
Nothing is permanent at this point. So take your time, and move things around until you are happy with it.
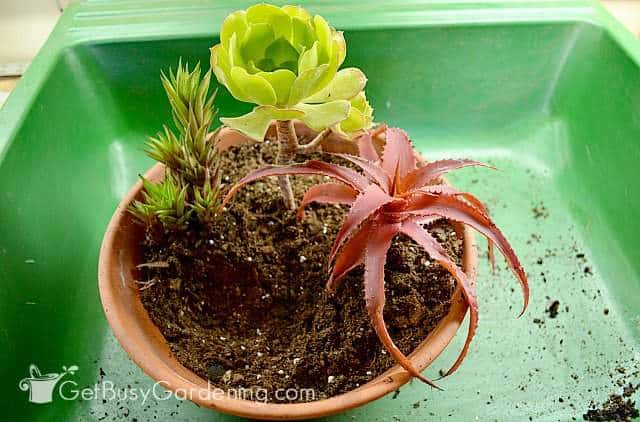
Step 4: Add the cascading plant(s) – Last, add the cascading plants around the outside of your planter.
These should spill out over the top of the container, adding a whole new dimension to your small indoor succulent garden. You can add one or several of them, depending on what you like, and how large your container is.
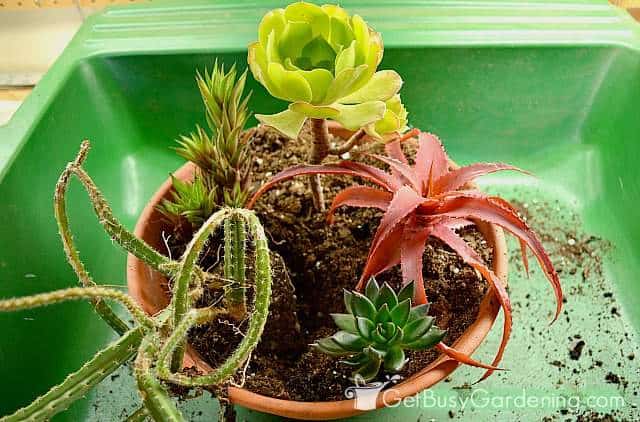
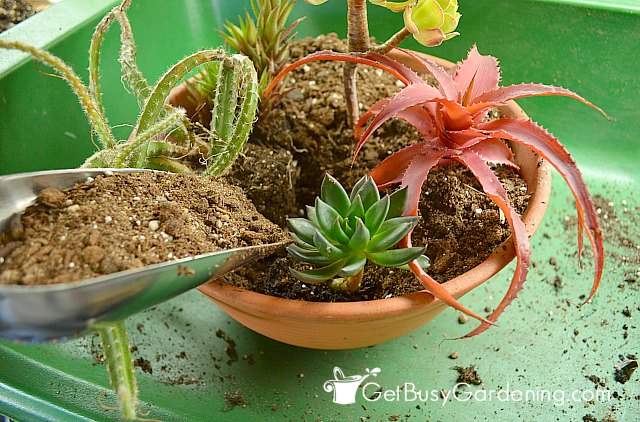
Step 5: Fill the rest of the container – Once you have everything arranged how you like it, fill the spaces between them with soil, gently packing it in place as you work
If you plan to add decorative rock to your indoor succulent planter (see step 6), leave about a half to one inch of space between the top of the soil and the rim of the planter.
Water the container, and allow everything to settle. Fill in any gaps or holes that form with more dirt as necessary.
Related Post: How To Water A Succulent Plant
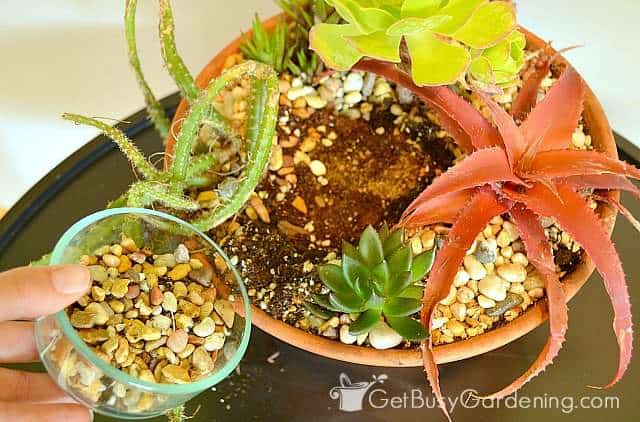
Step 6: Add decorative rock to your indoor succulent dish garden (optional) – Once everything has settled, you can add decorative rock over the top for a nice finishing touch.
I chose to use a multi-colored aquarium rock for mine, but you could use black river rock if you want to create more of a zen look.
This step is totally optional, but I always add cover rocks to my indoor succulent gardens. Not only does it look nice, it helps to keep the soil from splashing or washing out when I water it.
Related Post: How To Propagate Succulents In Winter
Indoor Succulent Garden Care Tips
Once you’re done creating your tabletop indoor succulent garden, it’s important to know how to care for it. Here are a few tips…
- Put it in a sunny window where it will get lots of light. If any of them start getting leggy, add a grow light.
- Do not overwater. Allow the soil to dry out at least 2″ down before adding more. If you have issues with giving your plants the correct amount, I recommend getting a moisture gauge to make it easier.
- Never leave the pot sitting in water. Allow the excess to drain completely, then dump it from the drip tray.
- Use a natural, organic fertilizer. I recommend either an organic fertilizer or a natural compost solution – they work better than chemicals, and are much healthier for your plants.
If you want to learn more, read my comprehensive Succulent Plant Care Guide.
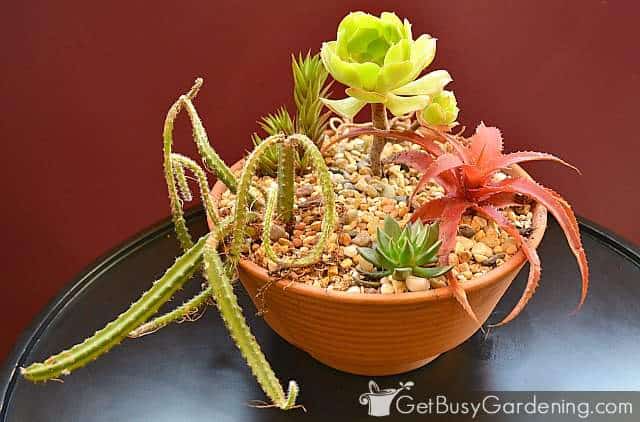
Creating an indoor succulent garden is fun, and it’s a great way to display your collection. I will warn you though, it is very addicting! At last count, I think I had over 15 of them! Oops! They make wonderful gifts though, so at least you’ll know what to do with all the extras.
If you want to learn all there is to know about maintaining healthy indoor plants, then you need my Houseplant Care eBook. It will show you everything you need to know about how to keep every plant in your home thriving. Download your copy now!
More Fun Gardening Projects
- How To Paint Terracotta Pots Step-By-Step
- How To Make An Easy DIY Tiered Planter
- How To Plant A Mum In A Pumpkin Step By Step
- How To Mount A Staghorn Fern (Platycerium) Step By Step
Share your tips and ideas for how to make an indoor succulent garden in the comments section below.



Robby Ramdhani says
Hi, I just find out your site today and I love it. You make a simple and clear explanation about caring plants.
I have one dish same with yours. I put jade plant, kalanchoe and sansiveira together, it really saves my time and yes, addictive!
Now, I plan to put some succulent plants and cactus together, what do you think?
Amy Andrychowicz says
Haha, yes, making succulent dish gardens is fun and addicting, I love it! You can sometimes combine succulents and cacti in the same container, but it depends on the care they require. If you get cactus plants that like to dry out completely between waterings, then many types of succulents will start to suffer and shrivel – or you risk overwatering the cactus plants. So make sure to check that each plant you use has similar watering requirements for the best results. Have fun!
Katie says
Hello, I am beginning a succulent garden but because my cats are jerks to plants, I am creating it in a terrarium. What should I do for drainage given the solid nature of my “container”?
Amy Andrychowicz says
LOL, I have a cat that is a jerk to plants too.
I do not recommend growing succulents in a terrarium. It is way too humid for them, and they will only rot. If your cat is digging in the soil, then you can cover it with rocks or tinfoil to keep them out. Otherwise, get a spray bottle to spray your cats when they are naughty (or threaten to 🙂 ). Or put the plants somewhere that the cats can’t get to them. I hang some of mine from the ceiling, and keep others in our spare bedroom with the door closed. Here’s a post I wrote that has all the details… How To Keep Cats Out Of Houseplants. Good luck!
Christina says
Hi Amy, your site is so informative and comprehensive! I’ve never had a green thumb but recently adopted an array of succulents from a friend who’s moving away. She grew them indoors and I’m noticing a lot of limp leaves and slouchy stalks. How should I go about making them firm and sturdy (or is slanting/slouching normal)? Also, what do you mean when a succulent gets “leggy”?
Thank you so much for your help! =)
Amy Andrychowicz says
Thank you, I’m glad you like my site! 😀 The description you’re giving of the succulents from your friend sounds like they are leggy to me. What that means is that, instead of staying compact and thick, they grow tall and weak because they are reaching for the light. Check out my succulent plant care guide for details about how to care for your succulents. You could also try to propagate your succulents to rejuvenate the leggy ones. Good luck!
Catherine says
What are the names of the plants you have used above?
Amy Andrychowicz says
Great question, thanks for asking! I used rat tail cactus, aeonium, aloe, haworthia and echeveria. Also, I added the list of plants I used right above the photo.