Propagating ZZ plants is a fun way to expand your collection, or share with friends. In this post, I’ll show you step by step how to multiply Zamioculcas zamiifolia using leaf or stem cuttings, or by dividing them.
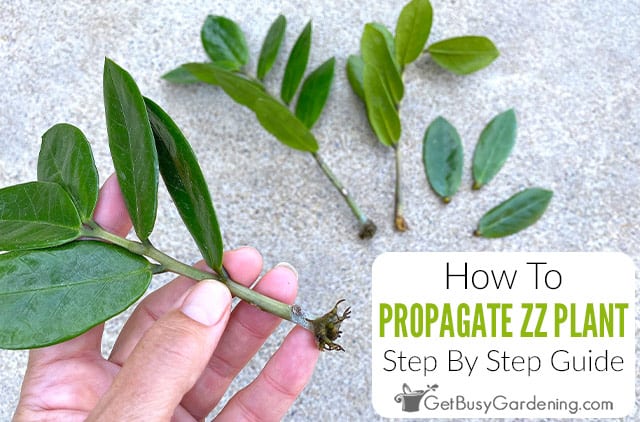
ZZ plants (Zamioculcas zamiifolia) are simple to propagate right at home. In fact, it’s something anyone can tackle, even the newest gardeners.
I’ve made it even easier with this complete guide, by providing all my key tips plus detailed step by step instructions.
In addition to tool recommendations and care tips, you’ll learn about rooting the leaves and stem cuttings, as well as how to propagate ZZ plants by division.
ZZ Plant Propagation Methods
There are a few methods you can use to propagate ZZ plants. Whether you have individual leaves, stem cuttings, or a mature plant ready for division, each can produce new babies for you to enjoy.
From Cuttings
You can take cuttings of Zamioculcas zamiifolias stems, or use the individual leaves, and root them in either soil or water. They are a bit slow, but require minimal maintenance.
Using long pieces of the stem is the best way to get large plants quickly, as the leaves take a long time to mature into a full sized specimen. But both will work with a little patience.
By Division
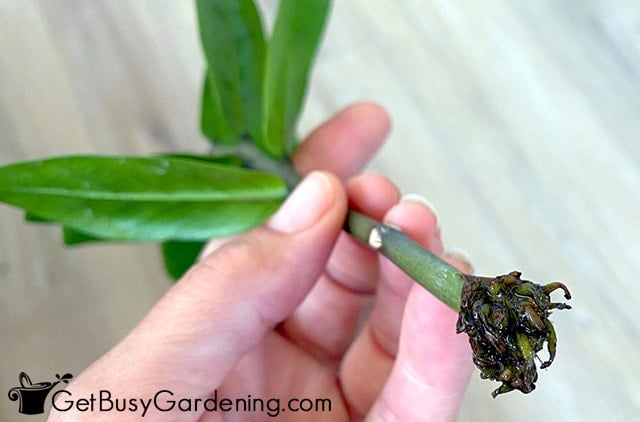
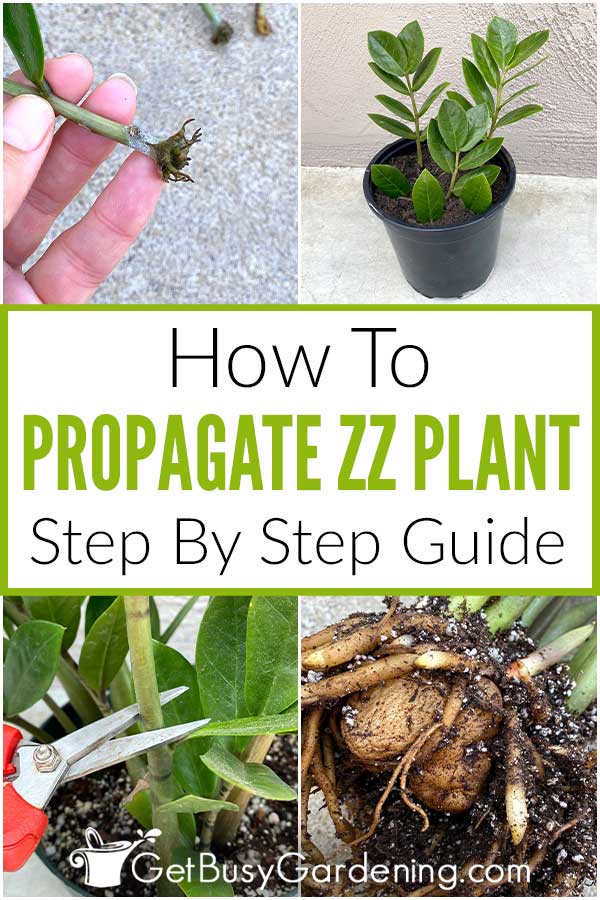
Mature ZZ plants that have filled their pot are great candidates for propagation by division.
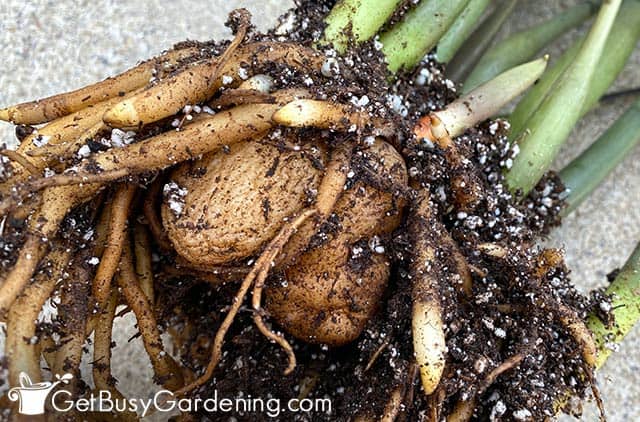
It’s possible to simply separate large chunks of the rootball to create one or two more. Or, tease apart the individual rhizomes segments to create many.
Related Post: Plant Propagation: A Detailed Guide For Beginners
When To Propagate Zamioculcas zamiifolia
The best time to propagate ZZ plant stem cuttings or leaves is in early spring or during the summer. That way they can benefit from the warmer weather in upcoming months.
Spring or summer are also the best times of year for dividing them. The warmer months will help them recover faster, giving you a higher chance of success.
Supplies For Propagating ZZ Plants
Before we get started with the steps for propagating ZZ plants, first I’ll give you a list of tools you’ll need.
Gather these before you begin to help the process go smoothly. You can find a list of more supplies you might need here.
- ZZ plant cuttings or leaves
- Rooting medium or water
- Pot or vase
- Rooting hormone
- Clean, sharp clippers
- Potting soil
- Heat mat (optional)
Propagating ZZ Plant From Stem Cuttings
When you’re ready to begin, follow these tips for taking stem cuttings correctly. The main thing to keep in mind is to only choose healthy stems with several green leaves.
How To Take ZZ Plant Stem Cuttings
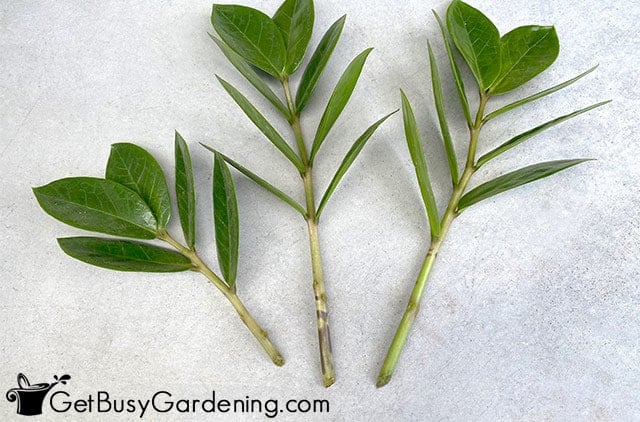
The great news is that it’s easy to take a good sized stem cutting from a Zamioculcas zamiifolia to propagate.
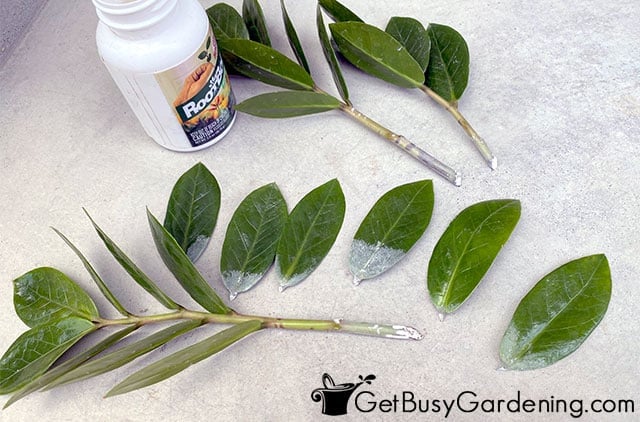
You can take them from anywhere that can provide at least 2” long segments, though I recommend 3-4” if possible.
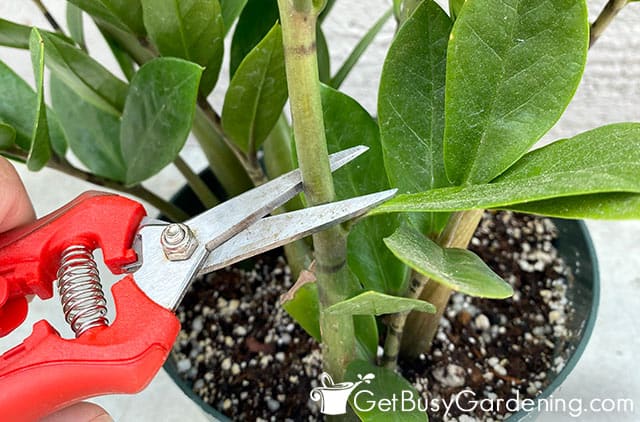
Use disinfected and sharp clippers to avoid crushing or damaging the stems, and to ensure you get a straight and clean cut.
Preparing The Stem Cuttings For Propagation
Shriveled or dried out cuttings will have a much harder time rooting. So it’s best to get them into the water or soil fairly quickly.
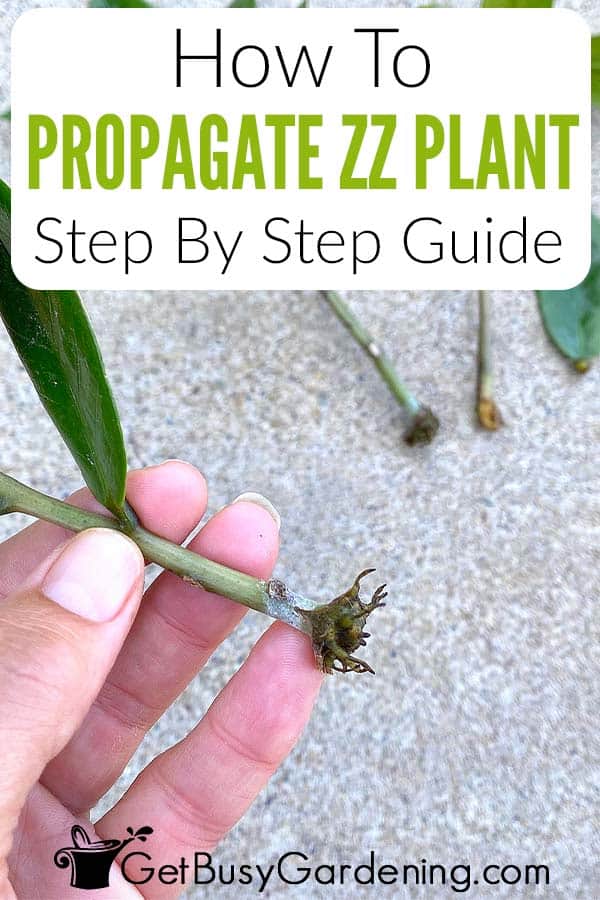
To prepare them, trim or pinch off the leaves on the lower 2″ of each cutting. That way you’ll have plenty of stem put into soil or water.
Propagating Zamioculcas zamiifolia From Leaves
If you’d rather try rooting some leaves, follow these tips for properly removing them. Since this is the slowest method of propagating ZZ plants, I recommend rooting several together.
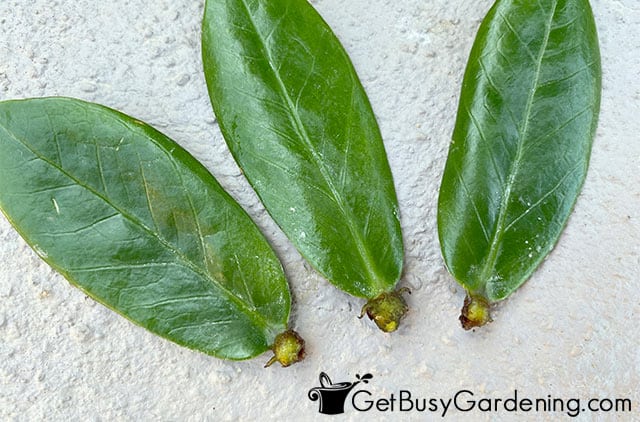
How To Take ZZ Plant Leaf Cuttings
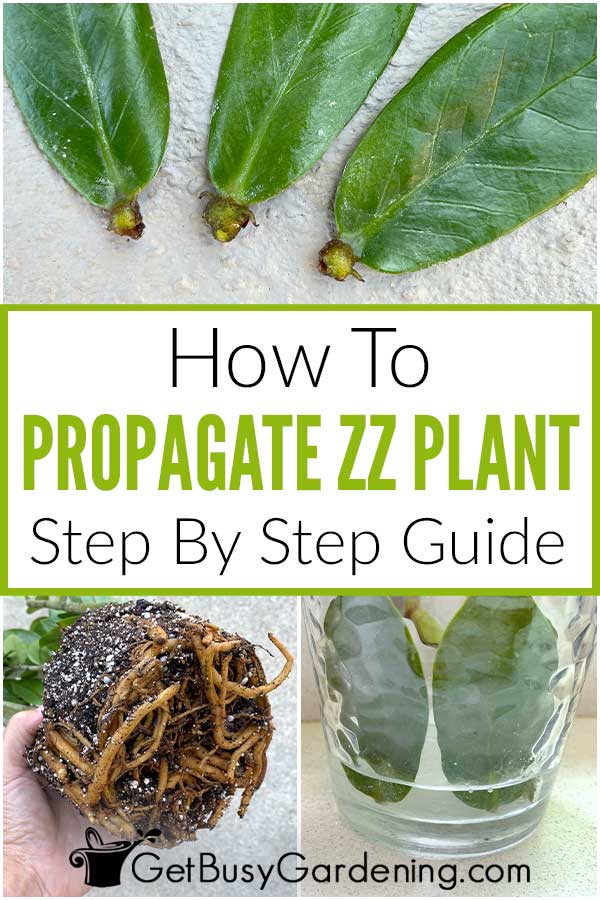
Use clean, sharp pruners to remove them, or pinch them off with your fingers. Be very careful though.
You need to keep the little nub of stem attached to the base of the leaf. So don’t tear or break them, or they may not root.
Preparing The Leaves For Propagation
There’s nothing special you have to do to prepare the leaves before rooting them. Just don’t let them shrivel or dry out, and get them into the rooting medium as soon as you can.
How To Root ZZ Plant Cuttings (Stem & Leaf)
Both the leaves and stems of a ZZ plant can be propagated in either soil or water. You’ll find step by step instructions for each method below.
Steps For Rooting ZZ Plant Cuttings In Soil
Using a soil medium instead of water is a great way to encourage strong roots, and has a high chance of success – but it can be slower.
Here are the step by step instructions for rooting either stem cuttings or individual leaves in soil.
Step 1: Prepare your pots and medium – To use this method, you’ll need a well draining rooting medium.
I recommend using a combination of equal parts potting soil and perlite or pumice to encourage drainage, and reduce the risk of rot. Fill the container almost up to the top.
Step 2: Use rooting hormone – Dust rooting hormone on the cut ends of both the leaves and stems to encourage faster growth.
Step 3: Create a hole with your finger – Make a little space so the hormone isn’t wiped off when you stick the cuttings into the soil.
I recommend burying stem cuttings 1” down. For leaves, bury only the bottom ¼. Then gently pack the medium around them so it comes into contact with the base, and holds it firmly in place.
Step 4: Moisten the rooting medium – Add enough water so that the soil is moist without being soggy. Allow any excess to completely drain from the pot.
Step 5: Place on a heat mat – ZZ plants root better with temperatures in the 75° to 80°F range. Lower temps will slow them down. Using a heat mat under the pot can significantly speed things up.
Step 6: Choose a bright location – They’ll thrive in a location that gets plenty of indirect bright light, but always protect them from direct sunlight.
Step 6: Keep the soil on the dry side – While your cuttings are rooting, don’t let the medium dry out completely. But keep it on the dry side, and avoid watering to the point of making it sodden.
Steps For Rooting ZZ Plant Stems Or Leaves In Water
Water is a fun way to watch the leaves and cuttings form their new rhizomes and roots. But they’re often less hardy using this method.
Rooting several at once will increase your odds, and you can put more than one into the same container.
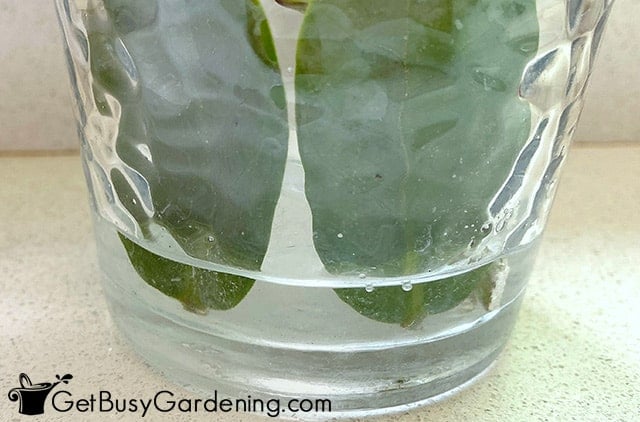
Step 1: Grab a container – Choose a glass or vase that will keep the cuttings upright. A shot glass or tea cup are great for the leaves. If you use a clear container, you can watch the roots form.
Step 2: Add water – The roots will come out at the very bottom of the cutting. So, only submerge the very ends to avoid rot. For leaves, the water should cover just the stem nub and bottom edge.
Step 3: Place in bright, indirect light – Shield the cuttings from direct sun during this time. Bright, filtered sunlight is ideal, or use a grow light if you don’t have a good location in your house.
Step 4: Keep the water clean – When you notice cloudiness or gunk in the water, rinse the container and refill it. Mucky or stinky water is a sign of rot. So check the stems, and discard any that are mushy.
How To Propagate ZZ Plant By Division
Propagating your ZZs by division is a great way to establish good sized plants quickly. If yours is mature and has filled the pot, this is a good method.
Be careful about doing it too often though. Dividing them is stressful, and they’ll need a few years to recover afterward.
Steps For Dividing ZZ Plants & Rhizomes
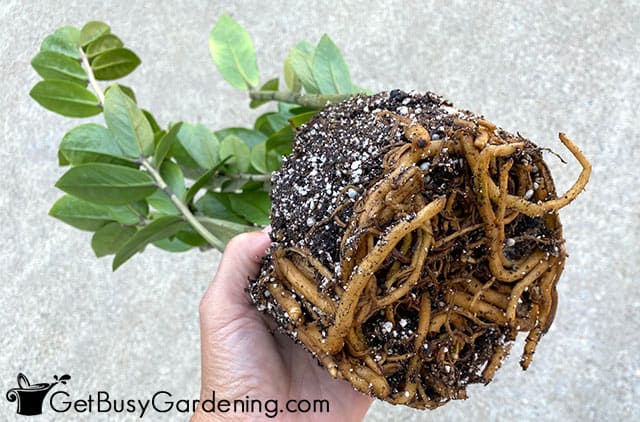
Below are the steps for how to propagate ZZ plants by dividing the rootball or rhizomes. It’s best to be gentle, so tease them apart by hand, rather than cutting or breaking them.
Step 1: Prepare new pots – Use a well-draining mixture of potting soil and perlite. Place enough in to cover the bottom of the container.
Step 2: Divide the rootball – Slide the whole thing out of the pot by gently placing your hand against the top of the soil and tipping it. Then tease apart the rhizomes individually, or into a few bigger clumps.
Step 3: Pot up the divisions – Set each division into a container and fill it with soil until they’re buried at the same depth they were in the original pot.
Ensure they are standing upright, then gently press the soil around the rootball, and add more on top if necessary.
Step 4: Water thoroughly – Give them a generous drink until the soil is moist, and allow the excess to drain out of the bottom of the pot. If the soil settles after watering, fill in the empty spaces.
Step 5: Place in bright, indirect light – They can tolerate low light, but prefer a spot with plenty of natural light out of the direct rays of the sun.
How Long Does It Take For ZZ Cuttings To Root?
As simple as ZZ plants are to propagate, cuttings can take a really long time to root. Even with ideal temperatures and lighting, they can take up to 3 to 4 months.
But it’s best to wait until they have roots that are at least 1” long before potting them up, which can take several weeks longer.
If it’s colder than 75°F, or there’s not enough light, this process can take up to 9 months. So don’t worry if they seem to be doing nothing for a long time.
Using a heat mat or a grow light to add extra warmth and light can speed things up so they will root faster.
Why Won’t My Zamioculcas zamiifolia Plant Propagate?
There are many reasons why your ZZ plant won’t propagate. Cool temperatures, dry air, and over or under watering can all affect your success.
Use a heat mat if your home is on the cooler side, and give them a light misting every few days if the air is dry.
The rooting medium should be evenly moist, never soggy or dried out. If you’re using a vase of water, don’t let it evaporate below the developing roots.
How To Care For Newly Propagated ZZ Plants
It’s common for newly propagated ZZ plants to droop after division or potting up rooted cuttings. Give them a few days, and they should pop back up.
Keep the soil moist, and place them in a bright, warm area with average humidity to help them recover faster.
Potting Up Zamioculcas zamiifolia Cuttings & Rhizomes
When it’s time to pot up rooted cuttings, prepare containers with a well draining mixture. Combine general purpose potting soil with perlite, or use a cactus mix for best results.
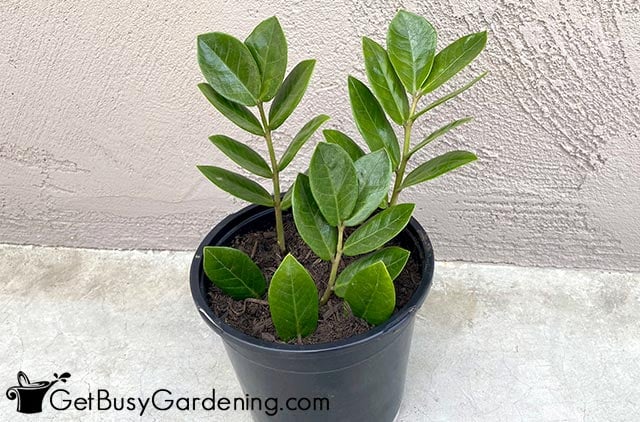
Nestle them into the soil, taking care not to break off any of the tender new roots, and gently pack it in around them. The rhizomes and roots should be completely covered and stable.
Give your new babies a good drink of water, allowing the excess to drain from the pot. Then return it to a warm, bright location.
ZZ Plant Propagation FAQs
Below you’ll find answers to the most commonly asked questions about propagating ZZ plants. If I haven’t answered yours yet, ask it in the comments below.
How long does it take for a ZZ plant to root in water?
It can take 3 to 4 months or longer for a ZZ plant to root in water. It’s best to give them ample time to develop mature roots that are at least an inch long before potting them up.
Can you propagate a broken Zamioculcas zamiifolia plant stem?
Yes, you can propagate a broken Zamioculcas zamiifolia plant stem, as long as it has leaves on top. Just trim the damaged end to create a straight, clean cut first.
Although ZZ plants are slow to propagate, the process is pretty simple. And it’s so much fun to take your mother plant and turn it into lots of new babies to enjoy and share with friends.
Up next, learn exactly how to care for your new ZZ plants here.
If you want to learn how to multiply all of your plants, then my Plant Propagation eBook is for you! It will show you all the best ways to propagate any type that you want. Download your copy today!
More About Plant Propagation
- Propagating Christmas Cactus
- How To Root Plumeria Cuttings
- How To Propagate Snake Plant (Sansevieria)
- Propagating Coleus Cuttings
- How To Propagate Pothos (Devil’s Ivy)
- How To Propagate Money Tree (Pachira aquatica)
Share your tips for propagating a ZZ plant in the comments section below.



Jody L Bearden says
Hi my ZZ plant has one stem. it had 2 the other died when I moved the plant. What should I do? Thank you
Amy Andrychowicz says
If your plant only has one stem, then you should definitely check to make sure you’re giving it the proper care – here’s my complete ZZ plant care guide to help you out. You certainly could try to cut off the one stem and root it, as long as it’s healthy, but you may want to try to save the plant instead using my guide.
Jodie Venturino says
I am new to having plants. I’ve learned so much already. Thank you!
Amy Andrychowicz says
You’re welcome!