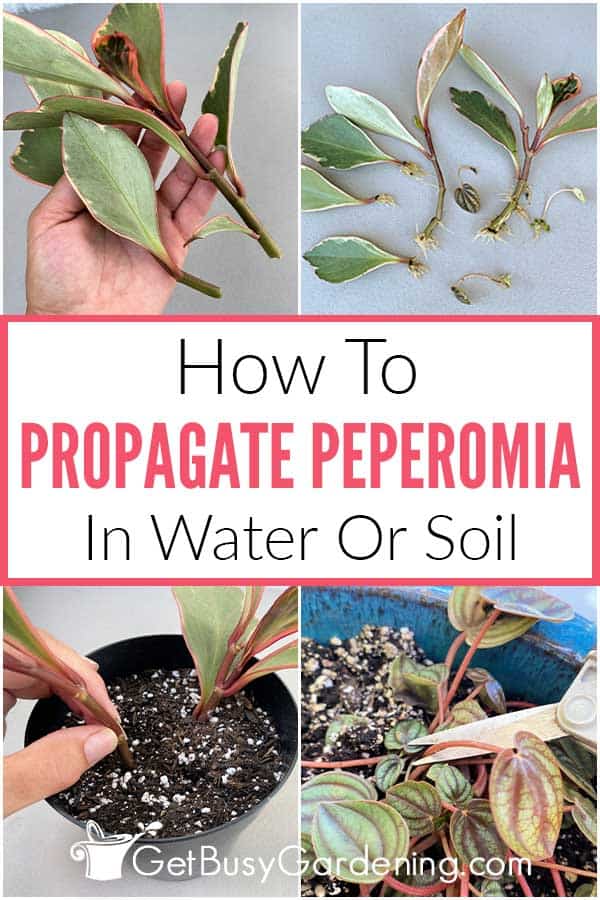
Propagating peperomia is simple and fast, and a fun way to multiply your collection. In this post I’ll show you exactly how to root stem cuttings or individual leaves step by step.
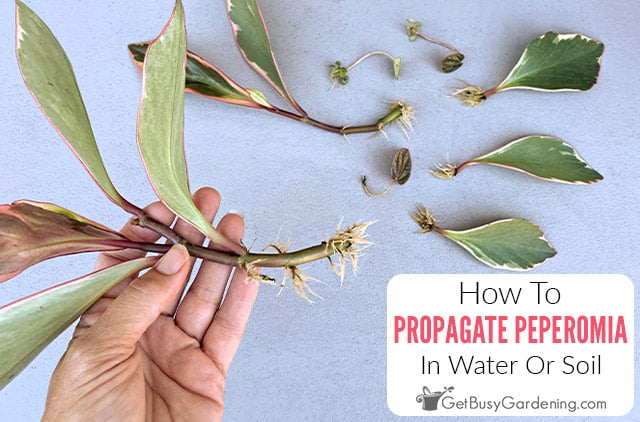
Any gardener with a peperomia plant will be excited to learn that it’s very quick and fun to propagate them.
This guide includes step by step instructions for a few different methods, and easy-to-follow tips that will help you get the techniques just right.
Everything you need to propagate your peperomia is included here, so you’ll be able to create lots of new plants for yourself, friends, and family.
Peperomia Propagation Methods
You can propagate a peperomia using several different methods. Cuttings, seeds, and division are all possible techniques, but some are easier than others.
The great news is that whether you have a Peperomia obtusifolia (baby rubber plant), Peperomia argyreia (watermelon), Peperomia caperata (ripple), or any of the other hundreds of varieties, you can use these same steps.
From Cuttings
Stem cuttings are the easiest and most common approach to peperomia propagation.
Roots will develop on healthy stems from exposed leaf nodes in either water or soil.
You can even use a single leaf, but it can be a bit trickier, and will take far longer to become a full-sized plant.
By Division
Division is another viable method for propagating peperomia, and it’s fairly simple to multiply them that way.
Remove the plant from the pot, then use a knife to divide the rootball into chunks that have both stems and roots.
They can be potted up into a separate container to create several larger, fuller plants faster than using cuttings or leaves.
From Seeds
When flowers are pollinated they will form a seed pod. It can be left to dry on the plant, then collected and used to produce new ones.
While it’s possible to use seed, flowering is rare, and germination is both difficult and inconsistent. It will also take a very long time to produce a mature plant.
When To Propagate Peperomia Cuttings
The ideal time for propagating peperomia cuttings is during the warmest months of the year. The heat helps them root and produce new starts faster.
The best seasons are spring and summer. But, if you live somewhere warm, you can even attempt it during the fall.
Propagating Peperomia From Stem Cuttings
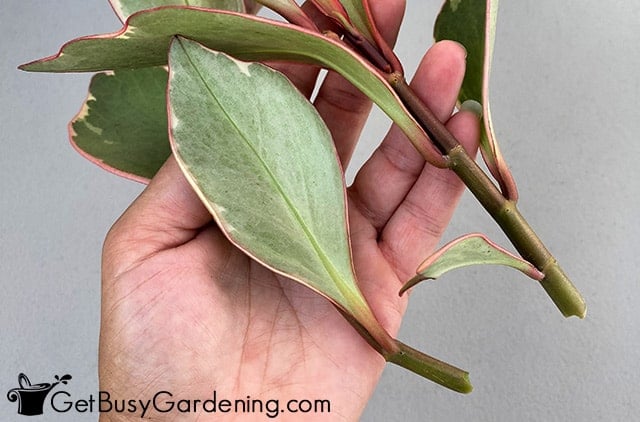
The first step in propagating peperomia is learning how to take and prepare the cuttings. It’s not difficult, but doing it right is important for success.
How To Take Stem Cuttings
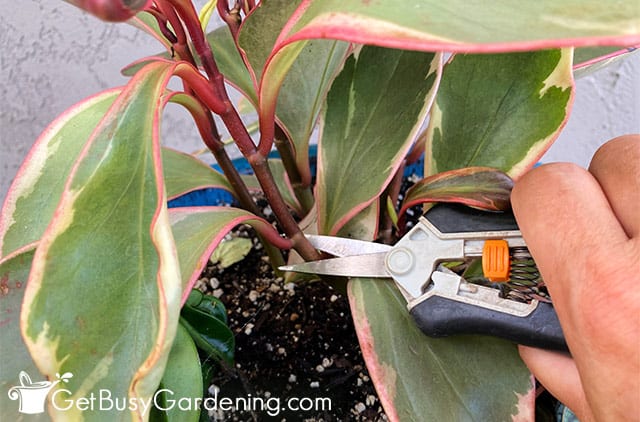
Start by choosing a 3-5” stem with leaves attached. It’s important that it’s healthy or it may not root.
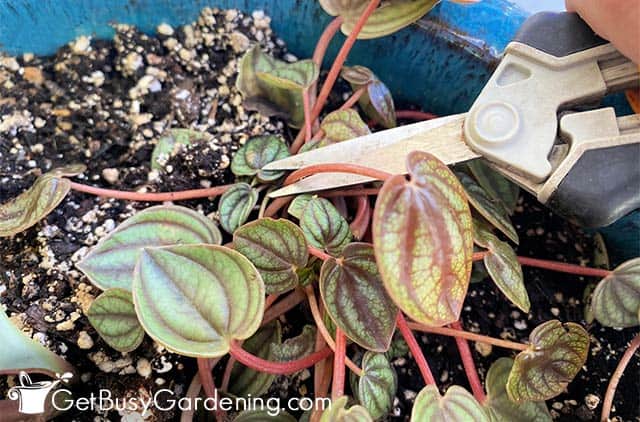
Use a sharp, sterile pair of micro snips or precision pruners to cut it just above a leaf, or at the base of the stem.
You can take several cuttings at once, but don’t remove more than ⅓ of the plant at a time, or it may suffer.
Preparing Stem Cuttings For Propagation
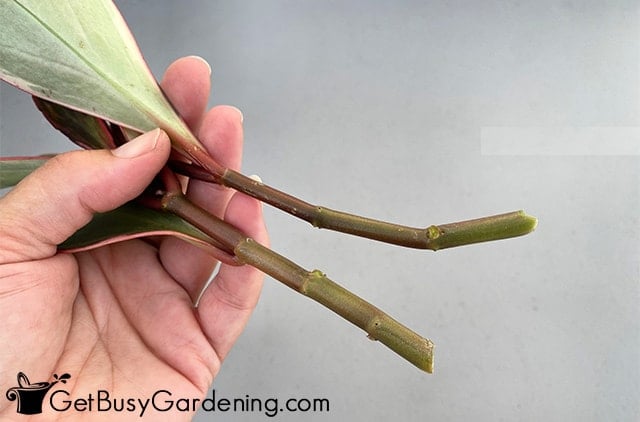
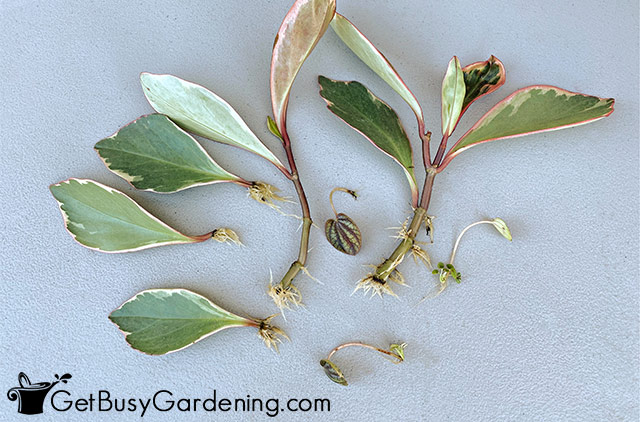
Once you’ve gathered your cuttings, remove all of the leaves except those on the very top.
Ideally you’ll have 2-3 exposed leaf nodes along the stem so you can have a higher chance of strong root development.
Once prepared, get ready to propagate your peperomia right away. They’ll begin to wilt fairly quickly, and are less likely to root the longer you wait.
Propagating Peperomia From Leaves
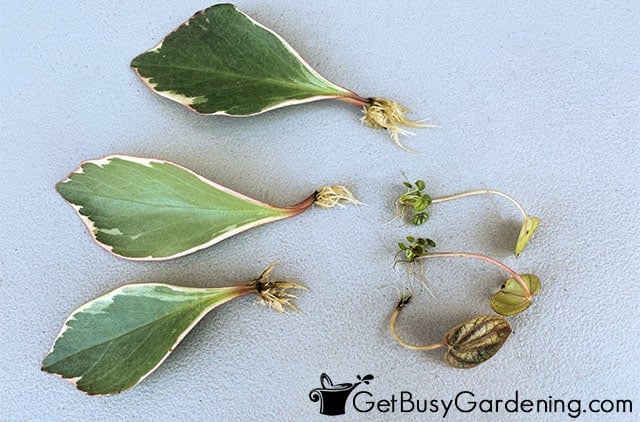
It’s possible to propagate peperomia from a single leaf, but it takes longer to become a full-sized plant.
It can be a bit more difficult too. But it’s still a fun experiment to try, especially with the leaves you removed.
How To Take Leaf Cuttings
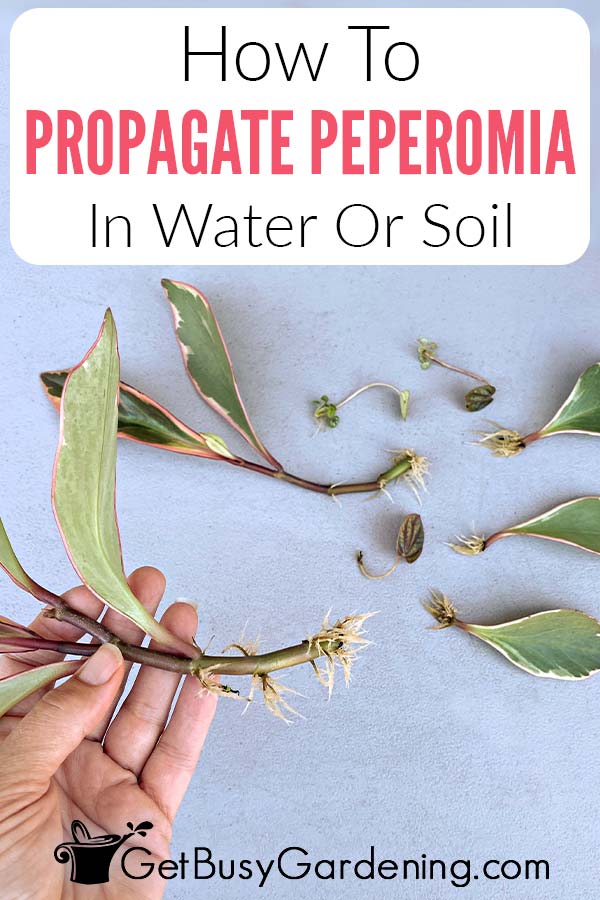
The leaves are simple to remove and require almost no preparation. Cut them from where they attach to the stem using sharp, clean snips.
Make sure the bit of stem that connected them to the plant is still intact at the base of the leaf or they won’t be able to root.
How To Propagate Peperomia Cuttings (Stems & Leaves)
With peperomia stem or leaf cuttings prepared and ready to go, it’s time to start propagating them.
Below you’ll find a supply list and detailed step by step instructions. The exact tools you’ll need will vary depending on the approach you choose. See my full list of the supplies I use here.
Supplies Needed:
- Peperomia cuttings
- Micro snips or precision pruners
- Rooting hormone
- Rooting medium or water
- Vase, clean pot, or propagation chamber
- Pencil or chopstick
- Hand trowel
- Heat mat (optional)
Steps For Rooting Peperomia Cuttings In Soil
Propagating peperomia in soil is a reliable method that produces strong, hardy starts. They’re much less likely to experience issues like transplant shock or rot when potted up.
Step 1: Prepare the medium – A fast-draining medium that’s light and airy is ideal for propagating peperomia.
Try mixing 2 parts of regular potting soil with 1 part of perlite or pumice, and 1 part of coco coir to make your own.
Step 2: Prepare the container(s) – Moisten the medium until it’s damp but not soggy. Use your hand trowel to fill the container with several inches of the dampened mixture.
You can also use a propagation chamber to hold several at once, in that case add 3-4″ of the medium in the bottom.
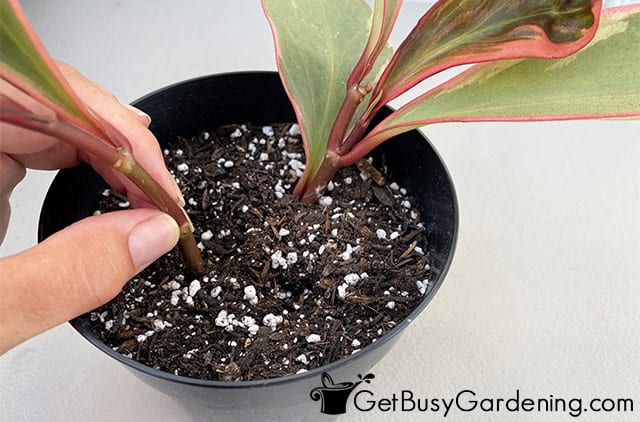
Step 3: Make holes – Use your finger, a chopstick, or a pencil to make holes in the medium deep enough to cover the exposed leaf nodes, usually 3-4”.
For single leaves, make very shallow holes just deep enough to bury the small stem piece.
You can combine several in the same container, but make sure they have enough space for air circulation. Overcrowding can lead to mold and rot.
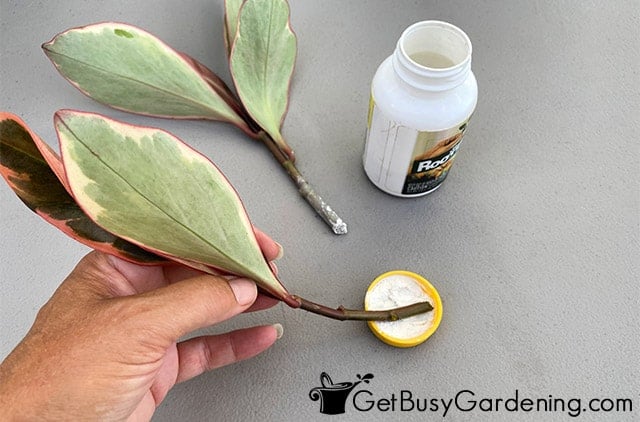
Step 4: Apply rooting hormone – Dip the stem into rooting hormone so it completely covers the cut end or exposed nodes. This is a very easy way to encourage faster, hardier roots.
Step 5: Plant cuttings or leaves – Place the dusted ends into the prepared holes and pack the medium gently around them to prop them upright.
Try to keep most of the leaf above the soil line and bury only the small stem end. If too much of it is covered, it will likely rot.
Step 6: Place somewhere warm and bright – Choose a location that has plenty of bright indirect light away from cold drafts or AC vents.
A heat mat is optional, but a great way to speed up rooting and keep the temperature consistent.
Step 7: Cover with plastic (optional) – Tent a large plastic bag over the pot, or place the top on your propagation chamber.
This is optional, but creates humidity that helps prevent drying out. Make sure there is no plastic touching the leaves or they will rot.
Step 8: Monitor the moisture – Keep the medium damp, but never let it get soggy or allow too much moisture to build up on the plastic.
If you see a lot of condensation, air it out to prevent mildew problems.
Step 9: Wait for new growth – When new growth begins to appear on top of the cuttings, you’ll know they’ve successfully rooted.
Steps For Rooting Peperomia Cuttings In Water
Propagating peperomia in water is a quick, easy, and fun technique. But it tends to produce weaker roots that can have difficulty transitioning back to soil.
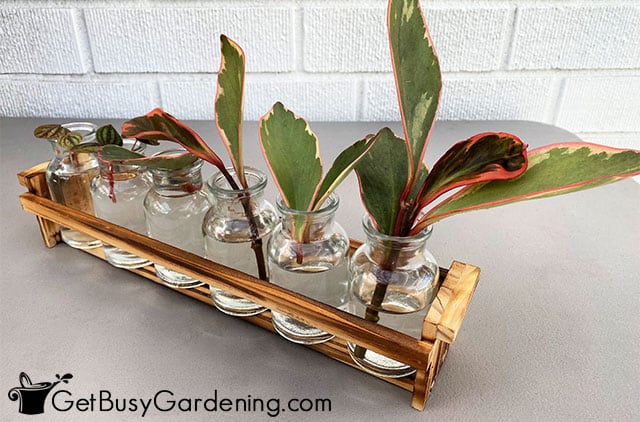
Step 1: Fill the vessel with water – Use a small jar, vase, or bowl and fill it with enough lukewarm water to cover the stems, but not touch the leaves.
I like to use clear containers so I can see the roots forming, but anything that will keep the cuttings upright will work.
Step 2: Submerge the nodes – Place the stems into the water so that the exposed leaf nodes are covered. Or submerge only the stem of the individual leaves.
You can place several in one container, but if any leaves are under water they will rot.
Step 3: Place in a bright location – For the best results, keep them in a location out of direct sun but with plenty of bright, indirect light.
Step 4: Monitor water levels and cleanliness – Don’t let the water level drop below the nodes. Also watch out for murky or cloudy water, which is a sign of bacteria and mold growth.
Replenish with clean, lukewarm water if necessary.
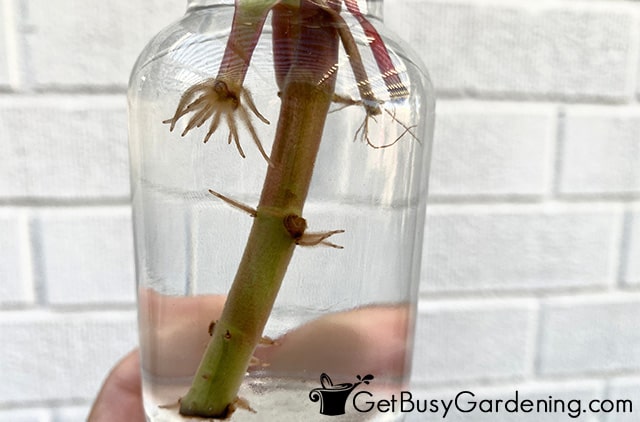
Step 5: Wait for roots to form – Watch for the roots to develop. As soon as they’re 1-2” long, pot them up. If you wait much longer, they can become weak or start rotting.
How Long Does It Take For Peperomia Cuttings To Root?
How long it takes your peperomia cuttings to root depends on the environment and the propagation technique you chose to use.
With ideal light, warmth, and humidity, it can take as little as 1 week to start seeing new roots. But it usually takes between 3-6 weeks before they are mature enough for potting.
Why Won’t My Peperomia Propagate?
There are several factors that can prevent peperomia propagation. Too much or too little moisture, lack of light, or cold temperatures can all be reasons.
Keep the soil lightly moist or the nodes completely submerged in the water. If you’re using a propagation chamber or plastic bag, make sure it’s not causing too much moisture buildup.
If you have trouble providing enough light, adding a grow light can help. Warmth is also important. If your house is chilly or they’re by a cold window, adding a heat mat is useful to keep them warm enough.
How To Care For Peperomia Babies
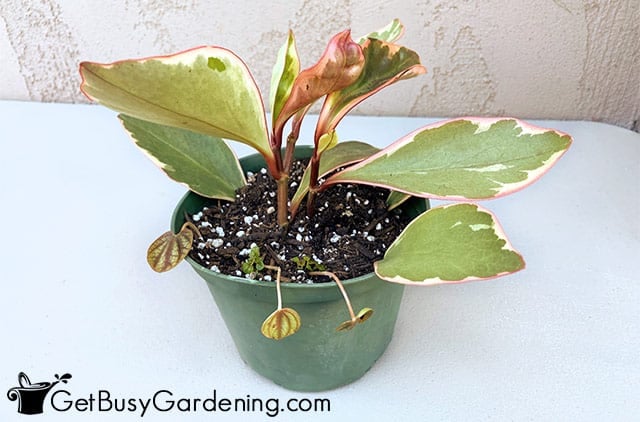
When the roots are long enough or new growth has started, pot them up with a loose, airy, well-draining medium in a container with drainage holes.
Keep your propagated peperomia lightly moist and in indirect light while they settle into the new containers.
Drooping is a common sign of transplant shock, especially for cuttings rooted in water. Give them a couple of days and they should pop back up. After a few weeks you can resume regular care.
FAQs
Here I’ve answered some of the most commonly asked questions about peperomia propagation. If yours isn’t on the list, please add it to the comments below.
Is it better to propagate peperomia in water or soil?
There are pros and cons to propagating peperomia in water or soil, and they can each be successful. Water tends to be faster and easier, but can result in weaker roots. Soil produces stronger starts and is reliable, but can take longer, and requires more supplies.
Can you propagate peperomia from a single leaf?
Yes, you can propagate peperomia from a single leaf as long as the small stem piece that attached it to the plant is still intact.
Can you root peperomia in water?
Yes, you can root peperomia in water. But they may not be as strong as they would be in soil, and it can be more difficult to do with a single leaf.
How long does it take to propagate peperomia in water?
How long it takes to propagate peperomia in water depends on environmental factors, such as warmth and light, but the length of time can range anywhere from 1-6 weeks.
Now that you know the methods and supplies needed to propagate peperomia, you can easily multiply your favorite varieties. It’s a great way to create new plants to enjoy and share.
If you want to learn how to multiply any type of plant you have, then you need my Plant Propagation eBook. It will teach you all you need to know, so you can multiply your collection as much as you want. Download your copy today!
More About Plant Propagation
- Propagating String Of Pearls
- Plant Propagation: A Detailed Guide For Beginners
- How To Propagate Lipstick Plant (Aeschynanthus)
- How To Propagate Snake Plant (Sansevieria)
- Spider Plant Propagation In 5 Easy Steps
- How To Propagate Wandering Jew (Tradescantia)
- How To Propagate Money Trees
Share your peperomia propagation tips in the comments section below.



Leave a Reply