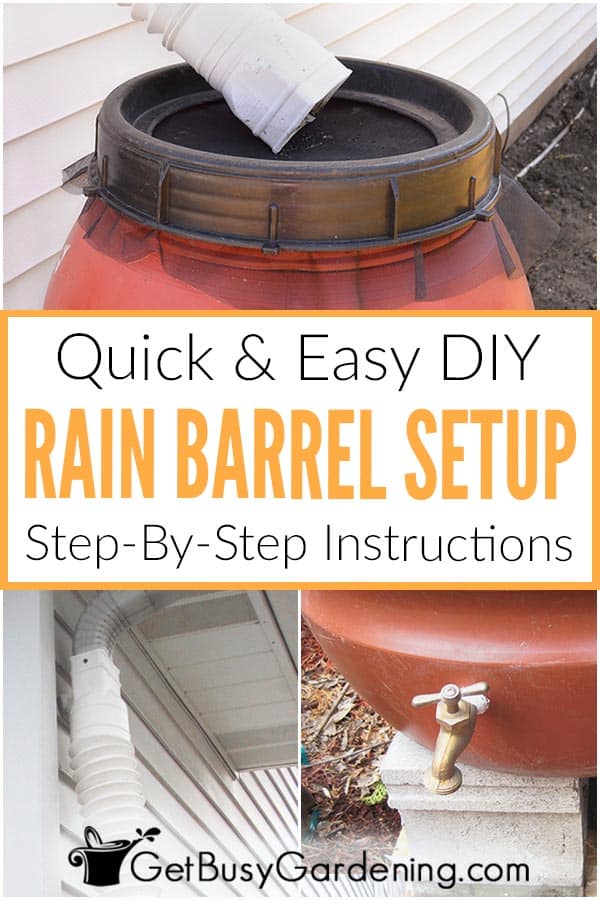
Setting up a rain barrel is easy, and doesn’t take much time to install. In this post, I will show you where to put it, give you detailed step-by-step instructions for how to set up rain barrels, and even give you tips for connecting them together.


Having a rain barrel is fun, and such a wonderful asset for any gardener. But many newbies are intimidated by the thought of getting it set up.
Installing a rain barrel may seem like a big complex task, but it is actually pretty simple. These steps take less than an hour, and it’ll be ready to use right away.
So, if you’re new to rainwater harvesting, then this tutorial is for you. Follow these simple rain barrel setup instructions, and get yours ready to go today…
Where To Install A Rain Barrel
Before setting up a rain barrel, you’ll need to decide where to put it. Look at all of the downspouts on your house, shed or garage, before choosing a location.
Here are some things to consider when you’re looking for the perfect place…
- Easy access – Put it in a spot that is easy to get to, and close to the area where you will need the water the most (like near your garden or potted plants).
- Level ground – Make sure it is on level ground. Water is really heavy, and if the barrel is not level, it could fall over once it’s full.
- Use a diverter – If you’re concerned about the overflow pooling around the foundation of your house, add a downspout attachment that will turn off the flow of water once it’s full. This will allow the excess to run through the gutter like it normally would.
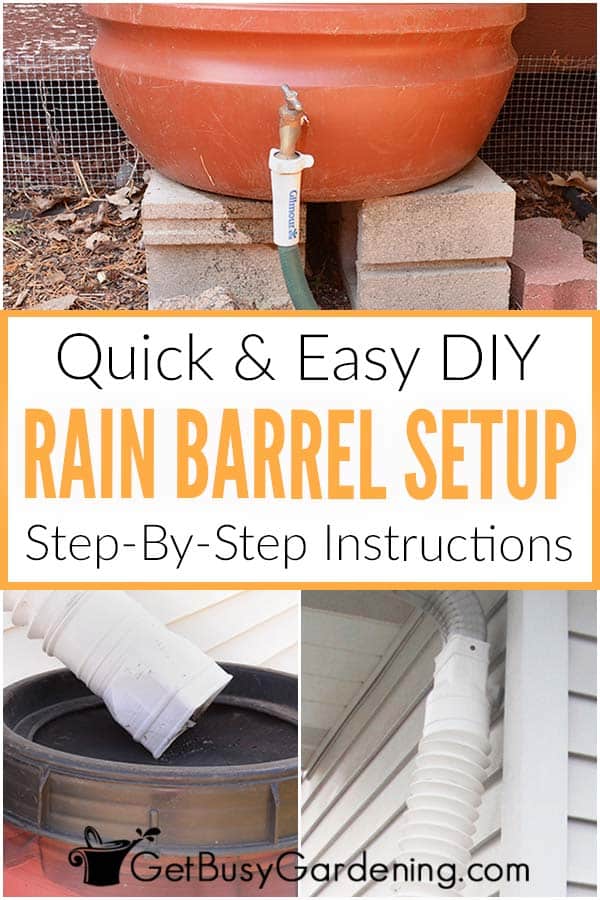
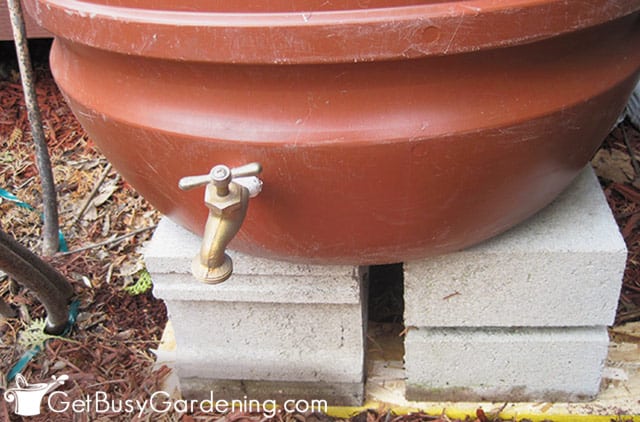
- Elevate your barrel – Use landscaping blocks or bricks to elevate the barrel. This will make it work better (allowing gravity to help with water pressure), and also gives you extra space below the spigot so it’s easier to access.
Easy Rain Barrel Setup Steps
Setting up a rain barrel is easy, and only takes a few minutes. You’ll only need a few tools to get it installed, which you probably already have around the house…
Supplies Needed
- Rain barrel
- Level
- Ladder
- Flat head screwdriver
- Flexible tubing, or downspout diverter kit
- Screen material (optional)
- Concrete blocks (optional)
- Tamper (optional)
- Hacksaw (optional, if you need to cut the downspout)
Step By Step Instructions
After gathering your tools and supplies, follow these easy rain barrel installation steps. The estimated set up time is about 30 minutes, but that can vary depending on your tools and supplies.
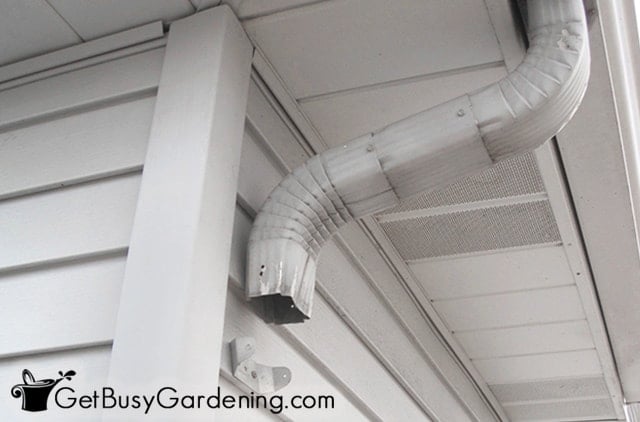
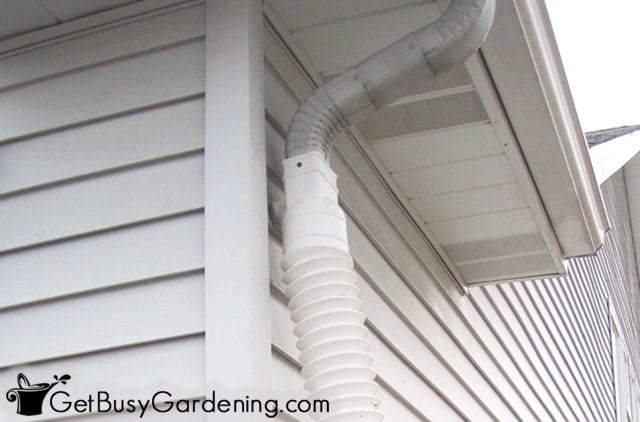
Step 1: Remove the downspout – Grab your ladder and the screwdriver, then look for the best spot to detach the downspout.
Find a seam in the gutter that is closest to where the top of the rain barrel will be. Then simply remove the screws from the downspout, and remove it.
Step 2: Level out the ground – Once it’s full, your rain barrel will get very heavy. It’s important to make sure it is as level as possible, so it won’t fall over. First, place it in the spot where it will sit, then use your level to see how off it is.
You may need to dig out or add soil to the spot to level it out. You can use a tamper tool for this, which makes it easier to level out the soil.
Step 3: (optional): Elevate the rain barrel – Consider placing it on top of concrete blocks to raise it off the ground.
Adding blocks underneath makes it easier to use, and also allows gravity to help increase water pressure. You can use cinder blocks to raise it up, or buy a stand for it.
Step 4: Add flexible downspout tubing – This tubing will direct the rainwater from the gutter into the rain barrel.
Secure the flexible tubing onto the gutter using the screws from the original downspout, so it won’t blow away.
You may need to drill or poke holes in the tubing in order to screw it to the gutter. Then you can simply adjust it so it will empty into the opening.
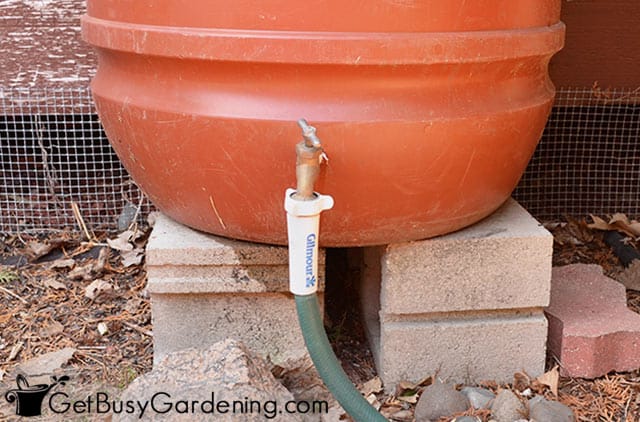
Step 5: Control the overflow – Your rain barrel should have an overflow spout near the top. You don’t want the overflow to empty right next to the house. So I use a cut off piece of an old hose to control where the overflow goes.
Instead, you can buy a downspout diverter attachment. That will turn off the flow once the barrel is full, allowing the excess to run through the gutter like it normally would.
Or you could use a fancier diverter kit to make installing your rain barrel even easier. Use a hacksaw to cut the gutter, and install the rain barrel diverter.
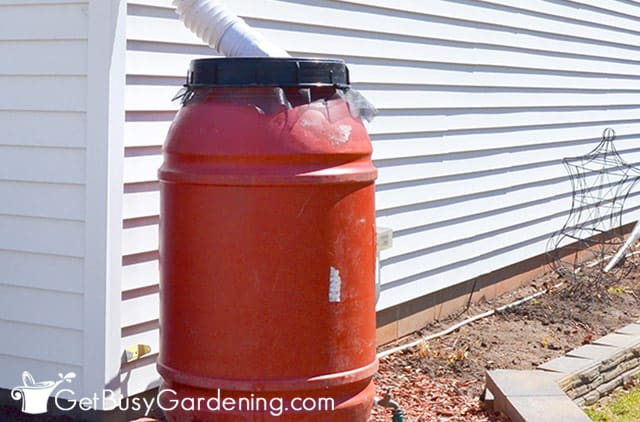
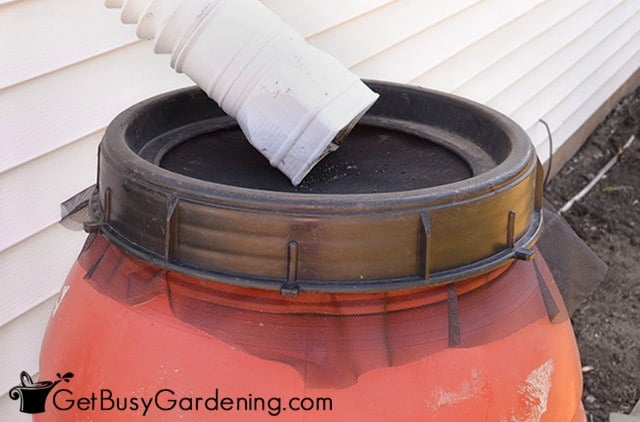
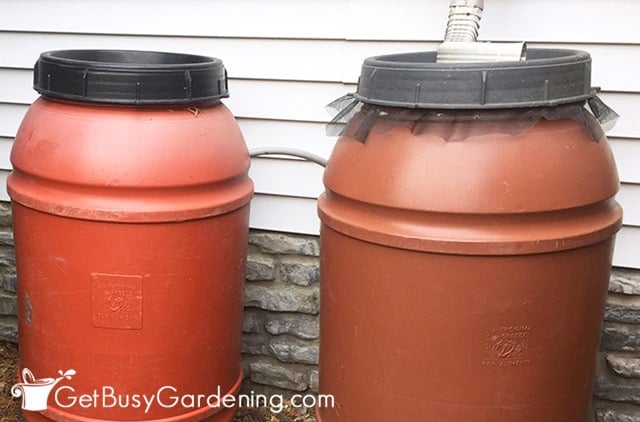
Step 6 (optional): Cover the opening – Some types fill up through the top, which is wide open.
In order to protect the water, and keep bugs (like mosquitoes) and debris out, cover the opening with a piece of window screen.
Simply take a piece of screen material, and cut it to fit over the opening. Then secure it under the lid.
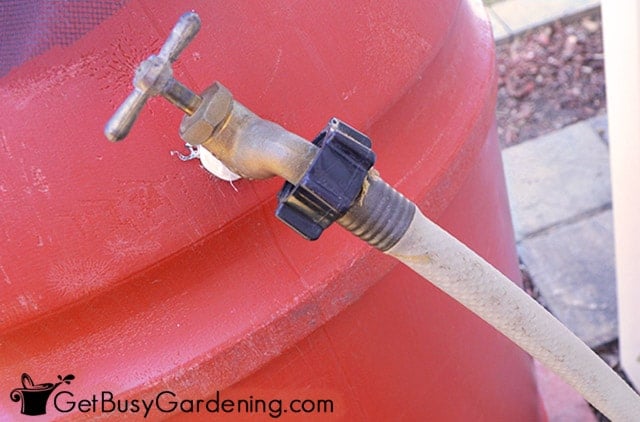
Step 7 (optional): Add a hose to the bottom spigot – In order to make it easier to use the water, attach a hose to the spigot at the bottom as the final step in installing your rain barrel.
I used a cut off piece of an old hose for mine, but you could certainly use a regular sized garden hose, if that’s what you prefer.
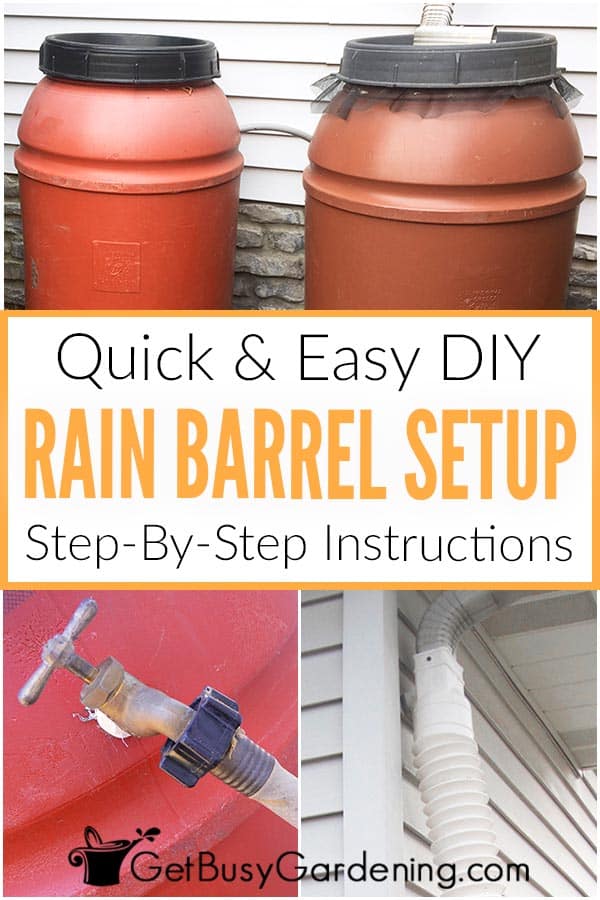
How To Connect Two Rain Barrels
If you have enough space, you can connect two rain barrels together to collect even more water!
To do that, simply run a hose from the overflow valve on the first one, and direct it to empty into the second. Otherwise, you can use a connector kit to hook them up.
Related Post: Winterizing A Rain Barrel In 4 Easy Steps
That’s it! Your rain barrel setup is complete, and you are ready to start using it right away! Installing a rain barrel of your own is really simple, and doesn’t take much time. So, what are you waiting for?
More Garden Irrigation Posts
- 7 Awesome Benefits Of Rain Barrels
- How Do Rain Barrels Work?
- How To Water A Vegetable Garden, The Right Way!
- How To Install A DIY Drip Irrigation System For Potted Plants
Give us your best rain barrel setup tips in the comments section below.

Michael Wisley says
It’s a shame they don’t make some kind of a filter and a plastic hose to go off the gutter into the top of the rain barrel that you could just cut and make fit with a filter I can’t believe no one has invented one maybe I will become a billionaire from inventing one
Amy Andrychowicz says
Haha, yes, your rain barrel filter idea sounds like a great invention!
Lisa says
What do you do when you don’t have gutters? I live in a trailer house and we don’t have normal gutters like other houses. But I really want to collect rain water! Help
Amy Andrychowicz says
There are rain barrel attachments that you can installed to collect rainwater if you don’t have gutters. They look like a giant funnel. I have never used one before, so I can’t speak to how well they work.
Lori says
What size is recommended for a good size rain barrel?
Amy Andrychowicz says
It depends on what you’re planning to use it for. I have two 55 gallon rain barrels, and one of them provides more than enough water to keep my containers and houseplants watered all summer. I use the other barrel to top off my small pond, or use it for watering parts of my garden. If you want to be able to water an entire garden, then you will need something much larger (depending on the size of your garden). But, if you’re just looking for a basic rain barrel that you can use to water your containers and houseplants, then a 50-60 gallon size would be perfect.
Hazel Casillas says
We are in So Cal where we are experiencing horrible drought and our City provided 2 rain barrels per household, the instruction are a picture which isn’t very helpful. Your utube is great, but I don’t know how to set the barrel up to overflow to the 2nd barrel.
Amy Andrychowicz says
Wow, that’s wonderful that your city provided rain barrels for you! Awesome! It’s hard to know how your rain barrels can be chained together, because they’re all so different. There should be an overflow valve of some kind toward the top of the rainbarrel, mine has a hole where I attach a spigot for overflow. If I was going to chain mine together, I would put the second rain barrel right next to the first one, and have it a few inches lower (so gravity can help). Then I would attach a short piece of hose to that overflow spigot on the first rain barrel, and put the end of the hose so that the water will empty into the second rain barrel. There are also attachments you can buy for certain types of rain barrels that you can use to chain them together. Good luck!
michael smith says
I have in-the-ground rain barrel/cisterns than collect rain water. They do no have lids though and end up filled with debris and mosquito larvae. Is there a source for lids? Thanks.
Amy Andrychowicz says
Could you use a piece of screen material like I do? Check at your local hardware store, they might have a stronger material that would work better for your larger system.
Amy
Avis says
Or mosquito dunk which I found in Home Depot.
Amy Andrychowicz says
Yes, but make sure they’re the all-natural ones and not made from synthetic chemicals.
Vegetarian Breakfast Recipes says
Thanks Amy! I'm going to give that a try. (Sorry I meant adding the spigots looked like something you did 😉 )
Amy Andrychowicz says
Great, hope it works out for you! Let me know how it goes.
Vegetarian Breakfast Recipes says
Hi Amy,
I'm setting up 2 rain barrels this year. (Very excited!!) I am wondering how you attached the spigots to your rain barrels, they look homemade and a great idea. I will probably be filling up a watering can as opposed to using a hose so a spigot would be handy.
Thanks in advance for your help.
Sam
Amy Andrychowicz says
Hi Sam,Mine aren't homemade, I bought them. But, I believe you could buy spigots like this at your local home/hardware store (HD, Lowe's…etc). Once you find the spigots, you would buy a drill bit the same size and drill the hole. The holes in mine are just drilled in like this. You can buy special tape for the end of the spigot that you screw into the hole, that will help seal it
Tammy says
We just installed like 30 spigots at our greenhouse to rain barrels got them at Lowe’s
M71 BRASS HOSE BIBB MALE
Body: Brass
Connection: (1/2″) Male NPT/Solder x Garden Hose Thread (3/4″) Male NPT X Garden Hose Thread
Pressure: 125 CWP
Sizes: 1/2″, 3/4″
Amy - Get Busy Gardening says
Hi PlantPosting! If you decide to get one, I know you'll love it!! I use the water in mine for everything during the summer and miss it when they are empty. Good luck!
PlantPostings says
I've been meaning to set one up. I think this might be the year. Such a great idea!