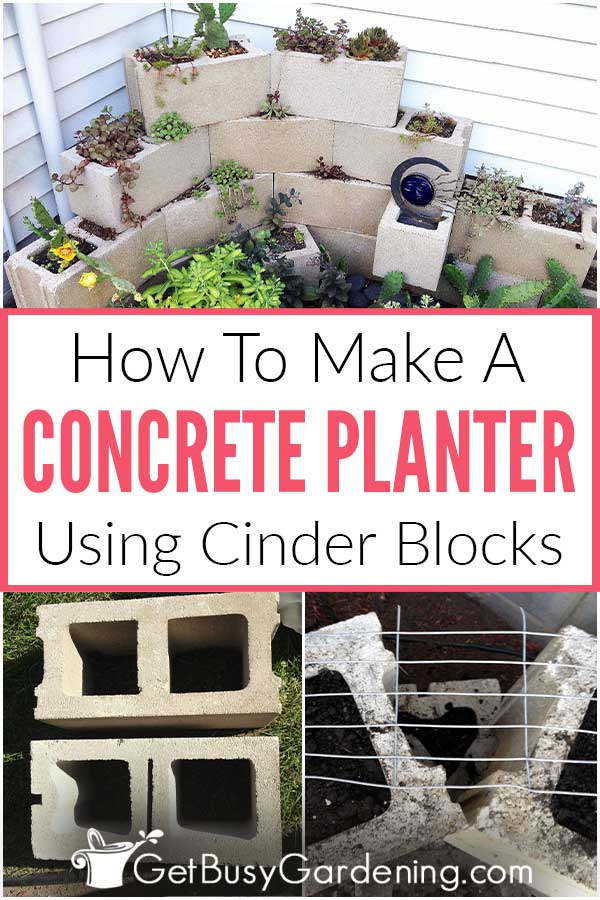

Building a DIY cinder block planter is fun, inexpensive, and looks fantastic. Plus you can get super creative with it, and come up with your own unique design.
It’s also versatile, so you can put it anywhere – and make it as small or large as you need. Another thing I love about this project is that you can customize it to fill your space.
In this post, I’ll give you the detailed steps for how to make your own concrete cinder block planter, including cost, design, printable instructions, and planting tips.


How Much Does It Cost To Build A Concrete Block Planter?
When I built this project, the cement blocks were only $1.00 each; which came to a total of $16 for my entire planter. But the exact price may vary depending on where you live.
I needed more soil to fill it than I expected though, and that ended up costing almost as much as the blocks. But I still built the entire thing for under $30, an amazing price for this large of a container!
Plants can also be a big expense. I saved money by using ones that I already had in my garden. But if you need to buy new ones, then you should also factor that into the cost if you’re working on your project budget.

Tips For Building A DIY Cinder Block Planter
Before you decide to take on this project, I recommend reading through the next couple of sections to make sure it’s for you.
I also included tips for selecting the cinder blocks, so there are no surprises when you start constructing your planter.
It Is Heavy Work
The concrete blocks are very heavy. I must have moved each one at least ten times in the process of building mine, and my back was sore the next day.
I wanted to mention this to you so you know what you’re getting yourself into. I didn’t think about this when I decided to make mine.
Also, if your design requires a lot of cinder blocks, you’ll probably need a truck or trailer to transport them since they are so heavy (and be sure to bring work gloves to the store with you to save your hands when loading them up).
I was able to get mine home in my car with a few trips to the store (which is less than a mile from my house) so it was easy for me.
Not All Cinder Blocks Are The Same
After I bought my concrete blocks and hauled them home, I noticed that they weren’t all the same. Some have ridges on both ends (top block in picture) and others have a flat end (bottom block in picture below).
This didn’t affect the way they fit together, but I had to pay attention as I built it to ensure the flat ends faced the front so they all matched.
To prevent this from happening to you, I recommend checking every block to make sure all of the ones you buy are the same. That way you don’t have to worry about which ones go where, and complicate your project.

Save Yourself Money On Soil
Another lesson I learned the hard way (and realized after I finished my planter) was that most of the cinder blocks on the bottom won’t have plants in them. Of course, I bought high quality potting soil for all of mine.
So, if there are holes in yours that won’t have anything growing in them (i.e.: the ones that have other blocks stacked on top), save yourself a few extra dollars by filling those with rock or cheap fill dirt rather than high-quality potting soil.
Don’t leave them empty though, filling the holes adds extra stability to your planter.
Be Sure To Choose The Right Plants
One thing to note about using concrete blocks for planters like this is that the cement can cause the soil to dry out very quickly.
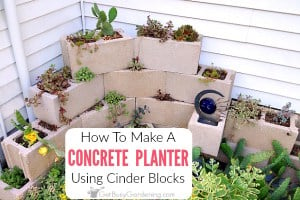
The corner where I built mine is one of the driest and hottest areas of our yard. So I filled it with hardy drought-resistant cacti and succulents.
You could paint the cinder blocks on your planter to help seal the moisture in, and add a nice decorative touch. Or you could install an inexpensive drip irrigation system to keep it consistently watered.
Whatever you decide to do, just make sure that you use the plants that will thrive in the spot where you build your planter.
How To Build A Concrete Block Planter
Ok, now that you know what you’re getting yourself into here (and you’re still reading, so that’s a good sign that you’re ready to build your own), let’s get started. Here are the step-by-step instructions for building your own cinder block planter:
Supplies Needed:
- Concrete cinder blocks
- Quality potting soil
- Paver base
- Level
- Tamper tool
- Work gloves
- Cheap fill dirt and/or rock (optional)
Step 1: Figure out your design – If you have an eye for design or any artistic ability, then you can draw your design layout on paper before you lift your first block.
Even if you’re not artistically inclined, it’s still a good idea to make a rough sketch and take some measurements of the area so you have an idea of how many cinder blocks you’ll need to buy.
Step 2: Lay out your planter design – I recommend taking the time to lay out your pattern using the actual cinder blocks before you officially start building your planter. It’s heavy work, but it’s worth it to make sure you like it, and that it fits in the space.
At this point, you’re just stacking the concrete blocks to get your basic design laid out. Don’t fill any of them with soil yet, we’ll do that in a later step once the design is final.
Related Post: How To Build A Raised Cinder Block Garden Bed

Step 3: Take a picture of your design layout – Once you have your cinder blocks laid out and stacked the way you want them, take a picture of your final planter design.
I took a picture purely for the purpose of writing this blog post – and boy was I glad I did. I referred to it constantly as I worked to build the final project. Below is the photo of my initial layout.

Step 4: Lay the first row of blocks – Once the design is done, disassemble everything, and start laying the bottom row.
The first row of cinder blocks will take the longest to lay because the planter bottom must be completely level. If it’s not, then your planter will be lopsided. Not only will that look bad, it could end up being very dangerous. You don’t want it falling on someone!
So be certain to use a level tool as you lay the first row, and a tamper tool to flatten the ground. Once the ground is level, tamp down some paver base over the top of it to create a solid foundation for the bottom row.
Step 5: Fill the holes – After the bottom row is in place, fill the holes that will be covered by other blocks with fill-dirt and/or small rocks, and the ones that will have plants in them with potting soil.
Tip: Do not do this until you finish laying the whole bottom row. Once the cement blocks are filled, they are a pain to move and re-level! Trust me, I learned this the hard way.
Related Post: Choosing The Best Potting Soil Mix For Container Gardening

Step 6: Add extra support under the corners (optional) – If your concrete block planter is square, you won’t have to worry about this step. But if you copy my design and build a curved one, then you’ll need to figure something out for this too.
Note: After adding the second level of cinder blocks to my corner planter, I discovered that my curved design created gaps. That made filling some of the holes impossible because the soil would just fall out the bottom. Oops!
My solution was to take some wire garden fencing (chicken wire would work too) and lay it across the gap under each of the corner blocks for support.
Then I laid landscape fabric over the wire fencing, and placed the next block on top. Whew, that did the trick.

Step 7: Fill the cinder blocks as you go – After each row is done, fill the holes with soil. Remember to use cheap dirt for the ones that will be covered by blocks, if you want to save a few extra pennies.
Step 8: Add the plants – When your planter is done, you can add any type of plants that you want. I filled mine with hardy succulents. Once they become established and cascade over the sides, it’ll look even more amazing.

I am thrilled with the way my DIY cinder block planter turned out. It’s perfect in the corner of my succulent zen garden, and does a great job of hiding the ugly corner. Just remember, while this project isn’t difficult, it does require heavy lifting. So make sure you are up for the manual labor, or recruit some muscles to help you (ehem, hubby?).
Share your tips for building a DIY cinder block planter in the comments section below.

Print Out These Instructions
How To Build A Concrete Cinder Block Planter
A DIY concrete cinder block planter not only looks fantastic, but it’s also very inexpensive to make. Follow these step by step instructions to build your own!
Materials
- Concrete cinder blocks
- Container potting soil
- Paver base
- Work gloves
Tools
Instructions
- Draw out your planter design - It's a good idea to sketch your design out on paper and take some measurements of the area first. That way you'll know how many cinder blocks you'll need to buy.
- Lay out your design - I recommend taking the time to lay out the blocks in the design pattern before you build the planter. It's heavy work, but it's worth it to make sure you like it. Don't fill any of the blocks with dirt yet though.
- Take a picture of your design layout - Once you have your blocks laid out in your design pattern, be sure to take a picture of the final layout. Then disassemble the blocks before you start building the planter.
- Lay the first row of blocks - The bottom of the planter must be completely level, so be certain to use a leveling tool as you lay the block. Use a tamper tool to flatten the ground, then tamp down some paver base over the top of it to create a solid foundation for the bottom row.
- Fill the planter blocks with dirt - Wait to fill the blocks on the bottom with potting soil until you're done laying the entire row. Otherwise it will be too difficult to make any necessary adjustments once the blocks are filled with soil or fill dirt/rock.
- Add extra support under the corners (optional) - If your concrete block planter is square, you won't have to worry about this step. But if you build a curved one, then you'll need to add support under the corners so those blocks will hold soil. Lay a piece of wire fencing or chicken wire across the gap for support. Cover the wire with landscaping fabric, and place the next block on top.
- Fill the blocks with soil as you go - After each row of blocks is done, fill the holes with soil or fill dirt/rock.
- Add your plants - You can fill your planter with succulents, annuals, or even veggies - whatever type of plants you want.
Notes
- Concrete blocks come in different shapes. Some have ridges on both ends, while others are flat. This won’t affect the way they fit together, but it will look much nicer if the flat ends of the blocks face the front of the planter.
- If the first row of blocks isn't completely level, then the planter will be lopsided. That will not only look bad, but it could end up being very dangerous - you don't want your planter falling on someone! So it’s extremely important that the bottom row of blocks is completely level.
- Rather than filling every block with a high quality container mix, you can fill the holes that will be covered by a block with cheap rock and/or fill dirt instead. This will help save you a few bucks on your project. Just make sure all of the planting holes are filled with quality soil, or the plants may not grow very well.

Rayna says
What do you put underneath the bottom of the (hollow) cinder block so the soil, rocks, or plants don’t fall through? I have glued burlap but I there has to be a better way. I use the square cinder blocks as planters and not stacking.
Amy Andrychowicz says
I used a piece of wire fencing and covered it with landscaping fabric to hold the soil in the cinder block holes that were open on the bottom (see the photo below step 6 in the main post).
Joan says
I building my first Cinder Block Planter. I will send in pictures as soon as it’s done. I subscribed to your site.
Amy Andrychowicz says
Sounds great, and good luck with building your concrete block planter, how exciting!
Alex says
Did you have any issues with the pavers affecting your soil pH- thus affecting your plants? I hear that concrete can have a high lime content, and could make the soil too alkaline(stunting growth). I am looking to do a raised vegetable/herb garden with pavers, and am curious if I need to prep/seal the pavers before planting (leach the concrete or seal with another material), or if the plants will turn out fine without this step…
Amy Andrychowicz says
I’ve never had an issue with the types of plants that I grow in my concrete planter. But I’ve never tried growing plants in there that require acidic soil. Vegetables grow the best in alkaline soil, so there’s no concern there. If you ever plan to grow something that requires acidic soil (like citrus or berries for example), then you should test the soil pH, and amend it as necessary. By the way, I have a post about how to build raised beds using concrete block planters too, if you’re interested in learning more about that… How To Make A Raised Garden Bed Using Concrete Blocks
Capt. Brigg Franklin says
You list a “Paver Base” in your supplies but don’t say what it is or how you used it.
Amy Andrychowicz says
Ha, you’re right! I just added it to the instructions. Thanks for pointing it out.
Kay says
Love this idea also! I plant Herbs in cinder blocks..(keeps them contained.) To stack..I put them side by side, with a gap between them, and where the gap is, I put one the long way. I would send pictures of how, but I have a broken Femur and in a wheelchair for the next 3 months.
Amy Andrychowicz says
Your cinder block herb planters sound nice! Hope your leg heals quickly, and you’re back on your feet in no time!
ravi says
Hi Amy
indeed a very practical yet stunning idea , very cost effective …im gonna be doing the same this weekend for my herb garden
i have one question though ..
how do i prevent the soil from falling through the block for those blocks that are protuding ?
thanks
ravi
Amy Andrychowicz says
I just put a decoration in mine, and thought that looked nice. I have seen tutorials where they cut a piece of concrete block to fit in the bottom of the opening, and then glued it in using a special glue.
Amy
GRACE PETERSON says
Great job, Amy. I love what you did. It had to be a little tiring, all that heavy lifting but the end result is so worth it. I hope you'll take another photo after the plants fill in.
Amy Andrychowicz says
Thank you! Building the planter was hard work, that's for sure. But you're right, totally worth it. I'll definitely share pictures once it fills in.
Amy
Julie says
Looking good Amy. Your cinder block planter looks great. Isn't funny what you find out you didn't think of before you start a project. LOL.
Amy Andrychowicz says
Yes, it is funny, but frustrating sometimes! I should always allow twice as much time for a project than I think it will take. 🙂
Billie Jo says
Cleaver. Be sure to post pictures when the plants fill in!
Amy Andrychowicz says
I can't wait for that and I will definitely post pictures!
Bonnie says
This is an amazing idea! I just love it! Thanks for posting it.
Amy Andrychowicz says
So glad you love my DIY concrete block planter! Thanks and you're welcome! 🙂
El Gaucho says
I noticed this wall when you posted previously about redoing this area. Thanks for the step by step on building the cinder block planter. I'm sure that in another year or two it will look fantastic with everything spilling out of its container.
Amy Andrychowicz says
Thank you, I'm glad you like it. I can't wait to see what it looks like once the plants take over!