Planning a rain garden can seem complex, but it’s really not that difficult. Once you figure out the best location for it, designing a rain garden is basically the same as any other flower bed. In this post, I will walk you through the whole process, step by step.
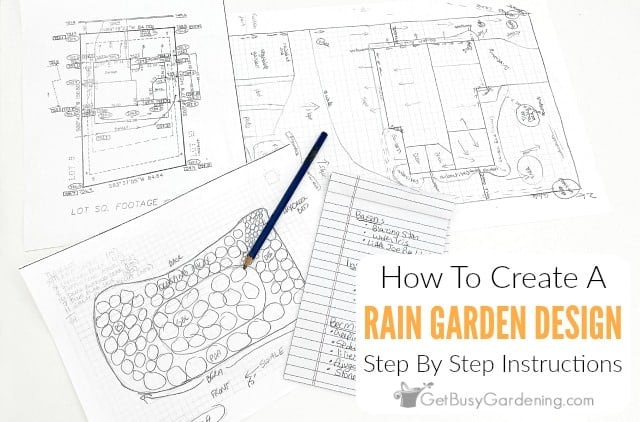
Going through the process of planning and designing a rain garden is fun and interesting. In the end, it’s really just an exercise of understanding how water flows through your property, and finding the best location.
If you’re interested in adding a rain garden, then you probably already know that choosing the best place for it is crucial for success.
There are a lot of factors involved in planning a rain garden, and you can’t just put one anywhere you want. You need to understand how water flows through your yard before you even draw out a layout.
Planning and designing a rain garden can seem like a big task, but I am going to walk you through it all step by step in this detailed guide.
We’ll start with determining the best location, then move on to designing the layout. In the end, you’ll have a detailed diagram, and be ready to start digging!
Where Should A Rain Garden Be Placed?
The first thing you need to do when planning a rain garden is to figure out the best place to put it, so you can enjoy it for many years to come.
It’s important to understand that you can’t just put it anywhere. If you don’t take the time to plan out the proper placement, it may not end up working, or it could cause problems.
Plus, the perfect location will ensure it alleviates some of the major drainage and erosion problems in your yard.
Not only is it necessary to know the best spot to put a rain garden, it’s probably even more essential to understand which areas to avoid.
So first, I will give you a list of places to avoid, then I’ll walk you through the steps for choosing where to put it.
Places To Avoid
To make it easier to figure out your rain garden layout, and narrow down locations in your yard, here are all of the places you should avoid putting one…
- Next to your house foundation – If it’s too close to your house, the pooling water could seep into your basement, and you definitely don’t want that to happen!
- On top of your septic tank – If you have a septic tank on your property, you definitely don’t want to put anything on top of that.
- Over a water well or natural aquifer – It wouldn’t be good for all that pooling runoff to end up seeping into your drinking water.
- Directly under large, mature trees – Mature trees have thick roots, which would make digging a major challenge. So, avoid those areas.
- Low spots where water pools – If water is already pooling in your yard, that is not an ideal location. Otherwise it won’t be absorbed into the ground fast enough, you’ll end up with a soupy mess.
- Directly on your property line – Many cities have rules for how close to the property line you can build anything in your yard, so make sure you know the requirements before getting started.
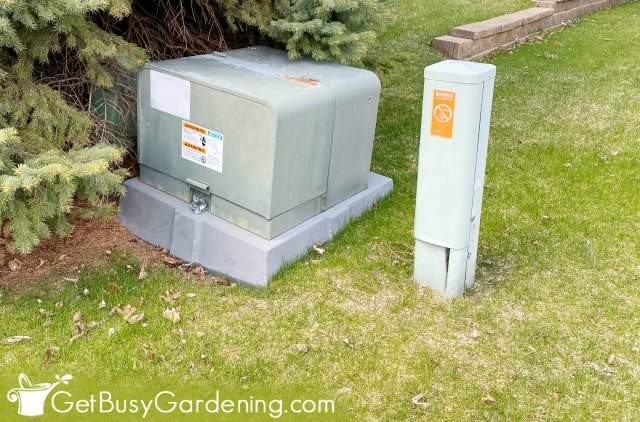
- Over the top of buried utility lines – Before you come up with your final rain garden design, make sure to call and have all of your utilities marked. Then avoid those areas.
Planning A Rain Garden Step-By-Step
Now let’s walk through the first steps you should take when planning a rain garden. After completing these steps, you will have a few great options for where to put it on your property.
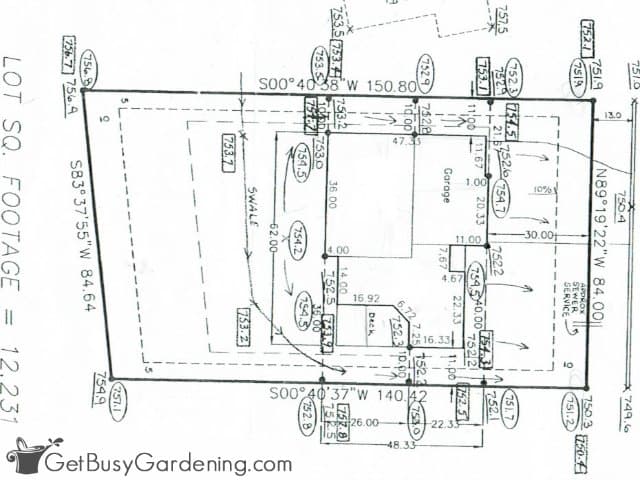
To make designing a rain garden much, much easier, I highly recommend requesting a lot survey diagram from your city, and having it on hand as you go through these steps.
A lot map has the dimensions of every part of your property and house. Having this will be a huge help for you to make the final decision, and save you the time of drawing it all out by hand.
Supplies Needed
- Lot survey map of your property (ideally)
- Drawing pencil
- Paper, or graph paper to make it easier (optional)
- Eraser
- Ruler (optional)
Here are the basic steps create your preliminary rain garden plan:
Step 1: Draw the outline of your home and property – If you don’t have a lot map diagram, grab some regular or graph paper. Draw the outline of your house and garage, as well as your property lines.
Step 2: Add any missing buildings – Once you have the basic outline of your property (or your lot survey), draw in any other buildings that are missing.
Step 3: Add existing landscaping – Draw in all of the trees, play equipment, landscaping features, existing gardens, fences, retaining walls, and hard surfaces (like the driveway, sidewalks, patios… etc).
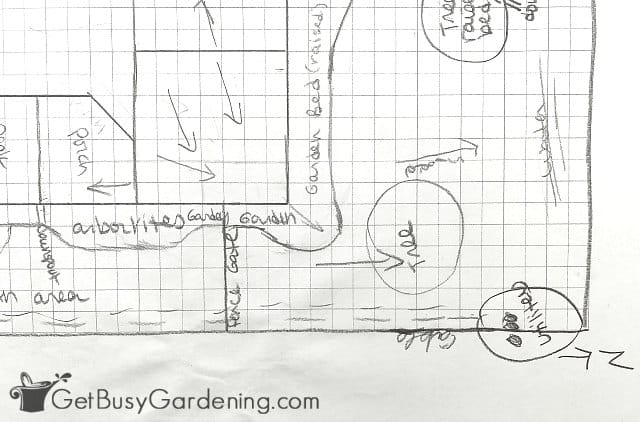
Step 4: Note all utilities in your yard – If you have any cable boxes, power line poles, a septic tank, water, gas, or other utilities in your yard, be sure to add those to your drawing. These are the areas you’ll need to steer clear of.
Step 5: Draw arrows to show the flow of water – Once you have a sketch of your lot, buildings, and landscaping, note any gutter locations, and then draw arrows to represent the direction of the flow of water off the roof.
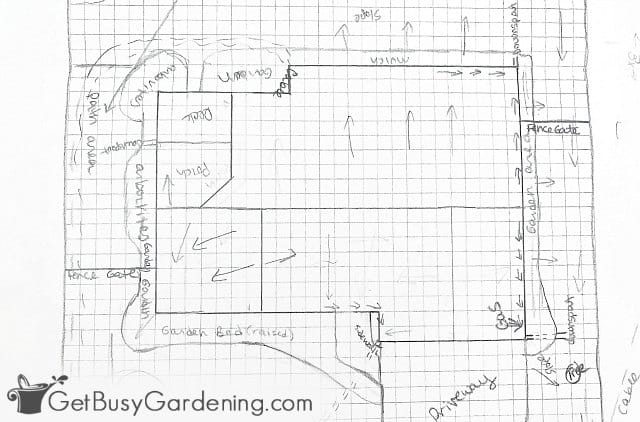
Step 6: Note slopes and direction of water through your yard – If you have any slopes or hills in your yard, draw arrows to show which direction they descend. Then add a few more arrows to show the way water flows through your property as it runs out into the street.
Step 7: Highlight locations where water pools – If there are any spots in your yard where water already pools after a heavy rain, note those on your drawing too.
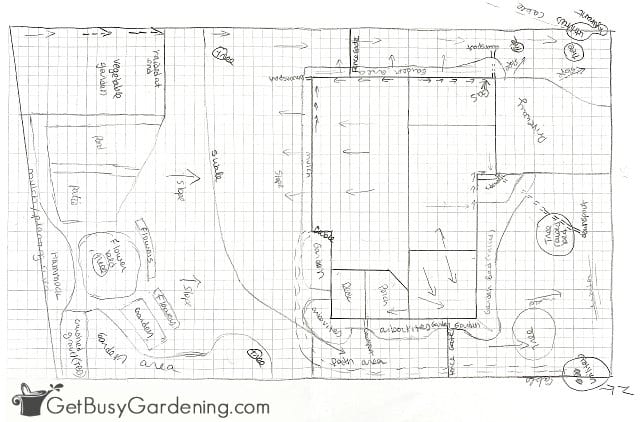
What you end up with at the end of this exercise is a very messy looking diagram of your property…
Choosing The Best Rain Garden Location
Now that you have your plot map all drawn out, and understand how the water flows through your property, it’s time to make the final decision on the best place to put a rain garden.
To choose the best location, it’s important to remember the main purpose of having one.
Think of it like this: the goal is to slow or interrupt the flow of rainwater, to keep it from running off, or pooling in the low lying areas of your yard.
So, the best location for a rain garden is somewhere in the path of the runoff, or in the place where water drains from the downspouts on your house.
Once you go through the exercise above to narrow it down, you may find that there are several good potential locations in your yard.
To make your final decision, look for an area with a natural slope, where one side of the rain garden will be slightly higher than the other.
The water should enter the garden at the top of the slope, and overflow at the lowest point when it’s full (mimicking the natural flow of the water).
Another thing to consider is the amount of sun that area gets. A full sun situation will make it easier to find a larger variety of plants. But don’t worry, you can certainly design a rain garden for the shade too.
Rain Garden Design Tips
Once your rain garden plan is all done, and you’ve decided where you’re going to put it, the next steps is to design the size, shape, depth, and layout.
Determining The Size & Shape
The larger you design your rain garden, the more water it will be able to handle. But, before you get carried away planning a huge one, the most important thing to remember is that the size and shape should fit naturally into your existing landscape.
Also, remember that you will have to care for it just like any garden, so don’t bite off more than you can chew. Make sure you keep it to a size that you can easily maintain.
You can get creative with the shape. It could be round, oval, square, rectangular, bean shaped – whatever fits best with your landscaping.
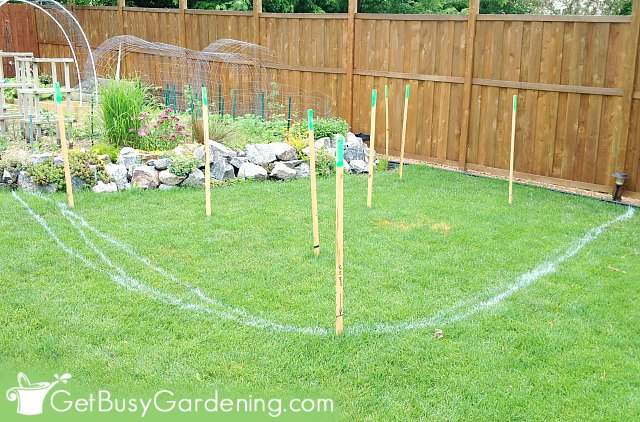
To make it easy to come up with a shape you like, use rope or a garden hose to mark the basic outline. That way you can easily move it around until you come up with a shape that you like best.
Once you decide on a shape that you like, spray paint around the outline so you don’t forget after you remove the rope/hose.
Figuring Out The Depth
Another important part of designing a rain garden is figuring out the proper depth. The goal is for the water to absorb into the ground within 24 hours.
On average, you should plan on making it 4-8″ deep, depending on your soil type, and how fast the water drains.
If you’re still trying to pick a spot, then this exercise should help to make your final decision. Figuring out the depth is simple, just follow these steps…
- Dig a hole that is 8″ in diameter, and 8″ deep in the spot(s) where you’re planning to put a rain garden.
- Fill the hole with water, allow it to soak in for a couple of hours to saturate the soil, then fill it with water again.
- Wait one hour, then check the water level using a ruler.
- Now, take the number of inches of water that drained from the hole, and multiply it by 24 to calculate the amount that will be absorbed within a day.
For example, if 1/4″ of water was absorbed in one hour, that means about 6″ will be absorbed in 24 hours (0.25 * 24). So you should plan to make your rain garden 6″ deep.
If a 1/2″ of water was absorbed, it should be 12″ deep (0.5 * 24). The maximum depth is 12″, and you should not go deeper than that.
Directing Water Into Your Rain Garden
One last thing to think about for your rain garden design plan is an inlet for the water. This can be a gutter downspout, drainage tile, or a dry creek bed, for example.
To it figure out, think about where the water flow will come from. That way, you can plan the best inlet for your rain garden design.
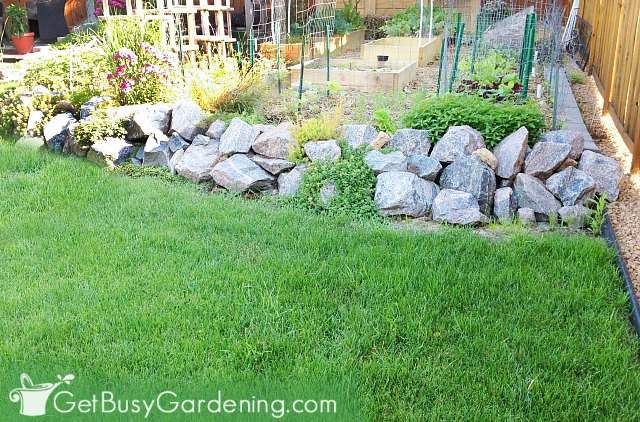
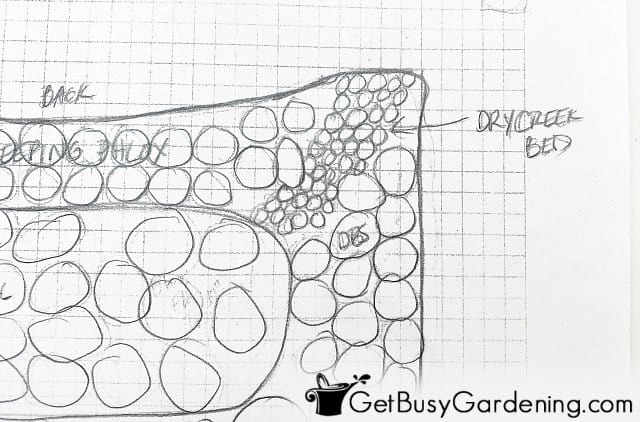
I decided that adding a bed of decorative rock would be the best option for my design. I incorporated the same rock that we used for the adjacent retaining wall. The rock not only looks nice, it also prevents erosion at the inlet.
Drawing Your Rain Garden Design Layout
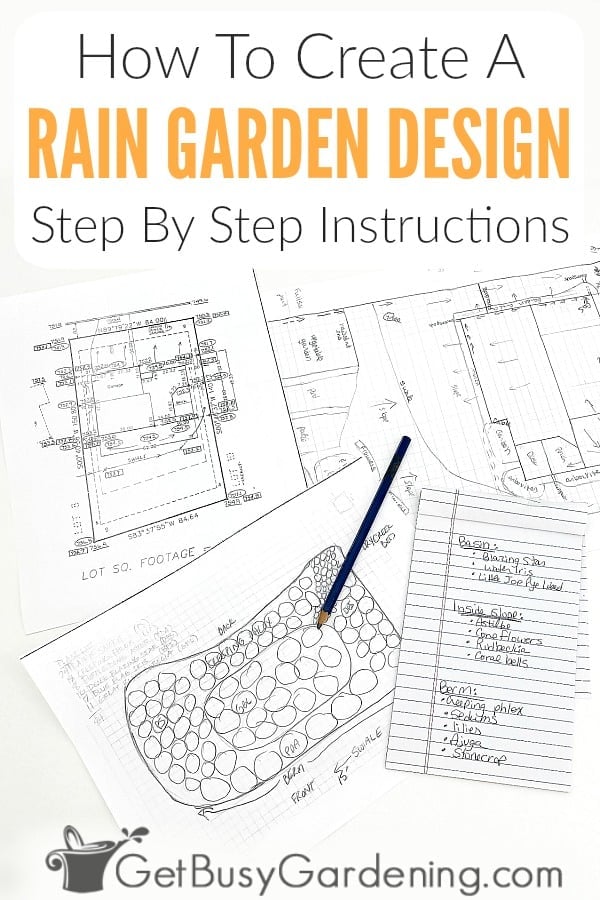
Once you decide on the size, shape, and location, it’s time to come up with your rain garden design layout. First, measure the area, and draw the basic shape on graph paper.
Then make a list of your favorite rain garden plants that you’d like to grow, and where they should be placed in your design (basin, inside slope, or berm).
Here is a sample rain garden design plan…
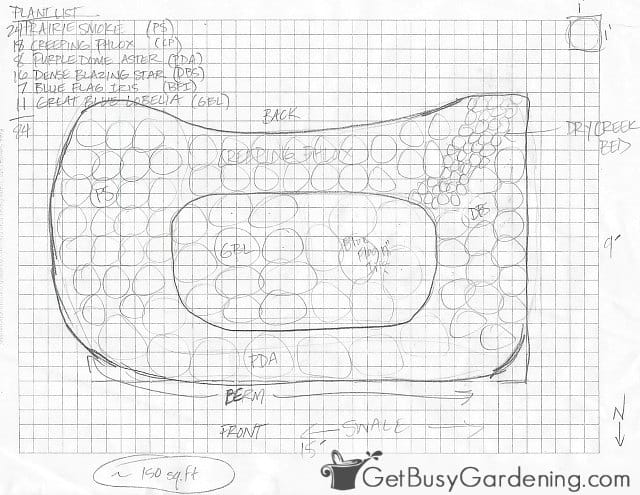
This design only uses six types of plants. So, if you like more diversity, you can add as many different varieties as you want.
As long as you space them properly, and choose the right ones for each area (berm, inside slope, and basin), you can mix it up however you want.
Then simply follow the same basic design principles as you would for any other garden. You can learn more about designing a perennial garden here. But I’ll give you a few quick tips:
- Group similar plants in masses of three or more for a fuller look.
- Choose a variety of flowers that bloom at different times throughout the season.
- Mix in plants with beautiful foliage hues and patterns for constant color.
- Add interest with unique textures, and a nice range of flower colors.
- Incorporate multiple heights and sizes, with the tallest ones in the center. Then layer them down so the shortest ones are in the front.
Planning a rain garden isn’t that much harder than any other garden. Use your detailed lot diagram to guide you in selecting the perfect place, and then get creative with your design layout. It will be so rewarding in the end.
Up next, learn exactly how to build a rain garden, step by step!
Recommended Books
- Rain Gardens: Sustainable Landscaping for a Beautiful Yard and a Healthy World
- The Blue Thumb Guide to Raingardens
- The Rain Garden Planner
- Creating Rain Gardens
More About Flower Gardening
- How To Make A Bee-Friendly Garden In Your Yard
- How To Design A Front Yard Foundation Planting
- Tips For Creating A Butterfly Friendly Garden
Share your tips for designing plans for a rain garden in the comments below!


El Gaucho says
I think your rain garden design looks fantastic. I'm actually a bit jealous that there are grants available for you in Minnesota. I wish we had that same kind of progressive thinking way over here in North Dakota.
Amy Andrychowicz says
Thank you! I agree, I am very lucky to have such a program available to me. Rain gardens are all the rage right now in Minnesota. We have much more water than you do in ND, maybe that's why? You could try contacting your city or county about it. Maybe they have a program, or would be interested in starting one. You never know.