No dig gardening is a simple way to create or maintain your beds, without all the back-breaking manual labor. In this post, I’ll tell you all about the no till gardening method, talk about the benefits, and show you exactly how to start one yourself.
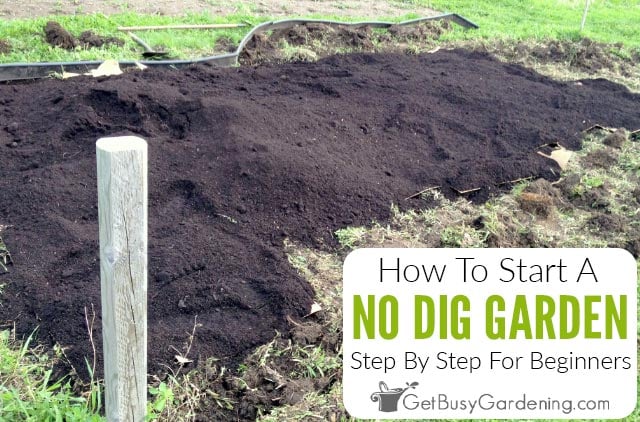
If you have ever built a garden bed from scratch, you know that it is hard work. And maintaining it is just as tiring. Instead, try no dig gardening!
Rather than relying on manual labor to manage weeds and fertilize the soil, no dig gardening uses nature (and a bit of time) to do these tasks. This is so much easier on you, and it’s healthier for the soil too!
So save yourself from the repeated back-breaking labor of tilling and pulling out huge weeds. Below I will show you exactly how to make no-till beds, without all the work of traditional gardening.
What Is The No Dig Method Of Gardening?
The no dig gardening method (also called “no till gardening”) is an easy way to create and maintain your beds, without the manual labor that comes with turning or tilling the soil.
In fact, the core principle of this technique is to disturb the soil as little as possible. The reason for this is that digging and tilling damages the delicate soil structure, exposes dormant weed seeds, and also kills beneficial organisms.
No dig gardening is not a new concept, it’s been around for centuries. But it has gained a lot of popularity over the past decade or so.
There are different variations of this method that have been created over the years. You may have heard terms like “sheet mulching”, “layered gardening”, or the ever popular “lasagna gardening“.
Well, each of those is a form of the no till method, and the basic concept is the same for all – no digging or tilling required.
Use this technique to create a new garden area, or to improve an existing one. It’s not just for vegetable beds either.
You can use it in any of your beds – including vegetable plots (newspaper ink is soy-based and non-toxic), perennial and annual beds, raised beds, or even in paths and walkways.
How Does No Dig Gardening Work?
No dig gardening is all about taking care of the soil. The idea is that you’re building it up, rather than destroying it by breaking it down with a tiller or shovel.
Instead of digging or tilling the ground, you mulch it with a thick layer of organic matter, like compost, well rotted manure, peat moss, leaf mulch, worm castings, or leaf mold.
Worms and other organisms will dig tunnels and feed on the organic matter, leaving their beneficial waste behind.
In the process, they naturally aerate the soil, creating good drainage, and also adding rich nutrients.
Why Use The No Dig Method?
Many new gardeners think that the ground is just plain dirt, and that all types of dirt are the same.
On the contrary! Healthy soil is teeming with life, and filled with billions of microorganisms, like bacteria, fungi, and bugs.
These microbes work together in harmony to create a balanced and fertile growing medium where plants can thrive.
When they are left alone to work their magic, they improve the structure, health, and fertility of the soil.
Digging and tilling disrupts this stable ecosystem, breaks down the soil structure, and kills the beneficial organisms.
When the soil structure is destroyed, it results in compaction and sterilization. It also causes poor drainage, which increases runoff and erosion.
To help wrap your head around this concept, think of the thick layers or organic matter that naturally pile up on a forest floor.
They never get disturbed by tilling or digging (well, except for the occasional squirrel searching for nuts!). And underneath all of that organic matter, you can bet you will find a humus rich, fertile soil.
Benefits Of No Dig Gardening
There are tons of benefits of using the no dig gardening method. Not only is it great for your soil, and all of those tiny critters that live in there, it’s also better for you and your plants!
Easier To Build & Maintain
A no dig garden is much easier to create and maintain than a traditional tilled plot because… Well, you don’t have to do any digging!
That means much less sweat labor for you, and less stress on your back. This is especially great news for lazy gardeners, or for people who have physical limitations.
Healthier Plants
Not only is it better on your back, it’s good for your soil and plants too. When you create a no dig garden, you are working with nature instead of against it to improve the soil texture and fertility.
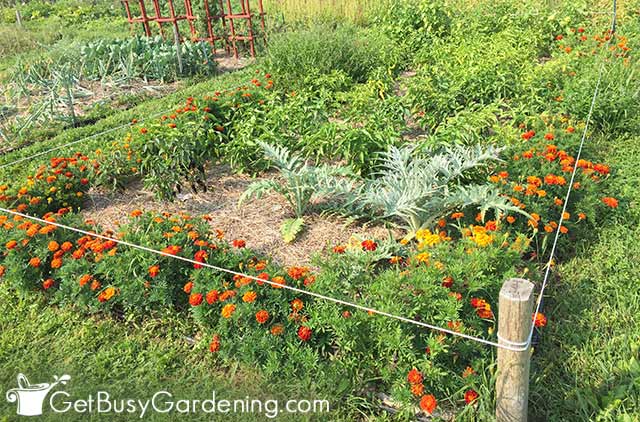
And guess what – healthier soil means healthier plants. These gardens tend to have fewer problems with pests and diseases, so plants can thrive. As a result, you’ll see an increase in both the yield and quality of your produce.
Fewer Weeds
Tilling the soil can stir up dormant weed seeds, and bring them to the top where they will germinate.
When you disturb the soil as little as possible, those weed seeds stay buried and dormant.
In addition, the few weeds that do appear will have shallow surface roots, so they’ll be easy for you to pluck out.
Improves Poor Quality Soils
This method is also a much simpler way to improve poor quality soils (like heavy clay or sandy loam), without all the work and expense of mixing in a bunch of amendments.
Instead, you pile the organic materials on top, and let the worms and other microbes do the manual labor of mixing it into the soil.
Less Need For Fertilizer
Since the organic mulches naturally feed the soil and plants as they break down, there’s less need for fertilizer.
You’re providing a quick food source for the beneficial organisms. They will reward you by building up healthy, fertile soil that has everything your plants need to flourish.
No Dig Gardening Saves You Time
Since you don’t have to dig, till, and pull out all of those weeds, creating a no dig garden saves tons of time. There’s no waiting, you can plant over the top of grass and weeds right away.
You’ll also find that you’ll spend less time on maintenance tasks like watering, weeding, and fighting bugs and disease all summer long too.
Less Watering
The thick layers of organic matter and mulch prevent evaporation, and help the soil retain moisture much longer than in a traditional plot.
No dig gardens also naturally drain better, and have fewer issues with runoff and erosion.
That’s because the well aerated soil absorbs water faster than it would if compacted by all that tilling and digging.
No Soil Compaction
Cultivating the ground using traditional methods increases soil compaction. That’s because it destroys the structure, the microbes, and the tunnels they create.
When that happens, the soil collapses, and becomes compacted. Compacted soil cannot retain water very well, and plant roots have a difficult time becoming established.
How To Make A No Dig Garden Bed
You can create a no dig garden anywhere you want. Including over an existing plot, in raised beds, or right on top of grass and weeds.
Here are the things you’ll need to make one, and the exact steps to follow…
Supplies Needed
- Thick cardboard (remove any staples, labels, or tape) or newspaper
- Organic mulch material (compost, leaf mulch, peat moss, well rotted manure, and/or worm castings)
- Water
- Lawn mower (optional)
- Garden edging (optional)
- Top mulch (e.g. weed free straw, grass clippings, or shredded leaves – optional)
Step By Step Instructions
If your beds are already established, then you can skip to step 3. Otherwise, start with step 1 if you want to create a brand new no dig garden over the top of weeds or grass.
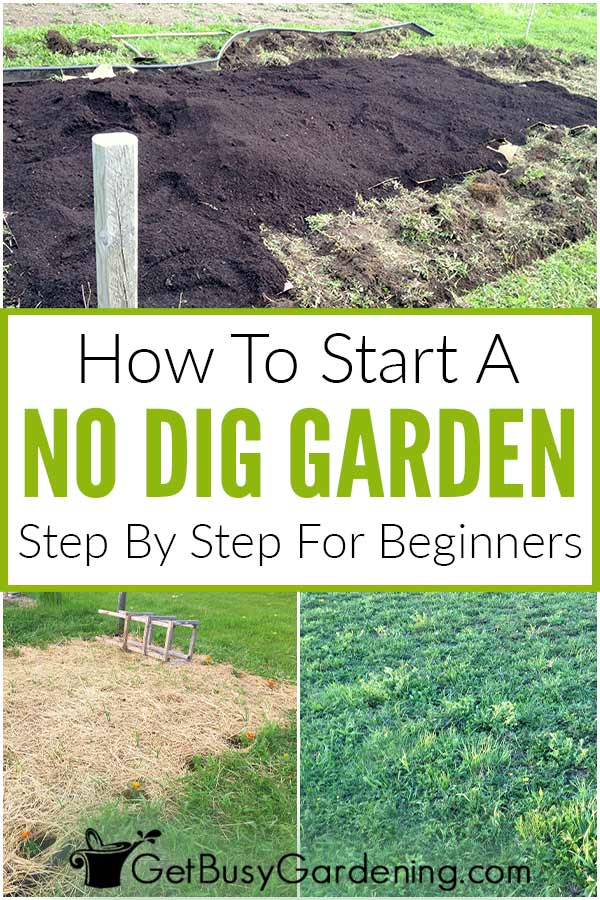
Step 1: Knock down the weeds and grass – First, mow the area using the lowest setting on your lawn mower.
If there are any well established perennial weeds with thick stocks in the area, then it’s best to pull or dig those out instead of just cutting them down.
Yes, I know this is the “no dig method”. But you may have to dig a little in the beginning to effectively get rid of the toughest weeds.
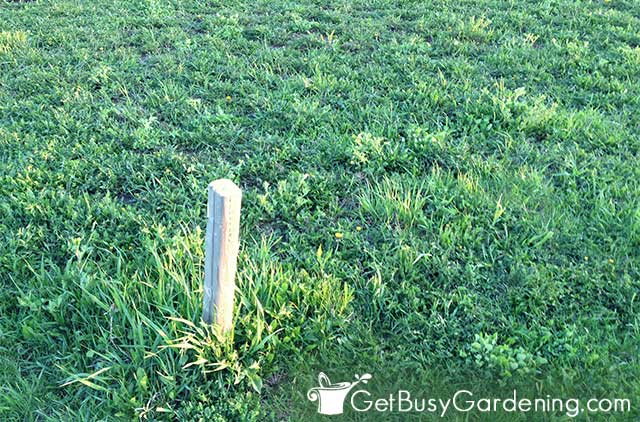
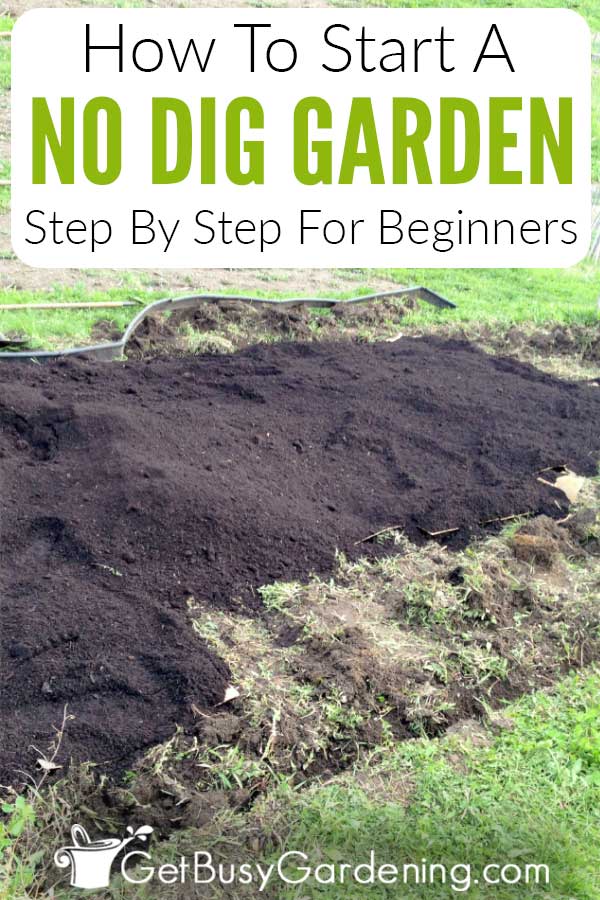
Step 2: Add garden edging (optional) – If you’re building your no dig garden in a spot that’s surrounded by grass, then I recommend edging it. This will help prevent weeds and grass from creeping in later on.
Inexpensive black plastic edging works wonders to keep everything out. Otherwise, you could use fancier edging materials, like brick or concrete bullet edgers. Just make sure to bury them deep enough.
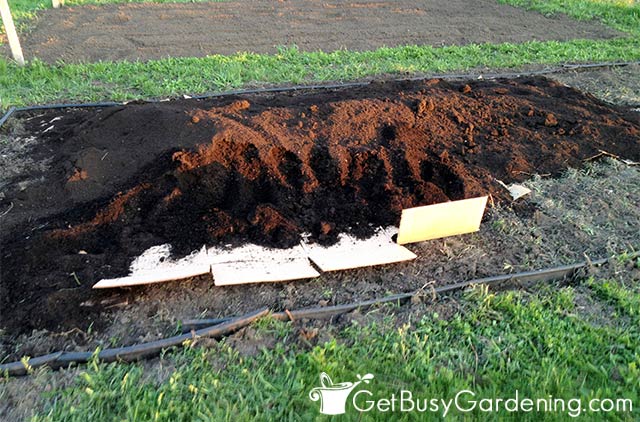
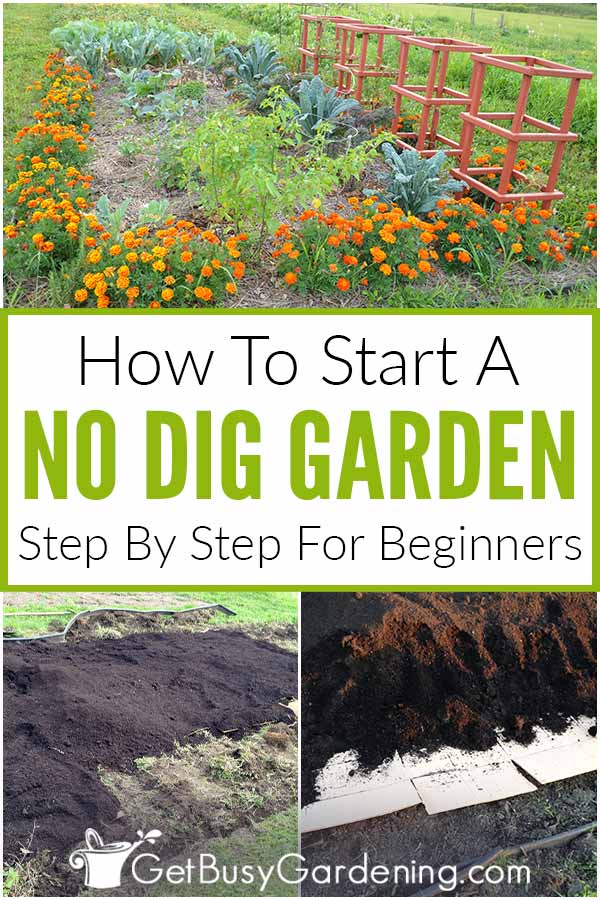
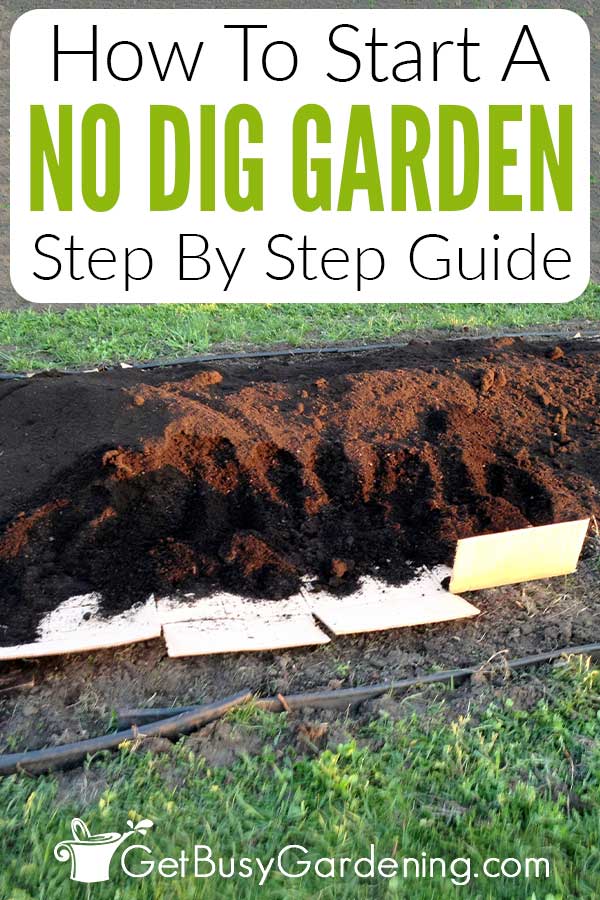
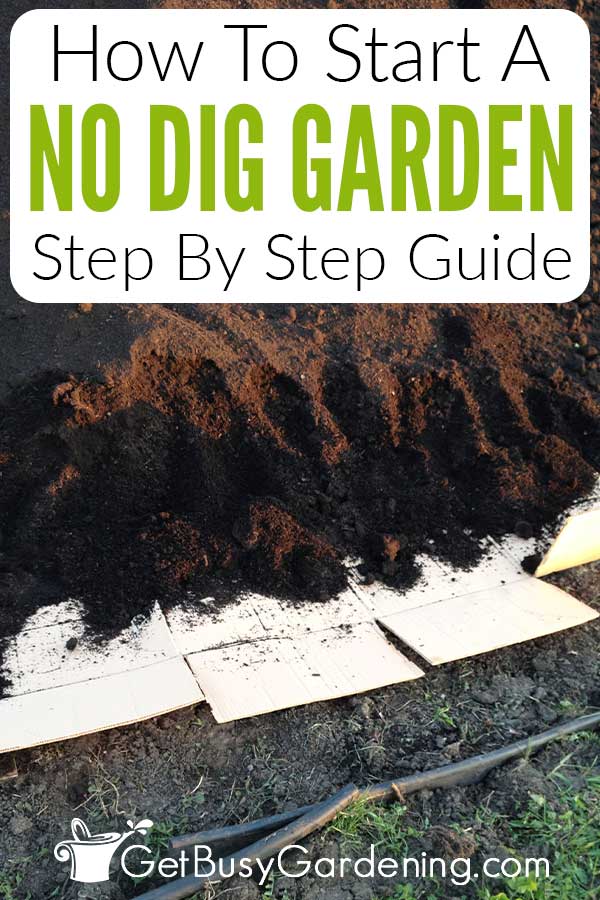
Step 3: Cover the bed with cardboard – Cover the entire surface of the ground with thick cardboard. This will smother the grass and kill it.
Be sure to remove any staples or tape first, as those won’t break down. If you don’t have cardboard available, you could use a thick layer of newspaper (6-10 sheets thick).
Overlap the pieces so that every inch of earth is covered, and there are no holes where weeds can find their way through.
Step 4: Wet it all down – Next, spray water over your base layer until it is wet. This will keep it from blowing away, and also soften the cardboard so that it can conform to the ground.
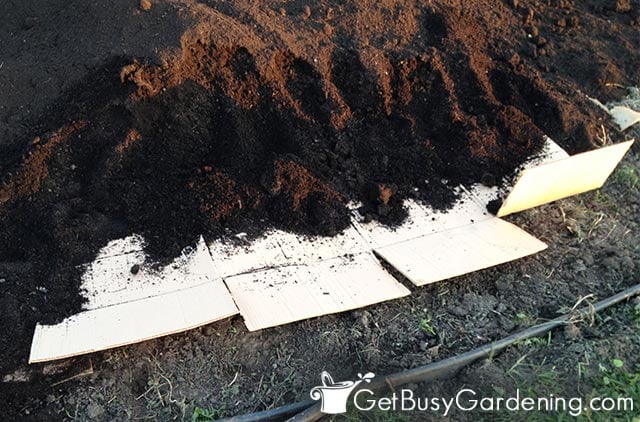
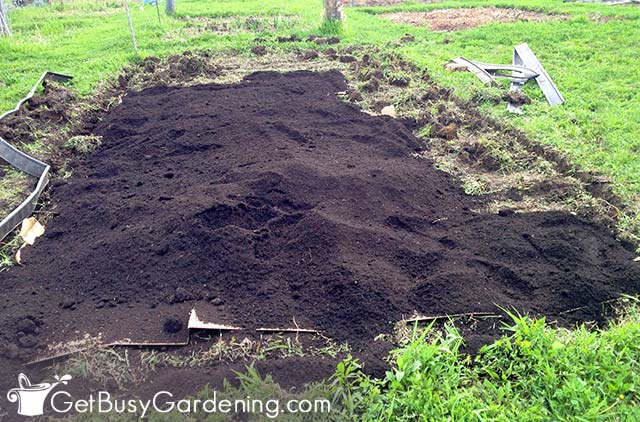
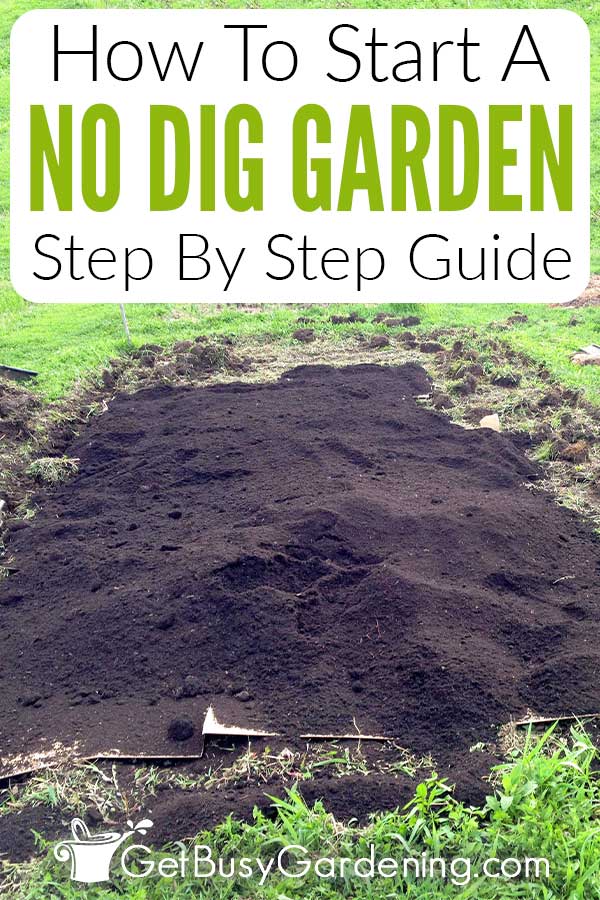
Step 5: Pile on the organic matter – Add a thick layer of mulch materials, like compost, rotted manure, peat moss, and/or worm castings over the top of the cardboard.
Remember, the idea is to block out all light from reaching the weeds and grass underneath. Plus the organic matter will keep the cardboard moist, which will help to smother the weeds faster.
In order for this to work, your compost layer needs to be at least 4-6″ deep to block out any chance of light getting through, and maintain the proper moisture level.
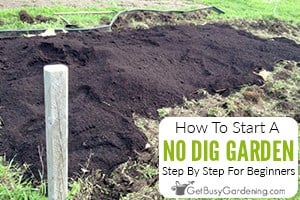
To give you an idea of how much material you will need, the plot in my photos is 10′ x 20′. In order to get the desired depth, I used 2 cubic yards of compost to cover it.
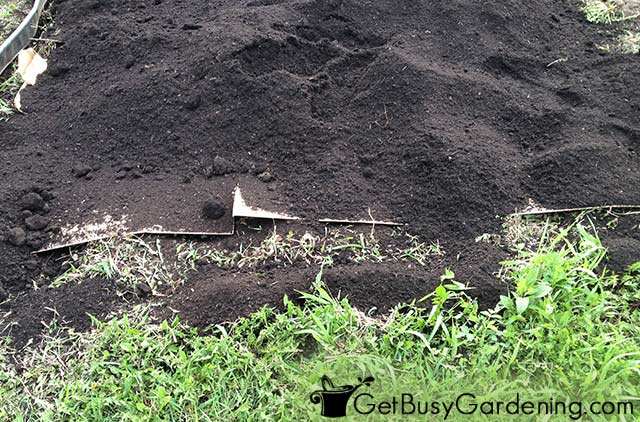
Step 6: Water the bed – The most important part of having success with the no dig gardening method is to keep the bed consistently watered.
Watering the thick top layer will help soften the cardboard even more, and also retain the moisture longer.
If the cardboard dries out, it will remain rigid, and won’t break down as quickly. That can make it hard for the plants to become established.
But when you keep it watered, it won’t take long for the cardboard to break down under all that wet mulch and compost.
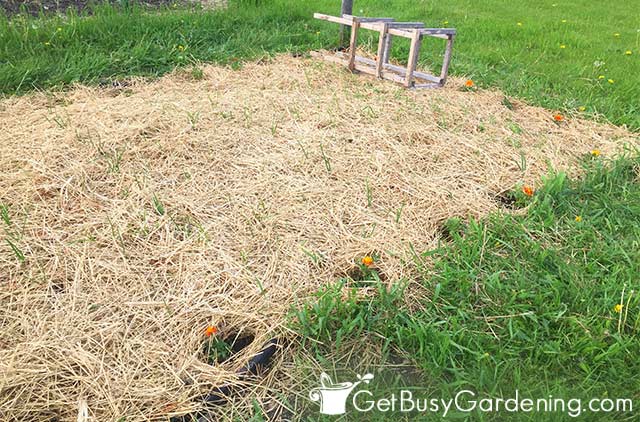
Step 7: Mulch over the top (optional) – If you don’t like the look of the plain compost, you can add a layer of traditional mulch, like weed free straw or shredded wood, over the top of the bed.
This will help to hold in even more moisture, and discourage surface weeds from becoming established. But it’s not necessary, so you can certainly skip this step if you want.
Step 8: Plant your garden – The best part about the no dig gardening method is that you don’t have to wait to plant your beds.
By the time the roots reach the cardboard, it will be soft enough that they’ll grow right through it, and into the soil underneath.
This is why the thicker your compost layer is, the better. You definitely do not want to poke holes in the cardboard. If you do that, weeds and grass will find their way through.
Dealing With Persistent Perennial Weeds
While no dig gardening works wonders to smother and kill grass and most weeds, you’ll probably find that some will still make their way through.
While this can be super frustrating, it’s a common problem with newer no-till beds. That’s because some weeds are tougher than others, and it can take much longer to smother them.
For these thick perennial weeds, you’ll likely find that one layer of compost will not be enough to get rid of them.
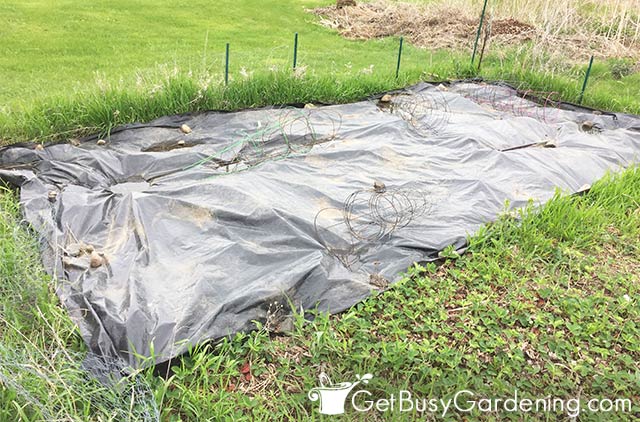
In this case, you may want to take the extra step of solarizing the ground with black polythene plastic before building your no till garden.
The plastic will hold moisture in the ground, allowing worms and other organisms to continue to thrive.
But the heat generated underneath it, along with completely blocking out all of the sunlight, will kill the weeds.
Materials Needed
- Thick black plastic sheeting
- Landscaping pins or cement blocks
Steps To Follow
Step 1: Lay out the plastic sheet – After mowing down the area, and covering it with a thick layer of compost, lay the heavy plastic over the top.
Step 2: Secure it in place – Use concrete blocks or fabric pins around the edges to hold it in place.
Or better yet, put some potted plants on top. That way you can still utilize the space while the weeds cook.
Step 3: Leave it in place until the weeds are dead – Ideally, you should leave the plastic in place for at least 6 months, but sometimes it can take a full year.
Step 4: Check for doneness – To check if the weeds are dead, lift a corner of the plastic and look underneath.
If you see any white or light green shoots or roots, that means they aren’t dead yet. In this case, let it cook for a few more months.
Once it’s done, you can simply remove the plastic, and plant in your garden right away. Or you can add even more compost and mulch to refresh the top layer.
No Dig Garden Maintenance Tips
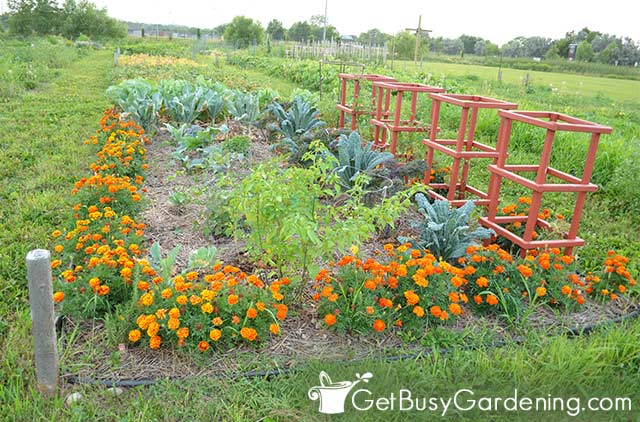
Once established, no dig gardens are easy to maintain. As I mentioned above, you’ll find your beds will require less weeding and watering than a traditional plot. Plus the plants will have fewer issues with pests and disease.
To maintain the proper balance, each fall simply put another thick layer of well rotted manure, compost, leaf mulch, worm castings, and/or peat moss over the top.
You can even lay more cardboard down if you need to in order to kill the most vigorous weeds. Continue to do this every few months, if necessary.
Once all of the existing weeds are dead, you won’t have to use cardboard anymore. Just add a 1 inch deep layer of compost annually.
Remove surface weeds before they can become established, and also pull any that pop through from underneath.
FAQs
No dig gardening is fairly straightforward, but you might have a few more questions. Below are the ones I get asked the most. If you can’t find an answer here, ask your question in the comments section below.
Does no dig gardening work?
Yes, once established, no dig gardens absolutely work. It can take a few years to kill all of the existing weeds.
But, once that’s done, you’ll find that maintaining your no till beds is much easier.
How long does it take cardboard to decompose in a garden?
In the right conditions, cardboard decomposes very fast in a garden. It only takes a matter of a few months for the cardboard to disappear completely.
The key is to make sure it stays moist, and is always covered by organic materials. Any pieces that are left uncovered or allowed to dry out won’t break down as fast.
Can I create a no dig garden if I have clay soil?
Yes, you can make a no dig garden over clay, or any other type of soil you have, no matter how poor the quality.
No dig gardening is so easy that you might wonder why you ever bothered with traditional tilling and digging in the first place. So, save your back, and let nature do the heavy lifting!
Recommended Reading
- No Dig: From Weeds to Vegetables Easily and Quickly
- No Dig Organic Home & Garden: Grow, Cook, Use, and Store Your Harvest
- Organic Gardening: The Natural No-dig Way
- Vegetable Garden Diary: No Dig, Healthy Soil, Fewer Weeds
More About Garden Soil
- How To Prepare A Garden Bed For Planting Vegetables
- 7 Tips For Winter Composting Success
- 7 Easy DIY Potting Soil Recipes To Mix Your Own
- How To Make A Cheap DIY Compost Bin
Share your tips for using the no dig gardening method in the comments section below.
Print The Instructions
How To Make A No Dig Garden Bed
You can create a no dig garden anywhere you want. Including over an existing plot, in raised beds, or right on top of grass and weeds.
Materials
- Thick cardboard (remove any staples, labels, or tape) or newspaper
- Organic mulch material (compost, leaf mulch, peat moss, well rotted manure, and/or worm castings)
- Water
- Lawn mower (optional)
- Garden edging (optional)
- Top mulch (e.g. weed free straw, grass clippings, or shredded leaves – optional)
Instructions
- Step 1: Knock down the weeds and grass – First, mow the area using the lowest setting on your lawn mower. If there are any well established perennial weeds with thick stocks in the area, then it’s best to pull or dig those out instead of just cutting them down. Yes, I know this is the “no dig method”. But you may have to dig a little in the beginning to effectively get rid of the toughest weeds.
- Step 2: Add garden edging (optional) – If you’re building your no dig garden in a spot that’s surrounded by grass, then I recommend edging it. This will help prevent weeds and grass from creeping in later on. Inexpensive black plastic edging works wonders to keep everything out. Otherwise, you could use fancier edging materials, like brick or concrete bullet edgers. Just make sure to bury them deep enough.
- Step 3: Cover the bed with cardboard – Cover the entire surface of the ground with thick cardboard. This will smother the grass and kill it. Be sure to remove any staples or tape first, as those won’t break down. If you don’t have cardboard available, you could use a thick layer of newspaper (6-10 sheets thick). Overlap the pieces so that every inch of earth is covered, and there are no holes where weeds can find their way through.
- Step 4: Wet it all down – Next, spray water over your base layer until it is wet. This will keep it from blowing away, and also soften the cardboard so that it can conform to the ground.
- Step 5: Pile on the organic matter – Add a thick layer of mulch materials, like compost, rotted manure, peat moss, and/or worm castings over the top of the cardboard. Remember, the idea is to block out all light from reaching the weeds and grass underneath. Plus the organic matter will keep the cardboard moist, which will help to smother the weeds faster. In order for this to work, your compost layer needs to be at least 4-6″ deep to block out any chance of light getting through, and maintain the proper moisture level. To give you an idea of how much material you will need, the plot in my photos is 10′ x 20′. In order to get the desired depth, I used 2 cubic yards of compost to cover it.
- Step 6: Water the bed – The most important part of having success with the no dig gardening method is to keep the bed consistently watered. Watering the thick top layer will help soften the cardboard even more, and also retain the moisture longer. If the cardboard dries out, it will remain rigid, and won’t break down as quickly. That can make it hard for the plants to become established. But when you keep it watered, it won’t take long for the cardboard to break down under all that wet mulch and compost.
- Step 7: Mulch over the top (optional) – If you don’t like the look of the plain compost, you can add a layer of traditional mulch, like weed free straw or shredded wood, over the top of the bed. This will help to hold in even more moisture, and discourage surface weeds from becoming established. But it’s not necessary, so you can certainly skip this step if you want.
- Step 8: Plant your garden – The best part about the no dig gardening method is that you don’t have to wait to plant your beds. By the time the roots reach the cardboard, it will be soft enough that they’ll grow right through it, and into the soil underneath. This is why the thicker your compost layer is, the better. You definitely do not want to poke holes in the cardboard. If you do that, weeds and grass will find their way through.
Notes
If your beds are already established, then you can skip to step 3. Otherwise, start with step 1 if you want to create a brand new no dig garden over the top of weeds or grass.


Ben J says
Thoughts on putting my cardboard down before winter? Then when the snow melts it will moisten the cardboard naturally and not need to be watered. Then maybe add my organic matter in March or early April (zone 5a).
Amy Andrychowicz says
You can certainly put the cardboard down before winter. However, if you don’t put anything on top of it to weight it down, it will likely just blow away. That’s why it’s best to pile the layers on it right away.
Karon says
I will be planting shrubs. Can I partially plant them in the ground then place the cardboard and mulch around the plants to a level appropriate for the large shrubs? These shrubs would be deeper than the cardboard level- 12-16” deep pots.
Amy Andrychowicz says
I would cover the rootball completely with soil, rather than putting the cardboard layer over the top of it. Otherwise you risk the cardboard wicking moisture away from the roots if it becomes dry. If you’re concerned about the layers becoming too deep and burying your shrubs, then plant the shrubs on a mound. Then you can build up your layers around that without any concern.
Margo Suhler says
Hi! This no dig garden is just what we need. We have already purchased garden soil though. Can it be used instead of compost as it has a little compost in it?
Amy Andrychowicz says
Yes, you can use garden soil to cover your no dig garden.
Bre says
I am confused about the compost/vs soil issue. I won’t be planting seeds this year, but plants straight from a local nursery. Is it okay to put them into straight compost or should I use some soil amended with compost? Thank you for any help. I am looking forward to my new no-dig garden!
Amy Andrychowicz says
You can plant them straight into the compost.
El says
Hi! Thank you for posting this! I wish I would have read it earlier!
We recently bought this house and one of the beds we want to make into a garden was overgrown with weeds and grass, it was in a pretty bad shape.. My husband and I spent a whole weekend pulling out those weeds and grass from it. Do you think we should still follow this process to prevent more from growing back, or since we spent time pulling weeds we should not? We want to plant veggies there. Thanks so much!
Amy Andrychowicz says
If you’re feeling confident that you got all the weeds, then you should be fine just mulching over the soil. However, if you have a lot of weeds and grass that were growing from runners or roots underground, then I would recommend using this no dig method to smother them, otherwise they will only grow back.
Rheanna says
I’m so excited to try this! Just super curious.. aesthetically speaking, is there anything I could use beside straw?! I am need at this but have an idea that I will have cute little frogs and gnomes sitting in between the dirt. Feel free to tell me to save that for the flow garden lol but seriously, thank you for this!!
Amy Andrychowicz says
Yes, there are other alternatives to the straw mulch for your no-dig vegetable garden. This article has a detailed list with lots of ideas… Choosing The Best Mulch For Vegetable Gardens.
Heather Woodbury says
Spread the straw & water it… then what?! How long do I wait before planting seeds? I’m not transplanting seedlings. Do I move the straw to plant the seeds directly in the compost, then replace the straw on top? I am brand new to gardening. I’ve had a raised bed with not great results and am hoping to set myself up correctly from the beginning to maximize my results. But I need to know what to do after the straw! Thank you!
Amy Andrychowicz says
You can plant your no dig garden right away. 🙂 Yes, move areas of the straw aside just enough to plant stuff. Don’t cover the seeds with mulch though, leave that small area open so they can grow.
Megan says
I’m in MN too! Thank your for your page. I’m starting my garden from complete scratch. Where is the best place to get compost from?
Amy Andrychowicz says
You’re welcome! I usually order compost in bulk from a local garden center, or from the yard waste recycling center. If you buy it in bags, be sure to get a high quality brand, because the cheap stuff is usually mixed with sand or other inexpensive fillers.
Kiran says
I new to start a vegetable garden at my backyard. I like your post about starting methods but in my backyard it’s covered with grass, weed and when I dig I can see some Little Rock’s like concrete. It’s mixed with the dirt underneath. So could you please tell me that is it safe to make a bed for my vegetables on it if I pour dirt then compost. Then seeds.
Please reply
Thanks ??
Amy Andrychowicz says
If your soil is full of rocks, then I would recommend installing raised beds rather than trying to plant stuff in the soil. You can use this same no-dig method, and just build the beds right over the top of the grass.
Patricia says
It’s May 31st. I live in Michigan and will be receiving 8 free hydrangeas that are still potted. I want to plant them along side of my house since already have enough in the front. Can I still plant them using this no-dig method?
Amy Andrychowicz says
Yes, you can use this no-dig method to create your new garden beds at any time during the growing season. Just be sure to cut the weeds/grass very short before you begin, and make your layers on top of the newspaper/cardboard at least 4-6″ deep so that no light can reach the grass/weeds underneath.
Nikki says
Hey I’m just curious (first timer here)
How long do you leave the straw on top? Or do you just plant through the straw?
Just trying to plan our garden 🙂 we are in Canada here thank you so much for the helpful info you have!
Amy Andrychowicz says
You leave the straw on. I just brush it aside when I plant something. The straw works to keep the weeds from growing, and you want to leave it on all the time. So, I add a new layer of straw over the top of my garden every spring.
Tegan says
How soon could you plant after doing this? I’m running into the same dilemma, our garden space is actually in a neighbors yard and I didn’t know if I could use it until just now and it’s totally overgrown with grass!
Amy Andrychowicz says
You don’t have to wait, you can plant your seedlings right in the compost on top of the cardboard. Just be sure to keep the garden watered well so that the cardboard will soften and conform to the soil, killing the grass underneath. As the plants grow, the roots will grow right through the cardboard.
Bart Nelson says
Converted grass to garden; marked out garden RRties, ADDED 4″-5″ MINK MANURE
( has no weeds), layer of straw, grass clippings and leaves then i cover it with black plastic. punched some holes in the plastic so some winter moisture could get in. Next fall i tilled it in. result was great soil.
Amy Andrychowicz says
Sounds like it would result in amazing soil! Where on earth did you get mink manure for your garden? How cool is that!?
Becky says
Our garden bed is over grown with grass and weeds, and I was thinking about doing this method now, in prep for spring, so the weeds are good and dead dead dead by then. Would you wait to put on the straw till you plant, or go ahead and cover it to keep the compost moist and from washing away?
Amy Andrychowicz says
Sounds like a great idea! I would cover it with straw now, that will also help to keep new weeds from sprouting in the compost in the spring. Good luck! 🙂
Joe says
Man, I’ve spent the last 3 years digging out an incredibly over grown garden bed. I wish I had found this method first, it would have saved me a few blisters and a sore back.
Amy Andrychowicz says
Haha, we’ve all been there. Now you know for the future! 🙂
Casa Mariposa says
This is excellent! Digging a bed for the first time is a lot of work, but you only have to do it once and it’s a great workout. 🙂
Amy Andrychowicz says
Thanks! Yes, I like the way you think. 🙂